Cleaning out your closet is never a job that is on the top of your list but if it includes adding some more pieces as well or updating some of your old wardrobes, then it becomes a little less daunting. The whole “new year, new me” is a phrase that gets said but not done, however, here are some budget-friendly ways to spice up your wardrobe without breaking the bank.
Organize What You Have First
Sometimes all you need to do is organize what you have to get inspired to spring clean. It may seem like a lot to do, but pull everything out of your closet and give the closet itself a nice cleaning. After your cleaning, organize all your existing clothes and pack away your off-season clothes in a box in your attic. This will show you what items you have for the current season and what you need and don’t need. A good tip for organizing your wardrobe is to swap out old hangers and use velvet hangers. They free up space and make it so you can’t just grab clothes off the hanger and have to carefully choose what you are picking.
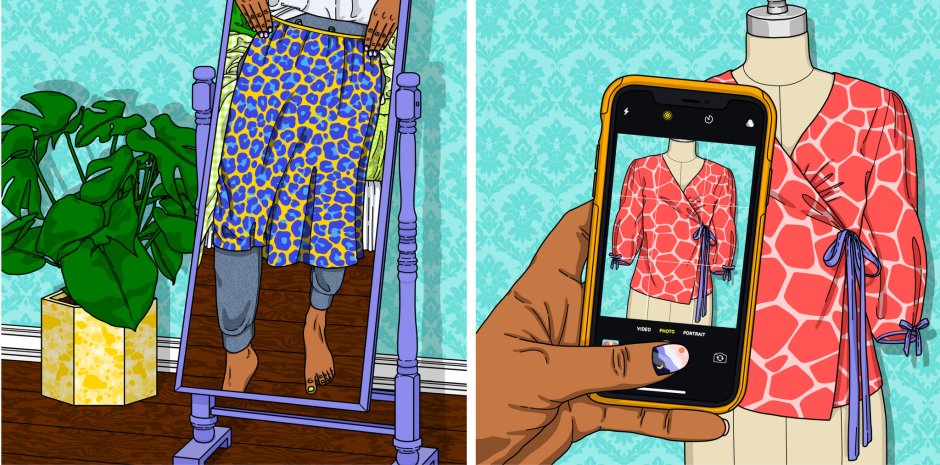
If you don’t want to buy any new clothes but getting bored with your old clothes, get out the sewing machine and scissors and get to work. If you have a lot of old denim taking up some space, take a cheese grater and create distressed denim instead of tossing them out or spending more money.
This is a big one to remember. We all have that one pair of jeans or little black dress that we store away for when we finally hit that goal and can wear it out in front of our crush to show them what they are missing. However, let’s be honest, it won’t happen as soon as you think and if you really do hit that goal, you should reward yourself with some new clothes! You can even save money on those items with the Kohl’s promo code and kickstart your hard work with some new threads!
A way to spice up your wardrobe that doesn’t even involve your clothes is to change up your hair. Getting a fresh cut can change your look entirely. You will freshen up your look without spending much money and feel as if you are worth $100 bucks.
You can try some of these tips to spice up your wardrobe and save your money. Even look at your favorite celebrities and bloggers to get some fresh ideas that feature your current wardrobe and you will be on your way!
How Do You Spice Up Your Wardrobe on a Budget? Comment Below!
If there’s one makeup skill that can make even the most veteran beauty editor quake, it’s applying fake eyelashes. It’s not everyday we decide to break these babies out, but when we do, it’s usually for a special occasion, so we need them to look as natural as possible. Think of them as the cherry on top of an ice cream sundae.
We don’t know exactly where it all goes wrong, but somewhere between adding the glue and placing the faux lash strip on our eye, things tend to get a little messy. To help us master how to apply fake eyelashesonce and for all, we tapped celebrity makeup artist Carolina Gonzalez. Keep reading to find out all her false lash tips and tricks.
STEP 1: Apply Mascara
The first step to applying fake lashes doesn’t actually involve any falsies. “I like to start with a light coat of mascara,” says Gonzalez. This helps the lash strip blend with your real lashes better. She calls it “camouflage” for falsies. One of our favorites is the Maybelline New York Falsies Lash Lift Mascara.
STEP 2: Fit the Strip to Your Eye
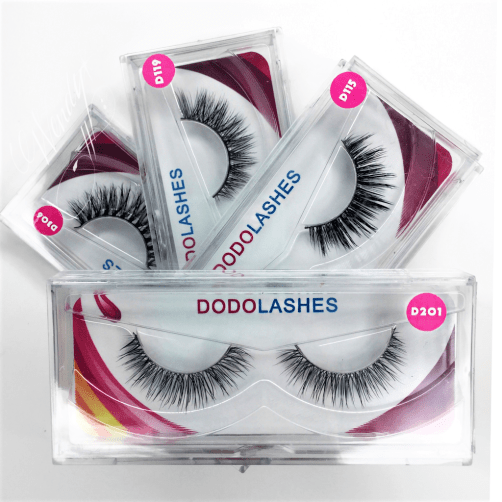
“If you’re using a strip, you want to fit them first, then trim if need be,” explains Gonzalez. To properly trim a fake lash strip, you want to always cut excess off at the outer corners. Try the DodoLashes D328 3D styles(apply code: BEAUTYLEEBAR for money off) or the Lily Lashes for a subtle look.
STEP 3: Glue
Once the eyelashes are the proper size, it’s time to apply the glue. You can either brush a light coating of glue directly onto the lash strip or apply a dab of glue to the back of your hand and run the strip through it. No matter which method you choose, just be sure you don’t glob on too much product. Lightly blow on the glue until it becomes less wet and more tacky, then you’re ready to apply. Gonzalez’s favorite glue is the KISS Lash Couture Strip Lash Adhesive in Black.
STEP 4: Apply Your Lashes
Now time for the tricky part — application. “Staring downward into a mirror, place the lashes and push with [your] fingers as close to the root of your lash,” says Gonzalez. Looking down is the key here; it will help you get the fake lash strip as close to your real lash line as possible.
HOW TO MAKE FAKE EYELASHES LOOK REAL
Let’s be honest, the ultimate goal here is to make our fake lashes look like the real deal — right? To do so, Gonzalez recommends applying your fake lashes after you do the rest of your eye makeup. “If done before, eyeshadow tends to fall onto the tops of the lashes,” she explains.
Another hack: Opt for individual lashes instead of a strip. It may seem like more work, but for truly natural-looking lashes, individually placed fake lashes mesh better with your real ones. Just be sure to mix in different lengths — small medium and long — to help them blend nicely. Try the KISS Ever Ez Trio Lash to get this look.
Gonzalez loves one of KISS’ newest products, Falscara, to achieve I woke up like this lashes. “They are perfectly wispy and instead of applying above the lash, you apply underneath, which is why you also can’t detect the lash weft,” she says. “They are great for those of us who love that lash extension look.”
HOW TO REMOVE FAKE LASHES FOR MINIMAL DAMAGE
While peeling away fake eyelashes can be very satisfying, taking them off the wrong way can pull at your real lashes. To avoid any tugging in this sensitive area, reach for a makeup remover. “I like to use an oil-based remover, paying close attention to the roots. They will literally slide off.”
HUDA BEAUTY FALSE LASHES TUTORIAL:
How To Apply False Lashes – For Beginners:
If you’re still struggling – we feel your pain – then try cutting the strip into three pieces. We know this sounds weird, but it will be SO easy to apply the tiny blocks of lashes individually – trust us, it will revolutionize your lash game. Once you’ve trimmed the lash to the right length, cut it evenly into three pieces. Then, start to apply the pieces, starting from the outside of your eye, working your way in.
What we love about this technique is that because the pieces are separate, they fit the shape of your eye really comfortably, and you don’t get the corners pinging off halfway through the day! This way of applying lashes is so perfect that Huda Beauty herself created a lash inspired by the technique, the Huda Beauty Eazy Lash – Harmony, $18.
How To Choose Lashes To Suit Your Eye Shape
The beauty of false lashes is that they can open up your eyes, alter the shape, and make them look bigger and sexier. But, if you choose the wrong pair of lashes, they can do the complete opposite. Depending on the shape of your eye, whether it’s almond, round, hooded, deep-set or monolid, the lash style needs to change. So, while almond-shaped eyes can get away with almost any lashes and deep-set eyes can go extra glam, round eyes will look even more sultry with a whispy lash that has more drama at the outer lash, and hooded lids need to go a little smaller. Check out Huda Beauty full guide on their fave lashes to suit every eye shape here.
How To Easily Clean False Lashes
False lashes can be expensive, but spending money on quality lashes is totally worth it and cost-effective in the long run if you know how to clean them properly. Lashes are super delicate, so the most important thing to remember is that you need to be gentle with them. Whenever you’re cleaning them, always hold them firmly at the base of the lashes so that the lashes aren’t pulled from the band. Check out this video to see how easy Huda Beauty lash cleaning method is:
Storing the lashes back in the original package is the best way to keep your falsies clean and safe. If you attach them firmly to the band and press them down this will help them to stay curled.
How To Safely Remove False Lashes
Removing false lashes can be dangerous – if you’ve ever caught your own eyelashes in the process, you’ll know the pain is real! The trick is to soak a cotton pad with your weapon of choice (micellar water, eye-makeup remover, or cleansing oil) and let it sit on your eye for at least 20 seconds to loosen and dissolve the glue. Then gently peel away the lash with your fingers. If the lash still isn’t easy to remove, soak another cotton pad in solution and let it sit on your eye for longer and then try again. Et voila! You’re lash-free with your natural lashes still intact!
Let us know if you guys have any more questions about false lashes in the comments below.
Patchy, streaky and blotchy blush is certainly not ideal. It happens to the best of us: One minute, you have rosy cheeks, and the next, you have hot pink product clumps that resemble clown makeup. While a botched blush job can leave much to be desired, thecorrect blush application and productscan help give you a naturally flushed, rosy and fresh complexion. To help you say goodbye to blush mishaps once and for all, we’ve listed our top tips for avoiding too-pink, streaky cheeks, ahead.
Blush Tip #1: Exfoliate Your Skin
One of the best ways to ensure smooth makeup application is by creating a smooth base. If your skin is dry and flaky, your blush — or anything else for that matter — will look streaky and uneven. Lightly exfoliate once or twice a week with a gentle scrub like the Lancôme Exfoliating Rose Sugar Scrub. It will help remove dead skin cells and flakes that could be messing with your makeup.
Blush Tip #2: Prime Your Complexion
Make sure to moisturize. A hydrated base helps create a supple canvas for makeup. To take it a step further, use a pea-size amount of primer to help blur imperfections and give you a more flawless foundation application that will stay on and look fresh throughout the day. Recently, we’ve been loving the Giorgio Armani Luminous Silk Hydrating Primer.
Blush Tip #3: Use the Right Tools for Application
In the same vein of keeping things smooth, it’s important to have an even base of foundation before applying your blush on top. We like to use a beauty sponge or foundation brush, like the IT Cosmetics Heavenly Luxe Complexion Perfection Brush #7, so that the product is distributed evenly across the face. (Pro tip: If you have naturally oily skin, opt for a matte foundation so that your skin’s natural oils don’t interfere with cream or powder blush.)
Blush Tip #4: Select the Right Cheek Product
Selecting the right formula can have a big impact on how your product applies and wears throughout the day. If you have dry skin (thanks, winter!) look for formulas that are cream or liquid and easily blendable to help your complexion stay hydrated throughout the day. We’re obsessed with the Maybelline New York Cheek Heat. It gives a natural looking flush, comes in six different shades, is buildable and leaves behind a gorgeous glow.
Blush Tip #5: Use a Clean Brush
Blush brushes are designed to have tightly packed bristles for splotch-free application. They’re normally tapered or angled for even distribution and a naturally blended look. But, if your blush brush hasn’t been cleaned in a while, all the excess makeup and oil from your skin will build up on the bristles and keep your blush from going on smoothly. Be sure to wash your brushes around every two weeks. If you’ve cleaned your trusted blush brush and are still experiencing splotches, it may be because the density and shape of your brush may have changed. Try switching it out for the IT Cosmetics Heavenly Luxe Boutique Blush Brush #4 — our personal favorite.
Blush Tip #6: Blend it Out
After applying blush to the apples of your cheek, make sure you blend out the product with your brush or a makeup sponge (ideal for gel or cream products) to create a natural, diffused look. If you’re using a gel-like blush, you can also use your fingers.
Blush Tip #7: Set it!
As the day wears on, your blush tends to wear off. Once the flush fades away, it can start to look blotchy as the pigment breaks down. To avoid this, after blending your makeup, set everything in place. Do a quick spritz of setting spray before walking out the door. We’re loving the Urban Decay All Nighter Long Lasting Setting Spray.
We’re calling it: blush is going to be one of THE biggest makeup trends of 2020. While some of you may think blush is a little old school, it’s a classic for a reason! When applied correctly, blush warms up your entire face and gives you the most stunning youthful glow. It also adds an element of harmony to your makeup game that we can’t live without (more deets on that later). The thing is, it has to be applied correctly otherwise a sun-kissed goddess is the last thing you’ll look like, and trust us, it’s easy to go overboard if you’re not careful! Here are all of our top blush tips, and how to avoid any blush-mishaps.
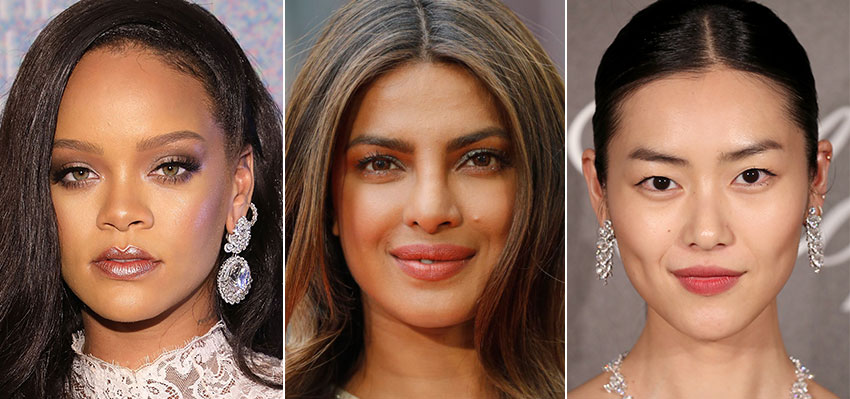
How to Find the Right Blush Shade for Your Skin Tone
Finding the right blush for your skin tone is one of the most important elements to get right. If it’s too bright it can look harsh on your skin, and if it’s the wrong shade it can disrupt the harmony of your look. The key is to choose a shade that looks like a natural flush; as if you’re blushing.
For fair skin tones: Light, pink-toned blushers work well for fair skin tones – the Benefit Cosmetics Dandelion Box O’ Powder Blush, $30, is perfect!
For light to medium skin tones: Peach shades will warm up your complexion beautifully. We’re obsessed with the Charlotte Tilbury Beach Stick in Formentera, $45.
For golden or olive skin tones: Opt for brighter pinks and soft corals like Patrick Ta’s Monochrome Moment Velvet Blush, $32, in the shade She’s Passionate – a beautiful coral-pink.
For deep and rich skin tones: Hot pinks, fiery corals, and deep berry tones look divine. The Glossier Cloud Paint in Haze, $18, is perfect for rich skin tones; it looks super bright but it blends out like a dream.
How to Choose A Blush Shade To Complement Your Look
Of course, you don’t have to stick to one blush shade, you can experiment with different shades depending on your vibe. However, try to create an element of harmony by using similar hues for your eyes, lips, and cheeks. It’s an MUA rule that we live by – it’ll instantly elevate your look. Celebrity makeup artist Patrick Taactually created a makeup collection dedicated to the monochromatic mantra including four sets of Lip Cremes, lip liners and Velvet Blushes in complementary shades to create a truly harmonious look.
For example, if you’re wearing a bold coral or orange-toned lip, opt for a coral-toned blush. If you’re wearing a brown nude lip like our Power Bullet Matte Lipstick in Board Meeting$25, use a cool-toned blush with muted brown undertones like NARS Luster, $30. Check out our examples below for monochromatic makeup goals:
For fair skin tones: To match the Dandelion Box O’ Powder Blush, $30, we’d recommend Huda Beauty Power Bullet Matte Lipstick in shade Rendez Vous, $25. It’ll create that soft feminine look that’s seriously trending right now.
Source: Benefit
For light to medium skin tones: The Beach Stick in Formentera, $45, is in fact, a lip and cheek stick, so you can use it to warm up your complexion as well as your lips. This is actually one of the easiest ways to create a harmonious look; either by buying multi-purpose products or using a lip creme as a blush. Simply try to find a shade that matches the blush shade for your skin tone, as we’ve recommended above.
Source: Charlotte Tilbury
For golden or olive skin tones: Patrick Ta’s Monochrome Moment Velvet Blush in shade She’s Passionate, $32, was created to be worn with Lip Crème shade She’s Independent, $24.
Source: Patrick Ta
For deep and rich skin tones: Once you’ve applied the GlossierCloud Paint in Haze, $18, to your cheeks, you can use it to stain your lips or try our Demi Matte Cream Lipstick in the shade Lady Boss, $20, which looks gorgeous on deep skin tones.
Source: Glossier
How to Find the Right Blush Formula
When you’re searching for your perfect blush, the formula is another crucial factor to consider. There are so many variations on offer from matte and shimmer powders, cream pots and sticks, and stains and tints. Each formula has its own set of pros and cons. Powder blush is great for those who love to set their foundation with powder and prefer a more matte skin finish. If you prefer the no-makeup makeup look and glowy skin and rarely set your base with powder, then you’ll most likely gravitate towards a ‘wet’ finish blush, like a cream or a tint. Blush stains are another great option and can be blended with foundation, but they can be harder to blend out, so you have to be very careful with the application.
Source: Benefit, Morphe
We recommend steering away from very shimmery or sparkly blushes, as these can disrupt the balance of your blush. Creams are also often not as long-lasting as a powder, which is why Beyoncé’s makeup artist Sir John suggests layering your blushes; first by applying a cream, followed by a powder to set it. He notes this is especially beneficial for dark skin tones to ensure it stays put and the pigment pops.
How to Apply Blush
For flawless blush application, use a tapered or rounded, medium-sized fluffy brush. If the brush is too densely packed, you run the risk of picking up and applying too much blush, and if the brush is too small, then the blush will be too heavily concentrated and won’t look well blended.
Our Fave Blush Brushes
The Spectrum A05 Blush Brush, $10, which has a tapered finish and works beautifully for targeted blush and contour.
The Patrick Ta Monochrome Moment Blush Brush, $35, has crimped synthetic fibers that easily pick up powder formulas and a tulip shape to disperse pigments for seamless application.
The Real Techniques Blush Brush, $9, is a classic and one of our all-time faves. The tapered bristles allow for precision application and flawless blending.
How to Apply Blush for a Natural Glow
For a healthy flush of color apply blush to the apples of the cheeks and blend outwards using a circular motion. Scott Barnes, J.Lo’s go-to MUA told us “Instead of applying blush to the sides of your face, apply it towards the front of your cheeks, more under the eye line.”
What You Should Never Do…
Scott warns; “Applying blush on the sides, or stretching it out really far like it’s some sort of blush contour, will make you look older or outdated. The only time you want to put blush on the sides is if you are doing an editorial shoot or fashion shoot with a specific reason. Proper blush screams youth and that’s the makeup gospel truth.” And if there’s anyone we can rely on for youthful makeup tips, it’s JLo’s makeup artist – that woman doesn’t age!
If you’re looking for a sun-kissed vibe, even in the dead of winter, blush is your BFFL. The trick is to apply a dusting (and we mean the lightest of dustings) of blush wherever the sun would hit. Think about the apples of your cheeks, the center of your forehead, and the tip of your nose. This looks works particularly well when it’s layered on top of a bronzed glow.
For a warm sculpted finish, apply blush to the apples of your cheeks as instructed by Scott, then lightly warm up your contour with any excess product, like under the cheekbones, and the top of your forehead. This will warm up your face and balance a grey-toned contour; the key is to go lightly – only use whatever is on your brush after applying your blush.
Do you guys wear blush? Let us know in the comments below.