Primp Tip: Brush, Sponge, or Fingers?

For some of us, putting on makeup is almost second nature. We have our routines down and can even step away from the mirror in 5 minutes flat. But for others, the application process can pose more questions than productivity. When there are so many ways to apply your makeup, it’s easy to get confused on which way is the correct way to go about it. Which brings me to my latest Primp Tip… Today I will be debunking the brush vs. sponge vs. fingertip debacle.

While there are pros and cons to each tool, it all comes down to personal preference. In order to find out which technique works for you, I recommend experimenting to see which applicator you feel most comfortable using. While trial and error is always a good way to determine the winner, below I’ve broken down each applicator and it’s specific benefits. So if you’re still deciding between a brush, sponge or your fingertips, keep reading…

Brush

Using a brush to apply your makeup is a great way to give your skin an airbrushed finish. Brushes are known for their precision and also for their blendability. Whether you’re using powder or cream, brushes are versatile enough to get the job done. Tip: It’s important to start with a small amount of product and build up to your desired look. With a brush you tend to get a more concentrated amount of product and color, so blending it all out is essential.

Sponge

Similar to using a brush, sponges are known for their blended out, flawless finish. For an even distribution of product, wet the sponge before using a liquid foundation. By doing this you should get a sheer and lightweight look that is easily buildable. Like brushes, there are a variety of sponges used for different makeup techniques (highlighting, contouring, etc.). The only thing to be mindful of when using a sponge is that they soak up more product than a brush or your fingertips does.

4fbd15de73d7ce2331ad04fda9c4b588--makeup-tips-makeup-productsFingertips

Last but not least, using your fingers to apply makeup is just as effective as using a brush or sponge. The warmth of your fingertips makes for more blendability—but be careful because you’re going to get more of a concentrated application. For colorful eye shadow and cream blushes, your fingertips will give you the best color payoff. If you’re going to use your fingers, be gentle! Always use a tapping motion with your ring finger and don’t use too much pressure.

While there isn’t a dramatic difference between each technique, the end results should be similar as long as your product is blended into your skin. You never want a harsh line! It ultimately comes down to practice and preference. I find that I use my fingers when I’m in a rush as opposed to a brush or sponge when I want a more done-up look.

So, which method do you prefer?  85367ab070c62321d54dd32c58d13edd

Let me know your thoughts in the comments! 

Click here to find out which tool(s) I prefer

Beauty Note: Why I Switched to a Foundation Brush—and Why I’ll Never Go Back

20161025_brushsoniakashuk2510_2copie

It all started on a routine trip to Target. I can’t help but make a detour through the cosmetics section every time I walk into the store—I swear it’s like a magnet! A small voice in my head convinces me that there’s something new that I need to try. During one of my more recent visits, Target had just remodeled the makeup brush section and I found myself comparing and contrasting every single one. After all, one needed to come home with me and I wanted it to be something I used on a regular basis. That day I became the proud owner of my first Sonia Kashuk foundation brush.

For the past few years I’ve been applying my foundation with a makeup sponge, and for the most part I had no complaints. After all, each application process has its pros and cons. Since I’m the kind of person that likes to test out the latest beauty trends to see what all of the hype is about, my curiosity is what ultimately lead me to the brush aisle at Target that day. I know that using a brush to apply foundation is not a new concept, and I have used makeup brushes before. But it been a while since I used brushes and there have been so many brushes that has been out that I needed to find out has there been a change for myself and I’m so glad I did. Keep scrolling to see why I’ve converted to using makeup brushes…

Why I’m ditching my makeup sponge.

All in all, makeup sponges work great when applying everything from foundation to concealer and even highlighter. After using a damp makeup sponge to apply my foundation for quite some time (I’m talking years), I found myself getting fed up with the lack of consistent coverage it was creating. Did you know that makeup sponges soak up a lot of the product that you’re using? I found that because of this, my makeup was looking blotchy in areas where there was more product and I was running out of foundation faster than I care to admit. Using a makeup sponge was proving to be more wasteful than helpful.

Why I’m sold on foundation brushes.

When it came time to test the makeup sponge against the foundation brush, the results were evident immediately. It cut my application time in half and it left me with polished and airbrushed looking results. The biggest difference for me was how even my skin looked—finally! Foundation brushes give you the option to build up as much coverage as you want, giving you full control of the look you’re wanting to achieve. These were the kind of results I was lacking with a makeup sponge.

After four weeks of using the foundation brush to apply my makeup, I can confidently say that I will not be reverting back to a sponge. If you’ve been curious about what they can do for you, I encourage you to make the switch! Not only will your product last longer, but you’ll be giving yourself an effortless airbrushed look every time you apply foundation. That’s a win win in my book!

Here are a few of my favorite foundation brushes:

What are your thoughts on foundation brushes?

(Let me know your opinion in the comments below!)


Natural Looking Makeup: Learn the Tips For Getting the Look Just Right

natural

Finding the right makeup to wear when you’re going for a natural look can be more complex than you think. You don’t want anything too cakey, too bright, or too dark. And we all know, that looking natural does indeed require SOME makeup application – and some skill, too. The best tip that I have for you is to wear colors close to your natural skin tone, and ones that just enhance and perfect your skin. For your best natural look, follow the tips and tricks below, followed by some of my favorite beauty products to use to get that natural looking glow.

1. Moisturize. Creating the perfect base for your makeup is very important. Moisturizing boosts hydration in your skin, prevents flaking and dullness, and creates a protective layer of moisture that lasts all day. Plus, proper application of a face cream will help anti-aging ingredients work better – increasing the odds that they’ll work.

Beauty Tip:

  • I use Shea Moisture Head-To-Toe Nourishing Hydration 100% Extra Virgin Coconut Oil
  • Sometimes, I feel like I have a dry skin so I have been using POND’S Dry Skin Cream. It deeply hydrates for smooth, soft, radiant skin. *Don’t worry, it won’t clog pores. Pond’s Dry Skin Cream is hypoallergenic and is suitable for sensitive skin. It has been Dermatologist tested for the ones that are concerned.
  • Since I have discovered a ULTA Beauty close by me, I have been going insane. A month ago, I purchased Luminizer Primer Base Lumiere by Dr. Brandt. You can either wear it under your makeup or by itself. If you want to control those pores of yours then Dr. Brandt is the way to go plus it adds a natural glow to your beautiful face.
  • Also, I use Juice Beauty Hydrating Mist. Here is the bonus: It formulates with certified organic ingredients. Tones with this refreshing blend of rosehip, ylang ylang, resveratrol-rich grapeseed oil and antioxidant-rich organic botanical juices for a fresh, radiant complexion.

2. Conceal. Hide away any dark circles, fine lines or blemishes with a concealer. This will get rid of any imperfections and leave your skin looking flawless

Beauty Tip: My go-to concealer is NARS honestly. I have many concealers by different brands but I always end up using NARS.

But sometimes I end up using PUR Bare It All foundation by itself without a concealer because it is a high performance, 12-hour, demi-matte foundation that helps to cover imperfections and instantly perfect the skin while helping to correct the problem areas. Designed for face and body and formulated with PUR’s proprietary Energy Complex and Ceretin Complex, this formula renews the look of your skin and goes the distance.

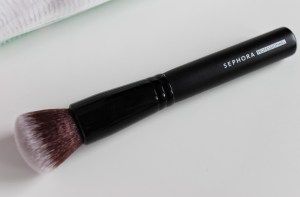
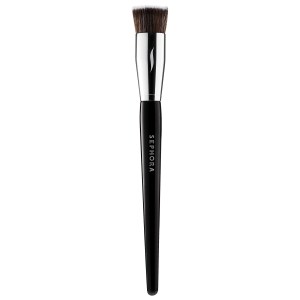
3. Powder or light foundation. I recommend to use a powder or an airy liquid foundation. The illusion that we’re going for is natural makeup, so using a thick cakey makeup doesn’t fit the bill. Be sure to apply evenly with a brush or sponge for an even, non-streaky, look and your face will appear naturally perfect.

Beauty Tip: For powder, I either use BLACK RADIANCE, IMAN, or Bare Minerals Matte. But remember, if you are using a matte foundation then you don’t want to use a matte powder because you might end up looking cakey.

I also love, I mean I LOVE IMAN Second To None Cream Powder Foundation . It is not heavy on the face and surprisingly, it is full coverage. When wanting to look natural but still be flawless, IMAN Second To None Cream Powder Foundation is the IT FACTOR!

If you still have the desire to bake then lets go bake! I tried the Too Faced Born This Way Ethereal Setting Powder and loved it. Now I can’t get enough. I also use the Black Radiance Soft Focus Finishing Powder to bake and the IMAN Second To None Semi-Loose Powder .

* I don’t use all these powders at once, I use 1 or the other depending on what makeup look I’m going for or usually what my hand grabs first. These are the products that I have used or is still using.

4. Subtle blush. Creme blushes work well because you can rub them in as much as you like for a dramatic or subtle look. Depending on your skin color, blush colors will vary – but peaches tend to look great on everyone. Blend in to your natural cheekbone line where pink undertones normally show.

Beauty Tip: I don’t normally wear blush but when I do, I go for Too Faced Blush.

5. Neutral shadows. Sweep a neutral color over your lids for a muted but beautiful eye. Choose a color that is just a shade or two darker than your skin tone, anything too dark will create a more dramatic eye and won’t look natural.

Beauty Tip: You don’t have to wear eyeshadows, it is totally up to you. Try the L’OrĂ©al L.A Palette Nude or The Nudes Maybelline New York. 

6. Nude lip. When choosing a lip color, go for the light pinks, peaches and sand colors. You could also apply a little gloss for an even simpler lip.

Try Burt’s Bees for the lip balm, Lucie + Pompette lipglosses, ColorKillMakeup, NYX, Fenty Beauty, LipLand by Amrezy, fullips, NARS, Sonia Kashuk lipliners, or Maybelline lipliners.

7. Little mascara (if any). A thin layer of mascara is all you need for a natural look. You still want your eyes to stand out, so if you have light lashes, adding a layer of mascara may be a good idea. If you naturally have dark, full lashes you may skip out on the mascara.

My Favorite mascara is Benefit Roller Lash and my two favorite eyelash primers so far are L’OREAL Voluminous Primer or the Elf Cosmetic Primer. *Benefit they’re Real mascara is a good one as well and Maybelline has good mascarars as well, it is so hard to choose.

8. No liner. While eyeliner is great for a dramatic eye, it doesn’t fit with the natural makeup look. Don’t apply any eyeliner on the top or bottom. Not only will your face look naturally stunning but you’ll love how easy taking off your makeup is!