Glow Recipe’s New Banana Moisturizer Just Became Our Go-To

In less than two years, K-beauty aficionados Glow Recipe has created sell-out product after sell-out product. The trend-quenching brand has transformed some of the most iconic fruits in pop culture – watermelons, avocados, pineapples – from pool float and phone cover necessities into bomb skincare products that feed your skin and your #shelfies with goodness.

From juicy watermelon to the revered avocado, Glow Recipe has made it its M.O. to craft the most fun, at-times viral skin-care products from nature’s fruit basket. Well, insert banana emoji here, because their latest launch has arrived, and unlike anything they’ve done before.

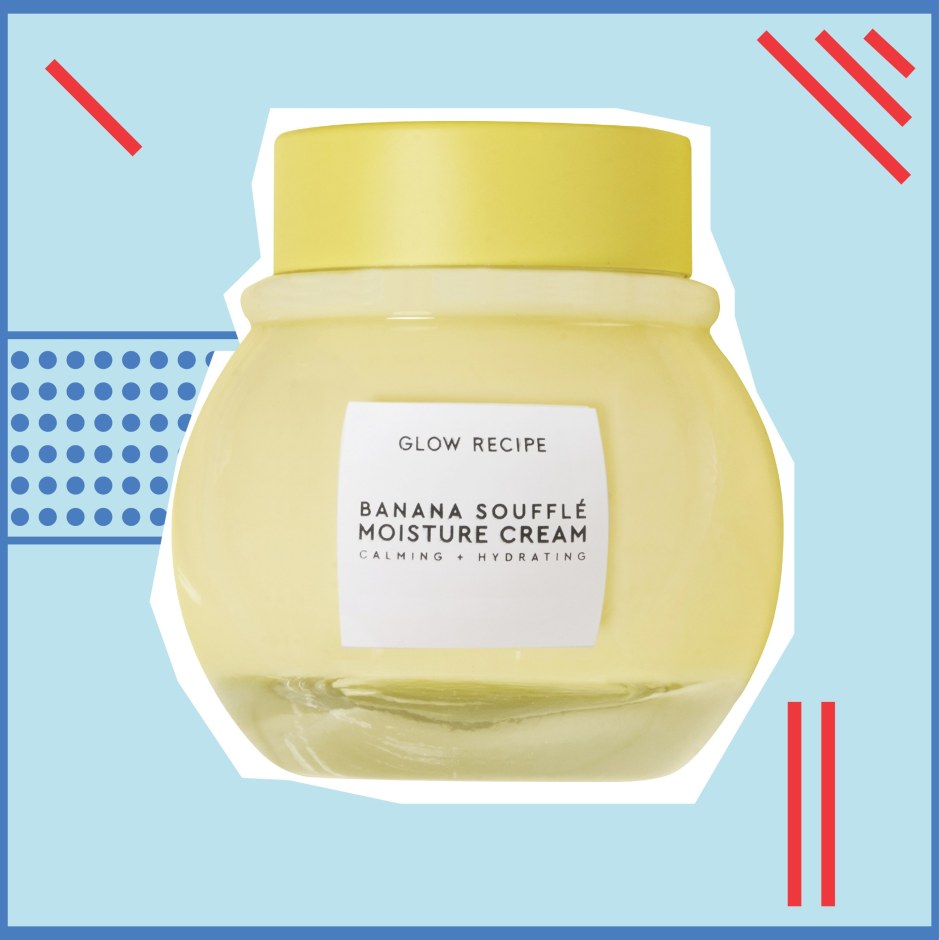
The latest super-fruit to join their family has less of an Instagram following, but its skincare powers are definitely on par with the rest. Meet the Banana Soufflé Moisture Cream, $39, that harnesses the moisturizing, nourishing and calming properties of banana, which launches online at Sephora.com on Dec 5th (and today on the Sephora app)! We were lucky enough to get a first try of this moisturizer, and we’ve been using it non-stop for the last two weeks to ensure we can give you a thorough review!

What it is: The Banana Soufflé Moisture Cream is a lightweight moisturizer bursting with banana, turmeric and chia goodness to give you plump, hydrated and happy skin that smells like banana cream pie filling.

What it does: This bouncy, banana-packed formula helps skin recover from dryness, dehydration, stress, and irritation by delivering an intense hit of magnesium naturally found in bananas to balance moisture levels and recover skin barrier health. Potassium works to hydrate the skin while manganese gets to work on healing stressed skin – aka when you’ve overdone it on AHAs or your skin is hella thirsty.

The ingredients: Well, if not for the color. Glow Recipe’s $39 Banana Soufflé cream is a telltale shade of pastel yellow that looks like the dreamiest, creamiest, banana-filled smoothie ever blended into existence — even though the formula relies on banana water, according to Byrdie’s behind-the-scenes look at how the moisturizer is made. The intriguing ingredient acts as a source of hydrating potassium and useful magnesium, which helps keep your skin barrier happy, healthy, and properly balanced, moisture wise. Take that, other superfruits.

Soothing Centella Asiatica (aka cica, a classic K-beauty ingredient) and turmeric are full of antioxidants to protect the skin while the essential fatty acids in chia moisturize deeply. Added vitamin A, B, and C reduce inflammation and help brighten dull skin. Jojoba seed oil also makes an appearance and is amazing for repairing the skin barrier as it naturally mimics your skin’s sebum while squalane, hyaluronic acid, and glycerin boost hydration.

glow recipe banana souffle moisturizer

Who it’s good for: This is great for all skin types. It’s light enough for those with oily, acne-prone or sensitive skin and will help regulate and balance your skin while it’s also really hydrating so it’s great for dry and normal skin types too. It’s not too heavy for daytime and rich enough to hydrate all night long.

What we thought: Another little glass jar full of goodness! This richly-scented moisturizer is just as potent as its sisters, and although it has no synthetic fragrance, the first thing you’ll notice is the smell – which, as banana pudding fans, we LOVED! The texture is super lightweight and feels whipped, just like a soufflé, with a seriously addictive, gooey-bouncy consistency that melts into the skin and blends out beautifully with no need to tug or pull your skin. A little goes a long way, and once applied the formula sinks in quickly with no heavy feeling, which is rare with a product this nourishing and moisturizing.

The results: True story, trying products non-stop is testing on your skin, and the Banana Soufflé could not have come at a better time. After testing a new toner, our skin was pretty parched, sensitive and tight, and not only did we feel immediate soothing effects with this moisturizer but, within days – we used it morning and night – our skin felt hydrated and plump again. This moisturize really came through to hydrate our skin and help it feel balanced and comfortable. In 10 days, our skin is feeling its best, healthy self, and definitely looks less dull and feels fuller.

We also tried their hack of combining the Banana Soufflé Moisture Cream with the Glow Recipe Pineapple-C Bright Serum, and we loved the feel and the brightening boost this gives.

The verdict: Naturally, Glow Recipe made it easy to integrate the new cream into your pre-established skincare routine. You can pat on a dollop of Banana Soufflé cream as the next step after your serums both in the morning and before you hit the hay, or create an extra-brightening version by mixing in a drop of Glow Recipe’s Pineapple-C Bright Serum.

If you need a moisturizer to keep your skin glowing on happily, we highly recommend this. Although it doesn’t contain ingredients to target any more problematic skin issues, mix this up in the evenings with one of Glow Recipe’s sleeping masks to target other skin concerns. For us, this is the perfect everyday moisturizer that will keep your skin supple, nourished, protected and balanced, which is especially important at this time of year. It works great under makeup too, which is always a win!

Launched Party: The new fruity creation from the brand dropped on Dec. 4 for pre-sale on the Sephora app, and the following day, Banana Souffle will be available to shop online at Sephora. If you do want to test out and feel the product before purchasing, don’t worry. It will be coming to Sephora stores a few weeks later on Dec. 27. The new product will retail for $39 making it the same cost as the brand’s existing Pink Juice Moisturizer.

The Banana Souffle Moisture Cream marks one of the first products to launch from the brand since founders Christine Chang and Sarah Lee decided to eliminate their K-beauty curations. Back in June, the brand announced that it would be focusing on its in house projects (Glow Recipe and affordable brand Sweet Chef) in order to launch more innovative and exciting skin care. Now, one of those creations is here in the Banana Souffle Moisture Cream.

If you were one of the thousands of people who joined Glow Recipe’s wait list when it first launched with the Blueberry Bounce Cleanser and Watermelon Glow Mask, there’s a new product to be added to your wishlist, and this time, you can avoid that waitlist.

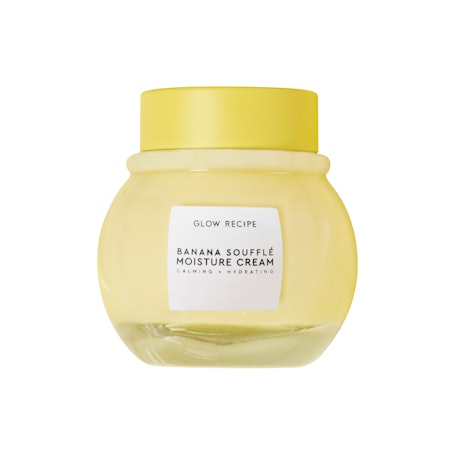
Glow Recipe Banana Souffle Moisture Cream $39

Related Posts:

5 PLACES YOU NEVER THOUGHT TO HIGHLIGHT YOUR FACE

In our eternal quest for radiant, illuminated skin, we’ve decided that just highlighting our cheekbones simply isn’t enough on the days when we want to look a little more glam. Luckily, we’ve spent some serious quality time with our (extensive) highlighter stash and have discovered a few unsuspecting places to pop on shimmer. Ahead, find the four spots that can up your highlighter game and give your face a major glow up. 

Highlighter Placement #1: Top of the Forehead

Highlighting the top of your forehead prevents the face from looking flat (a common beauty blunder associated with too much bronzer) and brightens up the entire face. Application here should be very sheer and look natural rather than powdery. One of our favorite techniques is to mix in some liquid highlighter with foundation and tap it on with a makeup sponge. NYX Born to Glow Liquid Illuminator our go-to pick for some lit-from-within shimmer.

Highlighter Placement #2: Below Your Brow Bone 

While you may not have racked up eight hours of sleep last night, popping some highlight below your brow bone and above your eyebrow arch will make you look wide-eyed and well rested. Focusing highlighter around your eyebrow can give the appearance of a mini eye-lift. We love Thrive Causemetics Brilliant Eye Brightener. It’s an easy-to-use pencil with a creamy consistency and amazing glow. 

Highlighter Placement #3: Center of the Eyelid 

Whether you did a full-on smoky eye or are going the more neutral route, the eyelid is an unsuspected spot to highlight — but it makes a big difference. We recommend a powder for this step, like the YSL Couture Highlighter. Use a flat brush to pack product on the center of your lid and in the inner corner of your eye. This trick will make your eyes twinkle — no joke. (Primp tip: If you want a foiled look, spray setting spray on your highlighter and then apply.) 

Highlighter Placement #4: The Cupid’s Bow 

The ‘V’ of your cupid’s bow is also a great spot to pop on some highlighter; it creates the appearance of fuller lips. Apply it with your finger and use a soft touch. When the light catches, your pout will look especially plumped.  

Highlighter Placement #5: All Over Glow 

A bronzer-highlighter duo? Count us in. IT Cosmetics CC Radiance Ombre Bronzer is an easy and natural way to amp up your overall illumination. It’ll give you warmth and sparkle around your cheeks, nose, chin and forehead. Use a buffing or blending brush to diffuse the product and achieve subtle radiance. 

RELATED POSTS:

Winter Haircare Tips


The winter season is upon us and we all know the cold can be bitter sweet. The winter months can attribute to dryness  can be hard on our hair. Black hair care techniques should change throughout the year, especially during the winter, thanks to the cooler temperatures and drier air.

Winter weather can wreak havoc on black hair if no extra care is taken, since excessive dryness leads to hair breakage and a dry scalp. The key to winterizing your hair care regimen is switching to a routine that causes very little stress on your hair throughout winter while preserving moisture. So how do you do this?

01. Wear A Hat:

Protect your hair from the harsh weather changes, by wearing a hat when outside. Wearing a hat covers your delicate strands from harsh winds which could lead to dryness. No one wants dry stiff hair.  I know many of us hate wearing hats, but what’s worse, not being fashion forward, of suffering from dry hair? I’ll say the last option.

Do not go outside with wet hair. Not only can you get sick, but this bad habit can also cause breakage. Depending on where you live and how cold it gets, your hair could even freeze.

Keep your hair wrapped and protected at night. Try wearing a satin bonnet or a scarf to prevent hair from drying while you sleep.

Wear protective styles (i.e. buns, braids, cornrows, etc). If you’re going to wear your hair in a bun, try to avoid pulling your hair, thus adding stress to your hairline. Wearing protective styles help preserve your hair throughout the winter.

Tame flyaways. Dry air can cause static, making even well-moisturized hair unruly. Carry a few unscented anti-static dryer sheets. Pass one over the top your head to immediately calm flyaways.

Wear a hat or a scarf. Wearing some sort of hat or scarf that’s loose enough to allow scalp circulation will protect your hair against cold winds.

Note that some materials, such as wool, tend to be more harmful to Black hair, but since you really shouldn’t venture out into the cold without head protection, try to wear a hat that has a satin lining – or create your own lining.

02. Deep Condition:

Deep Conditioning is one of the most crucial steps in having healthy hair in general. It doesn’t have to be the winter time, however winter is when hair is the driest especially if you live in a cold climate. If you don’t have enough time to leave your conditioner in sit in your hair for 30 minutes, consider using the one minute hair mask treatment from Garnier that I reviewed earlier this week.  I’d also recommend adding an oil, (I love olive oil) to your conditioner for an extra dose of moisture.

Shampoo your hair once a week. Remember that it’s not necessary to shampoo your hair every day, since washing Black hair too often can strip it of much needed natural oils, especially in during winter months, when the hair and scalp are already drier than usual.

Also, remember to use cooler water when wetting your your hair, and to be extra-gentle with wet locks. Try spraying your hair with a leave-in conditioner, using a wide-tooth comb, and blotting with a soft towel (as opposed to vigorously rubbing it, which can lead to even more breakage).

03. Don’t Be Afraid Of A Trim:

I hate getting my hair trimmed, however, it’s so necessary. Removing dead ends helps promote healthy hair growth. I have to tell myself a million times, it’s better to lose some hair to a trim than all hair to split ends; maybe that statement is a bit extreme, but nothing is worse than having long hair that is damaged from root to tip.

04. Minimize The Heat

The quickest way to cause breakage is by using excessive heat. Minimize the use of heating tools to prevent breakage.

Prepare Your Hair. If you decide to use a heating tool, use a hair product to protect your hair from heat. In addition, you can also use a leave-in conditioner accompanied by a heat protecting hair serum to replenish moisture.

Air Dry. Try letting your hair air dry instead of using a blow dryer.

Limit Combing. If you choose to comb your hair while it’s dry, try finger combing instead of using a comb. This will reduce breakage. If you do use a comb, be sure to use a wide tooth shower comb.

Use A Cooler Setting. When using a blow dryer, try using a cooler temperature setting. Your hair may take longer to dry, but it will minimize heat damage.

05. Add An Oil:

Oils are a the best hair care gift the earth could give us. I know I mentioned this above, however if you have dry ends (especially for the curly girls) you can coat the ends in a bit of oil to moisturize the hair without rinsing it out. What most don’t realize is, the ends are the oldest part of the hair and need more attention than the hair towards the scalp. Three great oils that are great for moisturizing the hair (from experience) are:

  1. Argan Oil
  2. Coconut Oil
  3. Olive Oil

To combat winter dryness, this is a crucial step. Moisturizing is extremely important during winter. Also, deep conditioners and hot oil treatments help restore and replenish moisture to your hair.

Use a moisturizer daily or leave-in conditioner. A leave in conditioner can do great things for dry and brittle hair.

Try to use leave-in conditioners with natural ingredients. Some ingredients such as sodium laurel sulfate, mineral oil, and petrolatum cause more dryness, so avoid using products with these ingredients.

Pamper your hair naturally at least once a week. Natural, intensive moisturizers like aloe, shea butter, jojoba or avocado oils can hydrate and revitalize the driest hair.

Deep condition. If your hair becomes persistently dry during the winter, use a deep conditioner or a hot oil treatment.

These products tend to be ultra moisturizing and great for black hair (you can even use a homemade deep conditioner with mayo or avocado). Hot oil treatments are great for replenishing moisture, as well. You can use a variety of different oils for great results, but the best oil to use is jojoba oil, because it is considered to be most like the natural hair oil, called sebum, which is produced from the sebaceous glands in the scalp. Ask your stylist for suggestions regarding the particular products you should use.

06. Eat Right & Consider Vitamins:

The strength of your hair is not only determined by what you put directly on it, but what you put into your body. Simply drink more water and add more fruits and vegetables and you are bound to see improvements in the overall appearance of your hair. If you want to amp it up a bit, consider biotin. Biotin, often known as the “beauty vitamin” can help grow strong hair, promote nail growth and help heal problematic skin.

Retain Moisture. The most important key to combating dryness during the winter is to protect your hair by retaining moisture. Add water to your diet and regimen by drinking at least 8 glasses of water and day and enjoying water-rich fruits and vegetables, such as tomatoes, cucumbers, strawberries and peaches.

Following these simple winter black hair care steps during winter will help prevent some of the winter damage and breakage.

What winter hair care tips do you have?

RELATED POSTS:

GIVE YOURSELF A SALON-LIKE PEDICURE AT-HOME WITH THESE 9 EASY STEPS

As tempting as it is to dish out money for a salon pedicure (I mean, the massage, you guys), it’s not always doable. Thankfully, it is possible to achieve salon-quality results at home. Ahead, find out the must-have products and a step-by-step tutorial on how to DIY a salon-quality Pedi in the comfort of your own home — for a fraction of the price.

DIY Pedicure Step #1: Let Your Nail Polish Remover Do Its Thing

Completely remove any nail polish that’s still on your nails using nail polish remover and a cotton pad. If you don’t have any leftover polish, you should still run remover over your nails to remove any excess oil on the nail bed.

DIY Pedicure Step #2: Soak Your Feet Like You’re at the Spa

Fill your tub with warm water and soap (body wash will do!) and let your feet soak for 15 minutes. (Pro tip: While you’re in the rest and relaxation mode, break out a face mask.) 

DIY Pedicure Step #3: Get Rid of Dead Skin

After drying off your feet, use a foot file to remove any dead skin from calloused, hard areas. Pay attention to the balls of your feet, the sides of your feet and your heels. Scrape these areas until they feel smooth, but don’t overdo it — you could end up causing irritation. 

DIY Pedicure Step #4: File and Shape Your Nails

Use a nail trimmer to achieve the length and shape you want. We recommend cutting straight across and then going in with a nail file to buff out the corners. According to Hadley, a big mistake people make is cutting their cuticles. “Trimming or cutting cuticles during a Mani or Pedi is purely cosmetic and sometimes it doesn’t benefit the nail in any way,” says Hadley. “The cuticle is a barrier to protect your surrounding skin and protect against infection.”

DIY Pedicure Step #5: Apply Cuticle Oil

Apply cuticle oil like Essie Apricot Cuticle Oil to the base of your nail. “Cuticle oil doesn’t just keep your feet soft and moisturized, but it also keeps your polish from chipping,” says Hadley. 

DIY Pedicure Step #6: Moisturize

Moisturize your feet with an unscented lotion to keep the skin hydrated and smooth. “Scented lotions with synthetic fragrances can cause your nail polish to crack.” We love La Roche-Posay Lipikar Daily Repair Body Lotion for this step. 

DIY Pedicure Step #7: Prep Your Toes

Use toe separators (you can buy a 12-pack for cheap online) to make painting your toes easier and avoid making a mess.

DIY Pedicure Step #8: Apply Your Polish

“Don’t forget your base coat because it gives your nail polish something to sink into besides your actual nails,” says Hadley. After about two minutes, the base coat should be dry. Then, you’re ready to go in with a color. Apply two to three coats of nail polish, making sure each coat has dried. Make sure to build thin coats of polish; thick strokes will have the paint looking clumpy and take longer to dry. 

DIY Pedicure Step #9: Finish With a Quick-Drying Top Coat

Finish with a top coat so your nails maintain high shine and luster. Because nail polish takes about 12 hours to harden, Hadley recommends sticking your feet in cold water for a few minutes to help your nail polish solidify. 

Processing…
Success! You're on the list.