Ultimate Pre & Post-Workout Skincare Routine For Glowing Skin

As you know, rule number one of working out is to take off your makeup! Doing this alone is a great to start ensuring your skin looks better, not worse, at the end of a workout. But when it comes to working out we don’t often think about our skincare routine, but treating your skin properly before and after your workout will make a huge difference to your skin. When you exercise, your body temperature increases and more often than not, you sweat – a lot – and that makes your pores dilate, making it even easier for makeup and bacteria to make its way in and block your pores.

So, we’re here to share the ultimate skincare routine for before and after your workout to ensure your skin brings its a-game every time. We’ve even discovered some workout skincare products that are giving us incredible results while we exercise – now that’s multitasking at its best!

Pre-Workout Skincare Routine

Step 1: Wash your Face

…Not with makeup wipes!!

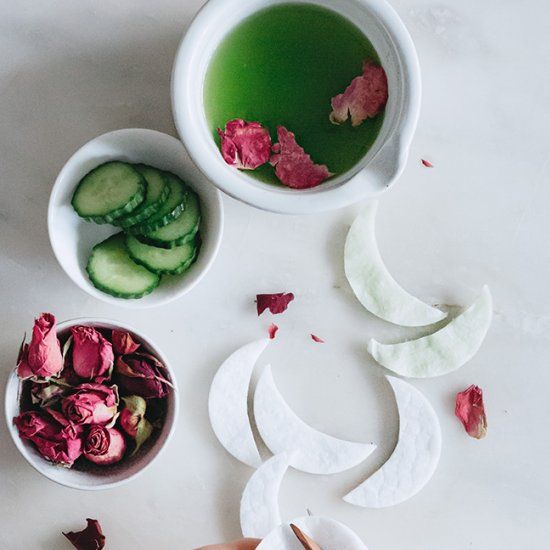
A.M.: If you’ve just woken up or you’re not wearing makeup, do a quick wipe with micellar water on a cotton pad or splash your face with a little water. It’s important that your skin is clean, so if you feel like your skin needs it, do a gentle cleanse with a milk or gel cleanser.

workout skincare

P.M.: Double cleanse to remove all your makeup! We love to use the Face Halo, because all you have to do is wet it, and the tiny little fibers will lift off makeup and dirt, so it’s super easy to use on-the-go. To finish, we love to use the Foreo Luna 3 cleansing device with a gel cleanser to remove every last trace of makeup – the T-sonic pulsations and soft silicone bristles help clean extra deep into pores, which is exactly what you need before a workout!

Step 2: Actives That Work

Just because you’re working out, doesn’t mean your skin shouldn’t get a little love. We love to use lightweight, hydrating and protective formulas while we work out, like a vitamin C serum, or an antioxidant-rich gel moisturizer to protect our skin from free radicals that attack during exercise. Avoid anything to rich and heavy, which could feel uncomfortable when you sweat.

Without a doubt, one of our most exciting new discoveries is Face Gym’s Training Sticks, $49, aka heat-activated skincare that gets to work while you do! Since we’ve discovered these, we literally haven’t worked out without them, and we love how they warm up on your skin while you work out, slowly releasing potent actives that penetrate deeper as your skin’s metabolism is accelerated. The controlled delivery system also helps improve your complexion for up to six hours post-workout (even after cleansing).

The Training Sticks are so quick and easy to use – literally just swipe onto your forehead, cheeks, chin, and temples – and we love the different options: Spirulina for lifting and firming, Activated Charcoal for detoxing, and Brazilian Pink Clay for brightening. You can also buy all three in mini version, plus a hydrating Multivitamin stick for $75 – so you can multi-mask to target different issues. The charcoal formula leaves our skin feeling super soft and bright post-workout, and we love that these fight against damaging free-radicals, which are rife during exercise.

Posts You’ll Love:

3. Protect

If you’re working out outside in the sun or going for a hike, SPF is essential. We recommend a mineral sunscreen, which means when you sweat your eyes shouldn’t sting (chemical SPFs often sting the eyes). Check out one of my fave mineral sunscreen here.

Finally, don’t forget a little lip balm to keep your lips moist and to prevent cracking. And always tie your hair up to avoid hair and hair products mingling with your skin.

Post-Workout Skincare Routine

Step 1: Cleanse

We know after working out you often have places to be, but it’s so important to wash your face post-workout as soon as possible. If you’ve washed your skin before your work out (we really hope you did), use a gentle water-based cleanser to get rid of sweat and bacteria. We love the Holi Frog Superior Omega Nutritive Gel Wash, $36, which is pH-balanced and deeply cleans the skin while nourishing it with omega fatty acids, probiotics, and antioxidants to replenish the skin. It also has natural antibacterial properties to help prevent breakouts and clogged pores, without stripping your skin.

Finish your cleanse by splashing your face with cool water, which helps to tighten the pores and shrink blood vessels, which will help to reduce redness more quickly.

Step 2: Hydrate

First things first, drink plenty of water to hydrate your body and skin – the best hydration comes from within! Then use plenty of hydrating ingredients on your skin. Start with a toner that’s soothing and calming, so look for ingredients like chamomile and aloe or opt for hydrating milky formulas. We love the Pixi Rose Tonic, $18, which helps to reduce redness and calm the skin while balancing your skin’s pH levels. Follow with a lightweight serum or hyaluronic acid, like the Sarah Chapman Intense Hydrating Booster Moisture Serum, $98, which is formulated with Bioecolia and Beta Glucan to activate the skin’s natural defenses against bacteria and irritants, plus hyaluronic acid and soothing rose water. We love how fluid this serum is and how easily it melts into the skin to instantly hydrate and repair the skin after the stress of working out.

Step 3: Lock it in

Now your skin is well hydrated, lock it all in with a moisturizer. We prefer to steer clear of thicker formulas post-workout (save that for nighttime), instead, stick to gel-like or lightweight moisturizers like the Biossance Squalane + Probiotic Gel Moisturizer, $52, which helps to reduce redness (great for after a workout), tighten pores, and balance your skin.

Now enjoy that glow-up and feel proud of yourself for working out and showing your skin some love at the same time.

Still looking for the perfect fitness essentials? Look no farther check out GIFT GUIDE: AMAZING FITNESS ESSENTIALS. WHAT DO MY HELLO BEAUTIES THINK?

10 EYESHADOW TIPS EVERYONE SHOULD KNOW

Your eyes are arguably one of your strongest assets. They are the so-called windows to your soul after all, which is all the more reason to brush up on your eyeshadow skills. But applying eyeshadow like a pro can be tricky. What are all those different sections of a palette for? What type of brush should you use? Let’s go back to the basics. Ahead, find our ten golden rules for applying eyeshadow and you’ll be golden, too.

STEP #1: Always Use Primer 

An eyeshadow primer creates a clean canvas for you to work with, and it acts as a barrier between your eyeshadow and the natural oils in your skin. That way, your makeup stays put so you can keep touch-ups to a minimum. Try a formula like Urban Decay Eyeshadow Potion Primer.

STEP #2: Enhance Your Natural Eye Color 

You want to choose an eyeshadow shade that accentuates your natural eye color. Finding colors that best complement your eyes takes some experimenting, but here’s a good place to start:

Blue Eyes: Shadows with bronze or peachy tones help blue eyes pop. Slate gray is another great option.

Green Eyes:A plum-colored shadow looks very flattering if you have green or hazel eyes. Rusty shades are also gorgeous.

Brown Eyes:If you’re a brown-eyed girl like me, we’re lucky because most shades look great on us. But gold or purple hues are especially flattering

STEP #3: Know Your Eye Shape 

Do you have deep-set eyes? Close-set? Hooded? Determining the shape of your eye helps you decide which shading technique is right for your specific features and plays up your natural beauty.

STEP #4: Decode Your Palette

You might be tempted to open an eyeshadow palette and just have at it, but it’s important to know which sections correspond to each part of your eye. Trust us, there’s a method to all this palette madness! There’s a variety of palettes out there, but here’s a general breakdown of your basic eyeshadow quad palette (the NYX Professional Makeup Ultimate Eyeshadow Palette in Warm Neutrals is a great one to start with). 

Lightest color: This is your base color. Apply this shade from your upper lash line all the way up to right beneath your brow. You can also use this color in the inner corner of your eye to add a bit of brightness.

Second lightest: This is your lid color, as it’s slightly darker than the base. Brush this over your lid from your upper lash line to your crease.

Second darkest: This is applied to the crease for a contouring effect. This should go over the area where your brow bone meets your lid to create definition.

Darkest color: Finally, the liner. Using an angled brush, apply it to your upper lash line (and lower lash line if you want a bold boost), making sure to brush where the root of your lashes meets your lid so there’s no visible gap.

STEP #5: Blend, Blend, Blend

We can’t stress this one enough! Blending your edges can be the difference between your eyeshadow looking flawless and looking like … well, a hot mess. Don’t smear. Use a light touch and gently sweep your brush along your lid, blending harsh lines. To blend like a pro, you need the right brushes, which brings us to step #6.

STEP #6: Invest in the Right Brushes

There are so many eyeshadow brushes out there in every shape and size, it can get confusing. Here are the three most important ones you should own:

Basic eyeshadow brush:The bristles are flat and stiff, and you use this for all-over color.

Blending brush:The bristles are soft and fluffier for seamless blending.

Angled eyeshadow brush:This is a precision brush that is perfect for lining your eyes.

STEP #7: Take Care of Your Tools

Cleaning your eyeshadow brushes is probably at the bottom of your to-do list, but it’s really important. We’re talking about your eyes here, so cleanliness is key. Run your brush under lukewarm water and then pour a nickel-sized amount of baby shampoo into your hand. Swirl the brush in the shampoo, rinse well and pat dry with a clean cloth.

STEP #8: Choose Your Formula Wisely

Pressed eyeshadows are your basic, most common formula. They’re a great, mess-free option. Cream shadows are perfect if you want a dewy sheen, but they can crease easily — especially if you have oily lids. Loose shadows usually come in a small pot, and while you’ll feel like a professional makeup artist using them, they are definitely the messiest of the three.

STEP # 9: Let a Bold Eye Shine 

A smoky eyeshadow looks gorgeous on its own, but once you add a dramatic lip into the mix, the two can overwhelm each other. Don’t be afraid to go bold, but just make sure your overall look has balance.

STEP 10: Keep it All in Place With a Setting Spray 

Get the most mileage out of your makeup by using a setting spray as your final step. Hold the bottle at arm’s length from your face and spritz away. We love the Urban Decay All Nighter Ultra Matte Setting Spray.

Read More:

POND’S: Cleansing Dry Skin

I’ve been using POND’S for about 4 years now. Pond’s has great products for people that have dry skin. Anytime I have used their products, I always end up with a soft, glowing healthy skin. POND’S has been a trusted brand in the beauty realm for over 50 years, so it’s easy to see how they’ve nailed down great quality products that are available at drugstores nationwide.

Since POND’S seems to mesh well with my skin, I was excited to give the POND’S Cold Cream Cleanser and POND’S Evening Soothe Wet Cleansing Towelettes a try. The aroma of the Evening Soothe towelettes alone is reason enough to use them. It felt like such a luxurious experience to remove my makeup and cleanse my skin. A little tip I have for removing extra stubborn eye makeup is to run one end of the cloth under the faucet to create a little bit more of a “suds” and press that on your eyes to soften the makeup. I wear a lot of mascara, so I’ve found that pressing an extra-moistened towelette on my eyes before attempting to work the makeup off is much kinder on my lashes.

The POND’S Cold Cream Cleanser is perfect for these dry winter months. And it’s both gentle and effective.

The last thing I want to spend time on in the morning is covering up any blemishes, and these products have helped me maintain blemish-free skin while also keeping it nice and hydrated.

My skin is prone to dryness in the first place, but especially in the winter I find that dry patches and irritation is common. Here are a few tips on cleansing dry or sensitive skin in the winter months:

1. Don’t use piping hot water. I know it’s much more relaxing to use hot water when you are washing your face, but the hot water can end up being a little bit too harsh and cause extra dryness in the end. Luke warm is best!

2. Don’t rub your skin with a washcloth afterwards. Pat it dry instead or let your face air dry! This motion will be a little bit more gentle on fragile parts of the face.

3. Hydrate, hydrate, hydrate! Drink plenty of water AND use a good moisturizer. Both will contribute greatly to well-hydrated skin throughout dryer months.

RELATED POSTS:

GET RID OF DARK CIRCLES

Why does the skin around the eyes always exhibit the first signs of aging? Well, this skin is incredibly thin – actually the thinnest in the body. Along with that fact, we are constantly squinting and smiling to form repetitive wrinkles. On top of that, the lack of oil glands around the eyes make this skin especially susceptible to damage from our lifestyle choices. Oil glands keep our skin moist and hydrated and stem cells from the follicles help the skin to repair.

8 EYE MASK RECIPES TO SOOTHE + REPAIR

Since the eye skin is deficient in this ability, it needs some extra TLC. So, let’s talk about how we can step up our eye game to avoid those pesky lines and crow’s feet. A few simple changes will benefit anyone who wants healthy skin around your eyes includes:

  • hydrate with water – increase your daily water intake. Water will keep your skin properly hydrated and allow your lymphatics under your eyes to drain impurities.
  • treat allergies – if you have inflammation around the eyes due to seasonal allergies, get to the root of the allergy. If you are itchy, it is especially important not to rub your eyes as this will lead to dark circles. Instead, apply a cool compress or cool chamomile tea bags to the area.
  • exercise regularly – increased blood flow delivers nutrients and removes waste build up and supports renewal.
  • get plenty of sleep – this is when it all happens. Your body needs a break to regenerate and repair.
  • eat whole foods – Processed foods with chemicals make you inflamed, bloated, and it shows with puffy eyes.
  • protect – wear sunglasses and an under-eye sunscreen. UV radiation is #1 cause of collagen breakdown and thin eye skin is especially susceptible.
  • use a nightly eye cream – nourish your skin from the inside AND from the outside.

All of the above tips are wonderful for overall under-eye health, but there’s even more we can do to treat this delicate area of the face! Weekly eye masks can help target different under-eye needs, from locking in moisture to de-puffing.

PUFFY EYE MASKS:

Ever wonder why sliced cucumbers are common additions in photos, television and movie scenes featuring face and eye masks? Rich in ascorbic acid and phytochemicals, cucumbers help tighten and soothe skin.

But instead of placing cucumber slices over your closed eyelids, this blended mask will reach the inner and outer corners of the eyes with concentrated vitamins and minerals.

Ingredients:

Cut your cotton rounds into two half moon shapes. This mask should make quite a few pairs, so cut more than you think you’ll need.

In a blender, puree the cucumber and rose water until liquified. Transfer to a bowl, then soak the cotton rounds in the mixture, squeezing out excess and then re-soaking for optimal absorption. Store the extra soaked cotton rounds in a Ziploc bag in the freezer for future use.

Thaw the eye pads for about 10 minutes before you use them, but make sure they are still cool as the temperature will also help with reducing puffiness. To apply, place the half moon eye pad underneath the eye, making sure to apply close to the bottom lash line. Leave on for 10-15 minutes.

For a morning wake-me-up, in addition to coffee in your mug, try it under your eyes as well! For an easy mask, combine coffee grounds with the vitamins and proteins of egg white, which tighten and firm skin. Puffy eyes and pesky crow’s feet, be gone! 

  • 1 egg white
  • 2 teaspoons unused coffee grounds

Beat mixture together with a fork until frothy, about 1 minute. With clean hands or a brush, apply the mask around and under the eyes. Let sit for  10 minutes. Use a soft, wet towel to gently clean off the mask. Follow with a caffeine-infused eye cream.

You can make chamomile tea anywhere, even in a hotel, as kettles are usually available in every room. Simply apply the tea bags to your tired eyes and enjoy a soothing warm mug before bed. 

  • 2 chamomile tea bags
  • mug
  • hot water
  • wash cloth

Steep two tea bags for 3 minutes in hot water, remove and set aside to cool to room temperature and then place over your eyes for 15 minutes. You can layer a cool washcloth over your eyes to keep the tea bags wet. Remove and follow with your moisturizer and eye oil.

WRINKLE & CROW’S FEET EYE MASKS

You’ll find egg whites in many anti-wrinkle masks for the face, and the eye area is no exception. Egg whites have been known to reduce the appearance of fine lines, while antioxidant rich vitamin E fights free radicals.

Vitamin E is extremely hydrating and often is used to treat eczema or psoriasis, thus a great ingredient for the dryer area around the eyes. Vitamin E can be extracted from vitamin E capsules or purchase a separate vitamin E oil for the following eye mask recipe. 

  • 2 egg whites separated from the yolk
  • 1 capsule or 5 drops of vitamin E

Beat the egg whites until they’re frothy and then mix in the vitamin E oil. Apply the mixture with your fingertips or a makeup brush to the under-eye area, careful not ignore the outer edges of the eyes where expression and squint lines form. Leave on for 10 minutes.

This wrinkle-fighting eye mask uses carrots, egg white and aloe vera, which makes it a power combo of retinol, vitamins, and protein. All the fancy ingredients you would find in an expensive eye cream, but completely natural, and definitely on the cheap side. You can apply this mask to the rest of your face as well, or you can use it as part of a multi-masking combination. 

  • 1 egg white
  • 1 tablespoon finely shredded regular carrot.
  • 1 teaspoon aloe vera

Combine egg white, carrot and aloe vera in a small bowl and whisk with a fork until frothy (about 1 minute). Let the mask dry for at least 15 minutes or up to 30 minutes. Use a soft, wet towel to gently clean off the mask. Finish with moisturizer.

This mega moisturizing eye mask is made with coconut oil and vitamin E, to visibly smooth fine wrinkles and cool tired eyes right away. A trick for the long term is to avoid exposing your eyes directly to the daytime sun, by wearing sunglasses and hats, and applying SPF cream. 

  • 2 tablespoons of coconut oil, melted if needed
  • 1 capsule vitamin E oil

Combine ingredients in a bowl. Cut cotton pads to fit the under-eye area. Soak cotton pads in solution and freeze for a few minutes until icy cold. Apply to eye area and place eye cotton pad on top. Let sit for 15 minutes and remove. Follow with eye cream.

DARK CIRCLE EYE MASKS

A cure for dark circles that only costs 99 cents? Sold! Vitamin C, chlorophyll and vitamin K in parsley help lighten skin discoloration, diminish age spots and reduce puffiness. So go ahead and add that bunch of parsley to your shopping cart, even if you’re not planning on making soup any time soon. 

  • Handful of fresh, organic parsley
  • 1 tablespoon yogurt

Roughly chop parsley then grind with a wooden spoon until the leaves release their juice. Add yogurt and stir. Apply with fingers or cotton balls and let mask sit for 10-15 minutes. Repeat twice a week to reduce discoloration. 

Turmeric masks are excellent for brightening complexions and evening out skin tone, and they even work on pesky dark circles. Combine with milk for a bit of gentle exfoliation.

  • 1 tablespoon turmeric
  • 1 tablespoon milk or buttermilk

Mix ingredients together in a small bowl and then use a brush to paint onto your under-eye area (avoiding the eyes). Leave on for 15 minutes and then carefully wipe off the mask.

Potato slices offer the same effect as cucumber—the cooling of the skin can reduce the vascular congestion to improve the appearance of this area, according to Dr. Ilyas. Her only concern surrounding the application of potatoes on the skin is that they may contain catecholase, which can actually darken the skin. “Catecholase is an enzyme that can promote melanin production,” she says.  

What home remedies to you use for your eyes? We’d love to hear your tips and tricks! 

RELATED POSTS: