DIY: How to Use Rice Water to HELP YOUR HAIR GROW NATURALLY

Thick, shiny, and strong hair—the qualities we aim for when caring for our mane. The secret to achieving luscious strands? Rice water. Recently learned this DIY trick during the month of January and can not believe it works! I have been applying this hair care tip to my own and will say I have seen a noticeable difference in growth and thickness. Many eastern countries have used the all-natural recipe for years, reaping its healing and nourishing perks. Below, I am breaking down the moisturizing and strengthening benefits of the minerals and vitamins in rice water and instructions on how to do the hair-enhancing treatment at home.

What you’ll need:
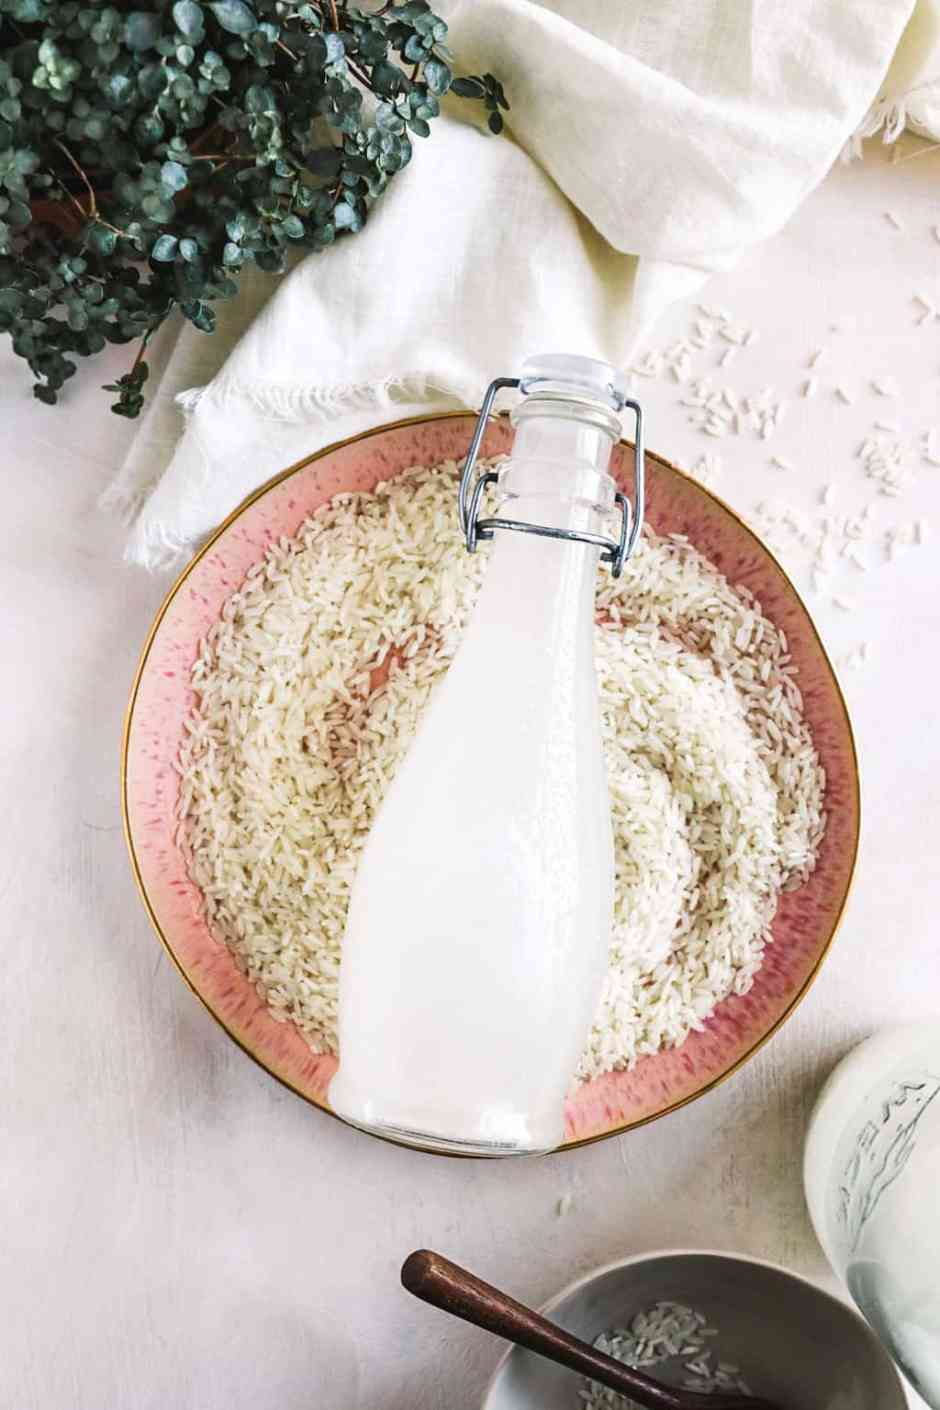
1 cup organic rice (any type as long as it’s organic)
Bowl
Water

Instructions:
1. Rinse the uncooked grains and then drain the water.
2. Place the clean rice in a bowl and add 1-1 1/2 cups of water. Let it soak for at least an hour (you can let it sit up to 24 hours).
3. Strain the rice and save the water.
4. Shampoo and rinse your hair.
5. Massage the rice water into your hair and scalp and let it sit for at least 20 minutes (and up to an hour).
6. Rinse.

RELATED READS

Recommend doing this 1-2 times a week.

Benefits:
Amino acids: strengthen and repair damaged hair
Selenium: promotes hair growth and reduces dandruff
Folic acid: helps strengthen and thicken hair (found in prenatal vitamins)
Magnesium: helps stimulate hair growth and healthy cell production
Niacin: contains vitamin B3, which strengthens hair and prevents dullness

Up next, go to beautyleebar Instagram to join our live at 4:30 PM (eastern time). I’ll show how you can still do it with braids and still receive the nourishments for your hair.

The content provided in this article is provided for information purposes only and is not a substitute for professional advice and consultation, including professional medical advice and consultation; it is provided with the understanding that BeautyLeeBar, LLC (“Hello Beauties”) is not engaged in the provision or rendering of medical advice or services. You understand and agree that BeautyLeeBar shall not be liable for any claim, loss, or damage arising out of the use of, or reliance upon any content or information in the article.

3 Setting Spray Hacks That Will Revolutionize Your Makeup Game

Cosmetic company Skindinavia released a consumer-facing setting spray to the market, credited as being the first to do so. Ever since then, setting spray has become one of the greatest beauty inventions of all time and an integral step in every beauty guru makeup routine. Although not everyone feels this way, trust me, it’s the secret to long-lasting makeup with zero touch-ups! You just need to know how to use setting spray to its full potential, and you’ll be converted. Here are three setting spray hacks I swear by for flawless, long-lasting makeup.

Setting Spray Hack #1: For Creaseless Eyeshadow

It can be hella-frustrating when you spend what feels like forever, blending and buffing your eyeshadow for it to crease a few hours later. This setting spray hack will ensure your eyeshadow lasts all day long. Dip your eyeshadow brush into your eyeshadow of choice, then mist the brush a few times with setting spray, then apply as usual. This helps not only make the pigment pop, but it keeps it in place all day long. This also works amazingly for shimmers, as it helps to intensify them. Try spritzing the brush first, then dipping into a shimmer before applying for ultimate shine.

Note: If you’re working with glitter eyeshadow, it is advisable to use a setting spray before picking the pigment from the shadow as well as after.

Setting Spray Hack #2: For A Long-Lasting Glow

Discovered this hack when I was experimenting with Huda Beauty setting spray, Resting Boss Face. Now, I can’t imagine doing mine or anyone’s makeup without it, as it not only locks the makeup in place, but it gives skin a stunning luminosity. All you need is setting spray, a beauty blender, and a cream highlighter. A great drugstore product is the L’Oreal True Match Lumi Glow Amour Glow-Boosting Drops, $15; the shimmer is SO pretty, and the liquid formula will work perfectly for this hack.

Start by spraying a damp makeup sponge with setting spray, then dip it in your fave cream highlighter. Next dab it along your cheekbones, the bridge of your nose, and the Cupid’s bow, then bounce the remaining product over the rest of your face to set and add a soft glow. You’ll be left with a radiant skin that stays all day. Get ready for the compliments!

Setting Spray Hack #3: For Groomed Brows

Laminated brows are one of the biggest beauty trends right now, and the easiest way to get the look is using a spoolie and a little setting spray. Just douse a spoolie in setting spray, Huda Beauty Resting Boss Face Setting Spray, is bomb for this hack, then comb the spoolie through your brows in an upward direction. It will instantly add shape and definition, and it keeps your brows locked in! Use this on bare brows, or use it once you’ve applied your brow powder or pomade, and it’ll majorly enhance the look. This hack will give your brows that beautiful, editorial feathered finish without any effort.

For more hacks, check out 10 EYESHADOW TIPS EVERYONE SHOULD KNOW.

Posts You’ll Love:

Hello Beauties NewsLetter:

Processing…
Success! You're on the list.

Join The Fam:

Beauty Debate: Should I Use Setting Powder or Setting Spray?

It seems like there’s a setting product for everything — whether it’s to quickly dry our nail polish, perfect our eyebrows or lock-in our makeup. And while the product options for setting our look are very straightforward when it comes to nails and brows, when we’re talking about the rest of our makeup, it’s just not as easy. How do we choose between different setting powders and setting sprays, and is there even a difference between the two? Tap in to find out.

The Case for Setting Powder

According to the web, setting powders are designed to absorb excess oil and moisture from your face. “Because skin is a porous surface and produces oil, you want to set your face makeup with powder to help it last longer without melting away.

Because of this, setting powder is applied during your makeup routine to set foundation, concealer and any liquid or creamy products you’ve applied. Setting powder often leaves the skin with an ‘airbrushed’ finish and can help to blend as well because it diffuses what’s under it. This is not to be confused with finishing powder, which is used after setting powder and adds even more of a blurred look to imperfections of the skin (lines under the eyes, pores, etc.) and control shine. Thus, setting powders are a great option if you have issues with creasing, cracking or excess oil throughout the day. 

The Case for Setting Spray

As far as setting sprays go, they’re designed to be applied after your whole makeup routine is complete. Setting spray is a fine mist which is applied after finishing the makeup routine. The setting spray can have different finishes such as matte or dewy, and it elongates the amount of time the makeup will last. It can also be used to amplify highlight or to apply a shadow damp — simply dust some product onto the brush and spritz the brush after.

Setting spray leaves behind a lightweight, skin-like finish but can not be absorbed into your pores like a powder can. Even mattifying sprays don’t mattify your face the way a setting powder can, in which making it a better option for those who have drier skin and need a boost of hydration.

urban decay all nighter ultra matte, dermablend loose setting powder

So, Which One Should You Use?

While powders tend to work better for oily skin and setting sprays for dry skin, if you really want to set your makeup and extend the life of your makeup, I recommend using both a loose powder and a setting spray. 
Pack on a setting powder like the Dermablend Loose Setting Powder to smooth your skin and finish it with a setting spray of your choice, like the Urban Decay All Nighter Ultra Matte.

How to Fix Cakey Makeup Like a Pro

Your makeup can start out looking as flawless as can be, and suddenly, some time around lunch, your makeup starts settling into lines you didn’t know you had and appears thick and cakey. Sound familiar? It’s happened to the best of us. Thankfully achieving that coveted second skin look and making it last isn’t an impossible feat. Here, I will be walking everyone through my tips for avoiding and fixing cakey makeup. 

Step #1: Prep Your Skin and Products

Cakey makeup is most often caused by one or both of the following: not prepping the skin properly and using dirty brushes or sponges. This is why the prep you do before applying your makeup is so important. Start by cleansing your skin. Every few days, follow with an exfoliator to remove any dead skin cells or surface debris, and then finish with a moisturizer and lightweight sunscreen. A solid skincare routine will give you a fresh, smooth canvas to work with. 

Also recommend cleansing your makeup brushes or sponges at least once every two weeks. Clean brushes and sponges apply makeup much better.

Step #2: Apply 

A third common cause of cakey makeup? Applying too much product. Try applying foundation and lip products in thin layers so that it all sets properly without looking cakey. Another tip for a flawless application is to use liquid foundation and concealer that contain hydrating ingredients like hyaluronic acid. If using a cream formula, I’ll let it melt down a bit to a more liquid consistency before applying.

Step #3: Refresh

If you follow the steps above and your makeup still turns cakey mid-day, a quick refresh is all you need. My suggestion is spraying a beauty sponge with a hydrating face mist or setting spray (try the Urban Decay Quick Fix Hydra-Charged Complexion Prep Priming Spray) and gently dabbing it over any cakey areas. This will absorb any excess product and re-blend your makeup. If the cakey-ness is primarily in the under-eye area, try removing the makeup in that area, re-hydrating, then reapplying under-eye concealer.

POSTS YOU’LL LOVE: