Creamy DIY Lip + Cheek Stain

If you’ve read this blog for a long, then you know we make a lot of stuff. I mean, you should see my bathroom. It’s a nightmare of bottles and jars of concoctions to test out. Some make the cut, and some sit for so long I completely forget what’s in them (apparently that’s what labels are for).

Advertisements

But this DIY, this recipe is one I am so excited about. Because I love, love, love it. It’s easy to make (3 ingredients!) and makes the prettiest color for your cheeks and lips. It’s lightweight and perfect for summer.

I’m all about β€˜no makeup’ in the summer. Multi-use makeup that I can apply with my finger is even better. Just swipe on your lips and cheeks for a healthy pink glow. It goes on easily and feels somewhere between a balm and a gloss on the lips. To apply, use your fingertip to dot a small amount onto your cheeks or lips and blend into skin.

Advertisements

Even if the stain starts a little strong, it’s easy enough to blend out to a sun-kissed flush that looks completely natural. I’m already obsessed! I like to bring it across my nose, tooβ€”a couple of tiny dabs make for the perfect, I just came from the beach look. 

And that’s not even the best partβ€”this stain is good enough to eat. Using beetroot powder for coloring is the perfect natural option for getting that flawless glow without resorting to using conventional products, some of which are irritating and not cruelty-free.

Most blushes rely on carmine for red pigment, which comes from crushed-up bugs. Ew! Plus, the combination of super-nourishing shea butter and castor oil makes for the perfect base.

DIY Lip + Cheek Stain Ingredients

Ingredients for Creamy DIY Lip Stain

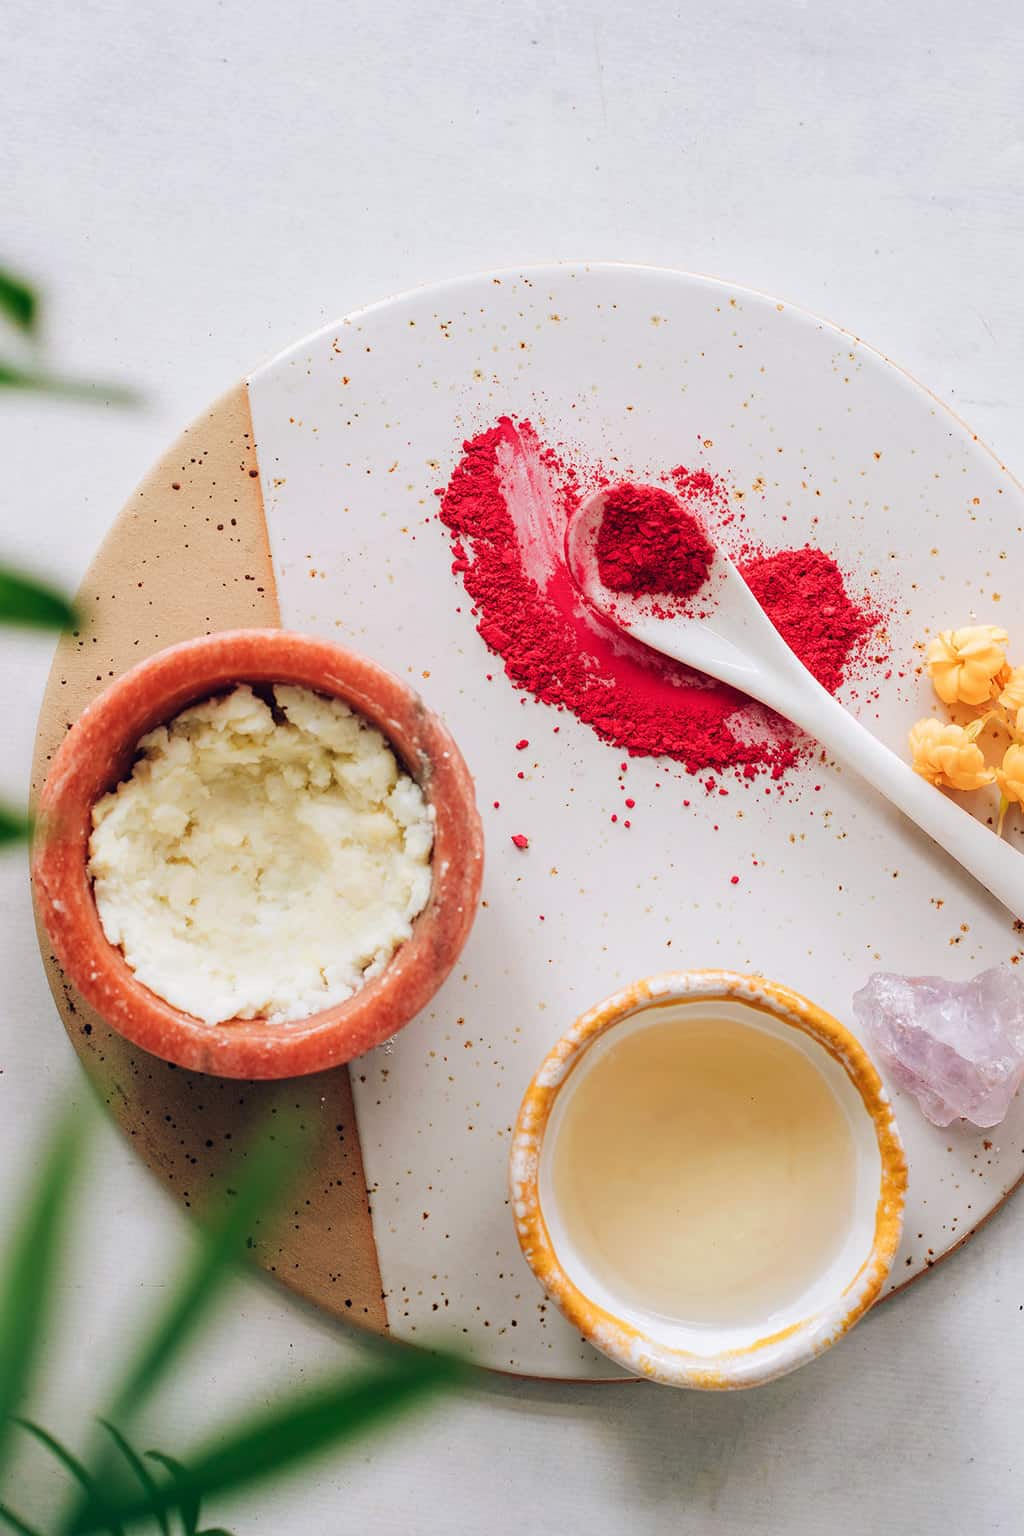
Here’s a rundown of the 3 ingredients:

Castor oil

Castor oil is very hydrating (it works great on eyelashes) and has a nice, thick texture that makes this recipe feel smooth and glossy. It is known for preserving moisture, and its fatty acids leave the skin feeling nourished.

Shea butter

Shea butter is such a silky, creamy ingredient. It provides healing moisture and also gives the blush its staying power on the cheeks.

Beet powder

I had no idea you could get beet powder in pill form. The powder is a super bright hot pink, but don’t let that scare you! If you want to tone down the pink, you could add a tiny, tiny bit of turmeric or cocoa powder.

How to make a DIY lip gloss with beet root powder

I’ve been more than a little afraid of venturing into make-your-own makeup territory, but this DIY might just have changed my mind! To keep this stain fresh for as long as possible, keep it in a cool, dark drawer or even better, the fridge. If you have a skincare mini-fridge, that would be perfect.

Because our ingredients are good enough to eat and we’re not relying on preservatives, it’s important to store our DIY products properly. If it begins to separate or smell a little funny, then you know it’s time to let go of this batch and whip up a new one, tout de suite!

Creamy DIY Lip + Cheek Stain

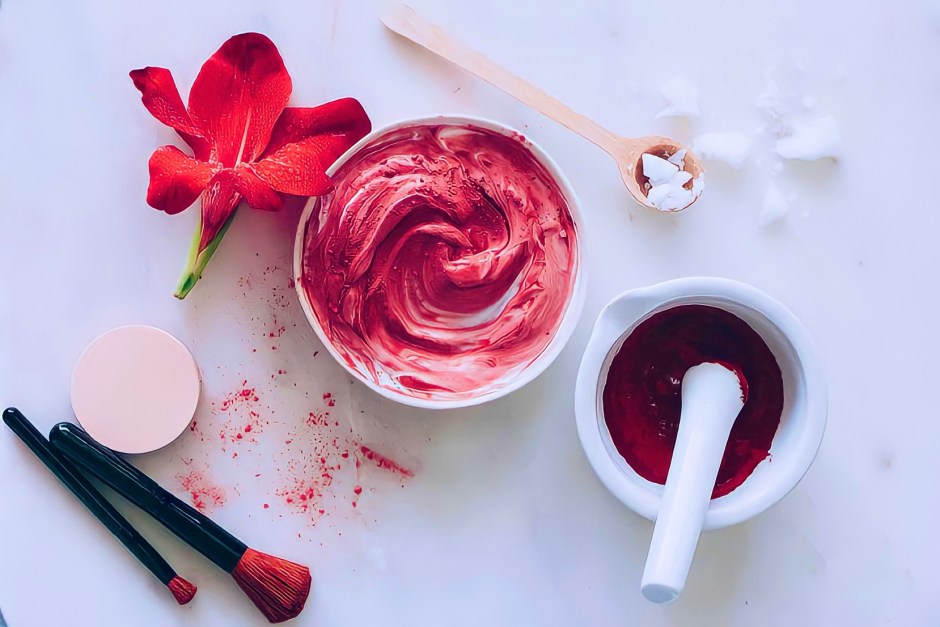
Beet Lip + Cheek Stain

With just 3 ingredients, this lip + cheek stain makes the prettiest color for your cheeks and lips. It’s lightweight and perfect for summer.

Prep Time: 10mins Total Time: 10mins

Course: Natural Beauty Cuisine: DIY Keyword: lip balm

Yield: 2ounces Author: Crystal Lee Cost: $5

Equipment

  • Measuring cup
  • saucepan

Materials

Instructions

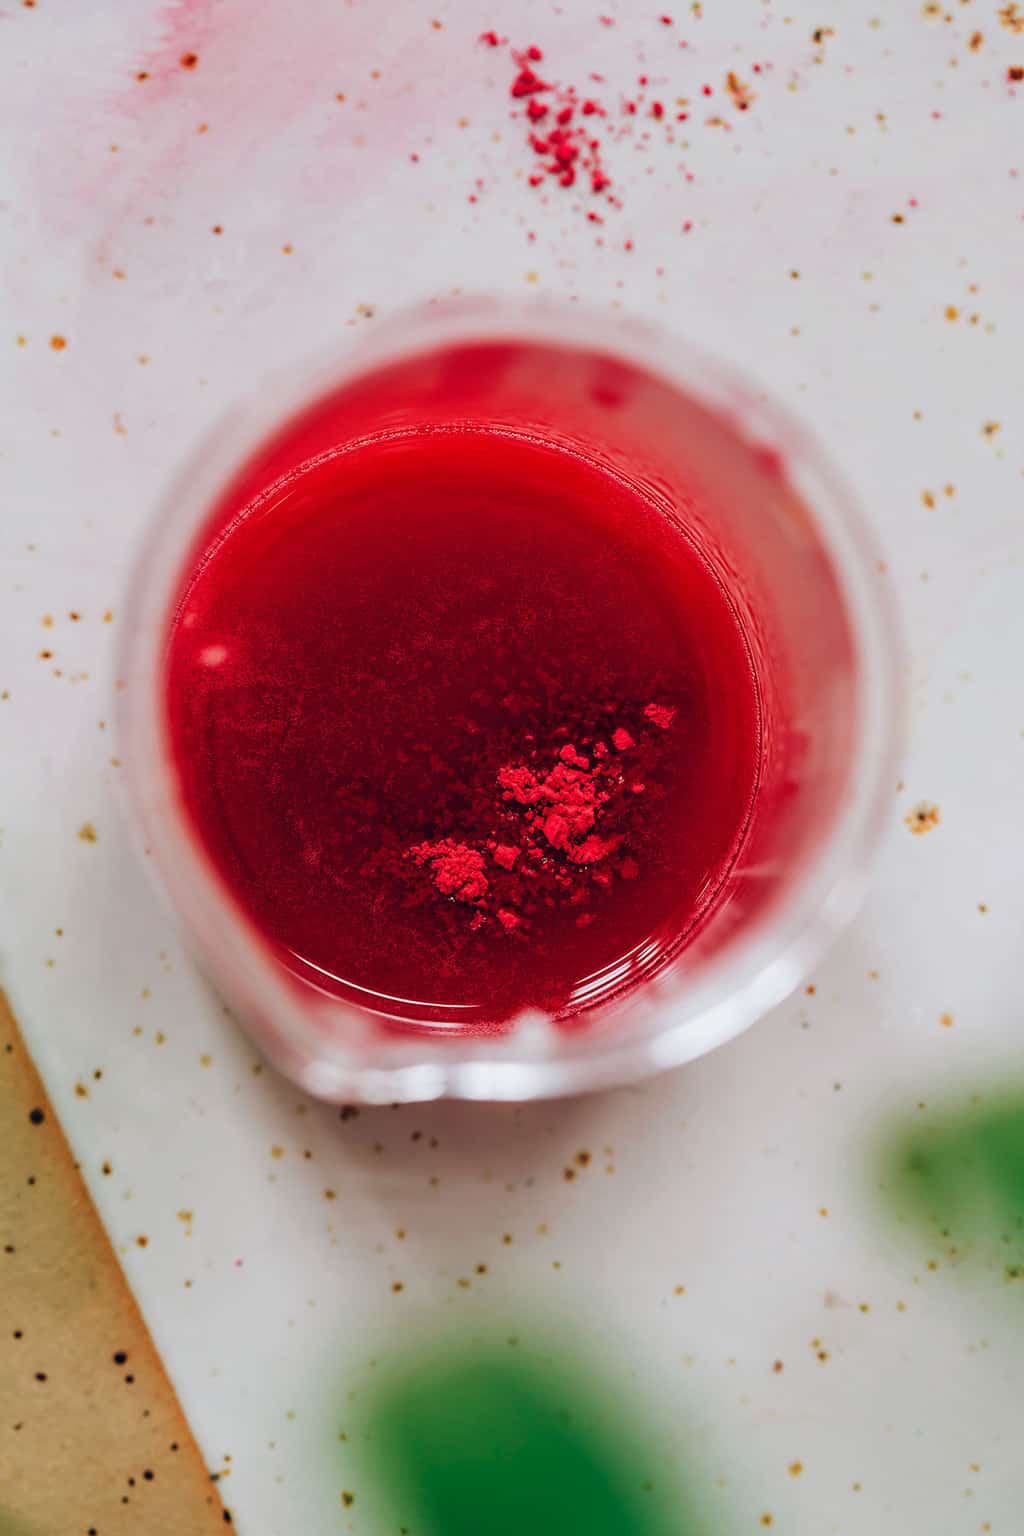
  1. Measure ingredients into a small glass measuring cup, then set in simmering water until shea butter melts.
  2. Stir in the beet powder and pour into a small jar and allow the mixture to cool.

Notes

Store in a dark area away from heat. Stored properly, the blush should last up to 6 months.

Rare Beauty Stay Vulnerable Collection Review

Last year around 2020 BeautyLeeBar reviewed the original Rare Beauty collection, and today I am sharing my thoughts on the Rare Beauty Stay Vulnerable Collection!

I’ll be reviewing the Rare Beauty Stay Vulnerable Melting Cream Blush, the product I am most excited about, and the Stay Vulnerable Glossy Lip Balm.

If you haven’t heard of Rare Beauty before, it was launched in September 2020 by Selena Gomez. It is her first beauty line and proceeds go towards mental health initiatives. Built on an ethos of self-love and confidence, Rare Beauty effortlessly exudes Selena’s down-to-earth, unpretentious relatability. The company also aims to de-stigmatize mental illness, a cause close to Gomez’s heart. A portion of proceeds from each sale goes to the Rare Impact Fund, which supports organizations dedicated to promoting mental health, particularly in marginalized communities. The brand’s philanthropic strategy is informed with the help of the Rare Beauty Mental Health Council, comprised of psychiatrists and activists.

I love the Rare Beauty debut collection, especially the Soft Pinch Liquid Blush which I reviewed here.

What intrigued me the most about the Stay Vulnerable collection was the new blush formula. Rare Beauty is known for its natural, easy-to-apply products, so I couldn’t wait to see how the blushes compare to each other. 

Keep reading for my review of the Stay Vulnerable Melting Cream Blush and the Stay Vulnerable Glossy Lip Balm!

Advertisements

The Rare Beauty Stay Vulnerable collection includes:

Stay Vulnerable Melting Cream Blush in five shades $21

Stay Vulnerable Liquid Eyeshadow in five shades $20

Stay Vulnerable Glossy Lip Balm in five shades $18

Rare Beauty Stay Vulnerable Melting Cream Blush Review

Rare Beauty Stay Vulnerable Collection Review

Blush is one of the best ways to bring light and color into the face, and the Rare Beauty blushes do that in the best way possible. Some blushes are hard to apply or they make you look like a clown, but that is not the case with these products. 

The Rare Beauty Stay Vulnerable Melting Blush is a cream blush, an in-between of liquid and powder. Cream blushes are amazing because they give you more control than liquid blushes do yet they are more pigmented than powder blushes.

I bought the shade Nearly Berry – deep berry, which is a beautiful color that compliments the deeper skin tone. This liquid-like cream blush melts into a second skin for the most natural-looking wash of soft-focus color. It’s long-lasting which I love, and you can layer it for more pigmentation. 

The best way to apply it is by using your fingers to dab onto your cheeks then blending with a brush. You can also apply it directly with a brush. Either way works which I like because sometimes it’s just easier to use your fingers. Each blush also looks great on the lips and can be worn under the collection’s gloss.

I find the Stay Vulnerable Melting Blush easier to apply compared to the original Rare Beauty Soft Pinch Liquid Blush. If you apply too much of the liquid blush you risk looking like a clown. The melting blush is something you need to build up for lots of pigment so it’s way more beginner-friendly. 

I tend to grab the Stay Vulnerable Melting Cream Blush more than the Soft Pinch Liquid Blush for its convenience. Overall, I would highly recommend this blush if you’re looking for something soft and neutral! Rare Beauty by Selena Gomez Stay Vulnerable Melting Cream Blush is the first-of-its-kind water-resistant blush that combines pigments with a non-greasy blend of weightless oils and spherical powders for a natural flush you can’t mess up. The ultralightweight, liquid-like cream melts on contact and blends to a smooth, satin finish that won’t cake, crease, or clog pores.

Advertisements

Stay Vulnerable Glossy Lip Balm

Rare Beauty Stay Vulnerable Collection Review

I also picked up the Stay Vulnerable Glossy Balm because a girl can never have too many lip products! I was intrigued by it as it’s a lip gloss, but also a lip balm which is a fantastic idea, but not common. 

I got the shade Nearly Berry – soft berry which is a beautiful soft reddish. It applies smoothly and isn’t sticky like most glosses. The gloss itself is neutral and light coverage. It adds just enough color to the lips where you can wear it on top of another product or alone! This has been my go-to lip product so far this summer.

If you’re looking for a gloss that is powerful and pigmented, this probably isn’t for you. But, it is great if you’re looking for an everyday lip gloss. 

The best part about the Stay Vulnerable Glossy Lip Balm is how soft it makes your lips feel. It noticeably nourishes and hydrates your lips. Like a lip mask in a gloss, this ultra-cushiony, comfortable formula hugs lips with nourishing hydration while visibly plumping them with buildable color and shine. Made with a botanical blend of lotus, gardenia, and white waterlily, it also helps soothe, calm, and nourish lips.

I would highly recommend Stay Vulnerable beauty products to anyone who’s looking for a new go-to! 

Question: Have you tried any Rare Beauty products? What are your favorites?

Advertisements

Selfie Makeup Tutorials That Will Forever Change Your Instagram Game

Β Taking the perfect selfieΒ requires a lot of attention and practice β€” you have to find that perfect light (helloΒ golden hour) and know what angles work best for you. Whether you’re more of an #IWokeUpLikeThis kind of selfie-taker or want a little more glam, we rounded up four tutorials that’ll help you achieve the perfect photo, and most importantly, will make youΒ feel confident.

For the Natural Selfie

Mia Randria breaks down exactly how she creates her perfect selfie makeup in this tutorial β€” and it’s all about looking natural while enhancing your best features. One of Randria’s tricks is to use a gel liner on the outer corners of the eye only and extend it to make a small wing. This helps open up the eyes. We recommend using theΒ Maybelline New York Eye Studio Lasting Drama Gel EyelinerΒ to make thin, precise lines.

For the Glowy Selfie

In this gorgeous glowy selfie tutorial, Amrezy focuses on light golden lids and juicy lips. The major takeaway here is to use a glittery eyeshadow β€” especially in the inner corner of your eyes β€” because light will softly bounce off the shadow, illuminating the face. Try using the Amrezy Eyeshadow Palette on your lids to achieve the look.

For the Awake, Monochromatic Selfie

VloggerΒ @iamShellyΒ keeps it clean, simple, and gorgeous in this tutorial. In addition to matching her crease color to her lip color, we also love how she makes her eyes look more awake by applying a light tan eyeliner β€” like theΒ NYX Professional Makeup Faux Whites Eye BrightenerΒ in Vanilla β€” on her waterline. This touch will make your eyes appear whiter and brighter when you snap that selfie.

For the Ultimate Instagram Tutorial

If you’re makeup-obsessed and want a full beat for your selfie, Alice Lockhart creates a gorgeous take on an Instagram baddie look in this tutorial. Not only does she create impressively sharp winged eyeliner, but she also finishes it off with fluffy lashes and completes the look with an overlined gloss lip. Recreate the lip with the Marc Jacobs Enamored Lip hi-shine gloss lip lacquer.

Advertisements

Beauty Q and A: Does This TikTok Blush Trend Really Work?

There are a lot of useful TikTok beauty trends out there β€” from powder foundation tricks to self-tanning tips. Some, however, raise our collective (and well-groomed) eyebrows, like a certain blush hack that involves applying blush all over the face and layering foundation on top for a dewy, radiant, and flushed finish. To get to the bottom of whether this blush trick works, we tapped makeup artist Kasey Spickard for his thoughts.

RELATED: Follow us on TikTok β™‘ Click Here

So, Does This Tiktok Blush Trend Work?

β€œHere’s the thing, it does work,” says Spickard β€œShould you do it? No.” Although it’s an eye-catching and entertaining video, he doesn’t recommend incorporating it into your everyday makeup routine. β€œThis trend is using the concept of adding deep contours and bright highlights under the makeup for definition, however, you’re going to end up going through a lot more productive than if you did a standard base and buffed in cream blush later,” he explains.

Spickard also notes that some formulas are simply not meant to be applied all over the face. β€œI see folks packing liquid lipsticks all over their face and layering foundation on top, which is a total recipe for a breakout,” he says. β€œThese products are not designed to be used that way, and can risk causing skin irritation and breakouts.” 

RELATED: Follow us on TikTok β™‘ Click Here

Advertisements

The Right Way to Apply Cream Blush for a Flushed Finish

Spickard much prefers to keep it simple when applying cream blush β€” and guess what? The same, flushed, and radiant finish is possible his way, too. β€œMy favorite method is to start by warming up the cream blush on the back of my hand and using my middle and ring fingers to buff it out onto the cheeks, cheekbones, temples, and nose bridge,” he says. We love the NYX Professional Makeup Bare With Me Luminous Cheek Serum for this. Complete the look by setting the cream formula with a powder blush using a fluffy brush (his favorite is the IT Cosmetics Heavenly Luxe Flat Top Buffing Foundation Brush).

nyx professional makeup luminous blush serum, it cosmetics brush

RELATED: Follow us on TikTok β™‘ Click Here

Advertisements