10 Ways to Use a Fan Makeup Brush

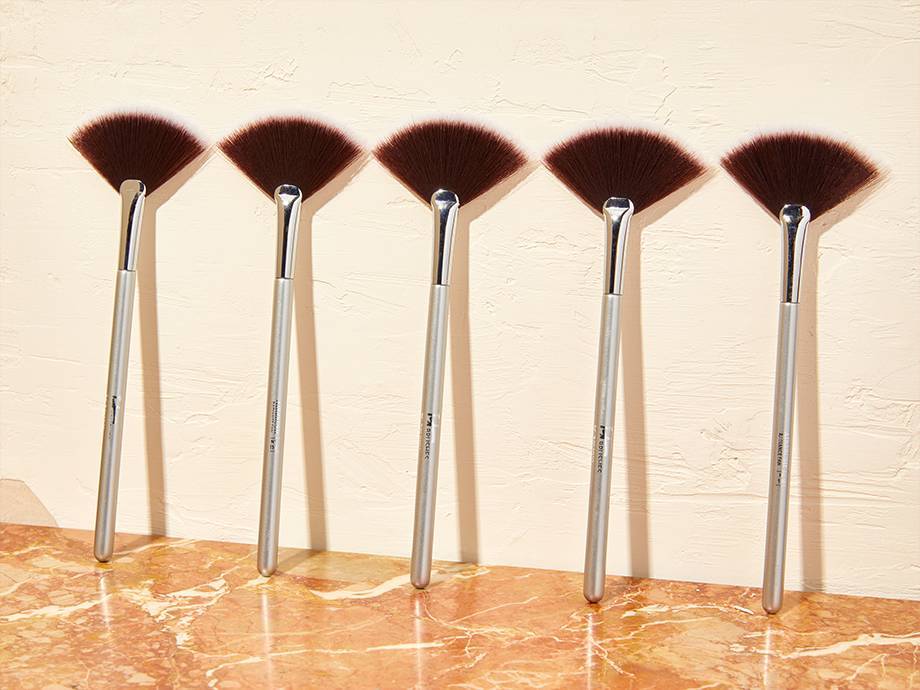
Of all the makeup brushes out there, a fan brush often seems to be the most confusing. While we normally see it being used to highlight the high points of the cheekbones, a fan brush is actually a very versatile beauty tool that can be used several different ways. Not sure how? Ahead, we rounded up ten ways to use a fan brush that will make your routine a lot easier. Thank us later. 

1. Brush Away Eyeshadow Fallout

You’ve applied the perfect bronzy eye, only to end up with eyeshadow all over your under-eye area. Don’t smudge it with your fingers; instead use a fluffy fan brush to swipe away any fallout without making a mess.

2. Apply Facial Masks

Use a small-to-medium-size fan brush to apply a facial mask with the utmost precision. Bonus,  you won’t waste as much product as you would if you were using your fingers.

3. Contour Facial Features

Because of its unique shape, a large fan brush is the perfect tool for contouring your cheekbones, nose, jawline and forehead.

4. Highlight to Perfection

This brush also makes for the perfect highlighting tool. For glowing skin, use it to lightly dust powdered highlighter along the tops of your cheekbones and the bridge of your nose.

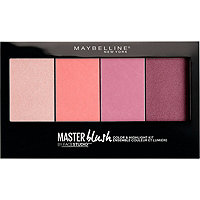
5. Dust on Blush for a Natural Look

We all get a little heavy handed with our blush application from time to time. To avoid overly bright pink cheeks, dust blush on with a fan brush — its soft bristles will diffuse the powder for a subtle hint of color.

6. Apply Tinted Moisturizer

If your skin is typically dry, applying tinted moisturizer with your fingers can zap the moisture right out of your skin! Use a fan brush to evenly distribute your lightweight coverage option without using too much of it.

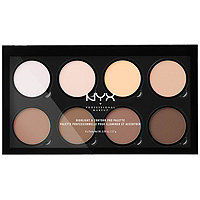
7. Distribute Powdered Foundation

Once you’ve applied your favorite foundation, use a fan brush with compact bristles to buff out the powder (don’t forget the neck area) for a perfectly blended complexion — the IT Cosmetics Airbrush Radiance Fan Brush #116 is our favorite for this.

8. Blend Bronzer, Blush and Highlighters

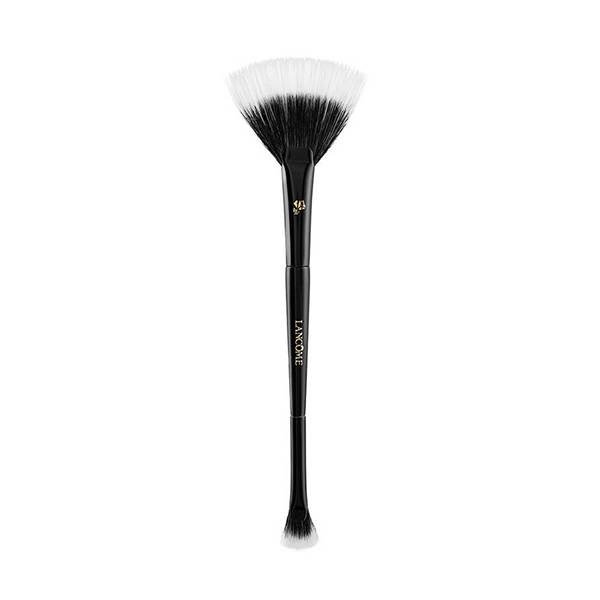
After laying down your foundation, blush, bronzer and highlighter, use a large, fluffy fan brush like the Lancôme Dual Ended Highlighter Fan Brush #31 to blend out any harsh lines — especially if you’ve over-applied — for an airbrushed finish!

9. Remove Shine in the T-Zone Area

Skin starting to look greasy? Touch up throughout the day by lightly dusting translucent powder onto your T-zone to banish shine.

10. Apply Mascara

You can even use a small fan brush to apply mascara to your top and bottom lashes for a natural, barely-there look and zero clumps.

Help! How Do I Remove Eyelash Glue From My Lashes?

Falsies are a girl’s best friend — bring on the volume and length. But if sticky eyelash glue gets stuck to your real lashes, it’s game over. The buildup and tackiness can make reapplication nearly impossible and cause unwanted irritation. To ensure that our false lashes can be used more than once and our real lashes stay healthy, it’s important to keep ’em clean. For some advice on the best way to do so, scroll down and enjoy!

Tip #1: Use Less Glue From the Start

To prevent a buildup of gunk and glue on your lashes at the end of the day, try to use as little glue as possible during application. My best tip is not to apply too much glue on the false lash to begin with. Think you may have gone too heavy with your glue? Recommended wiping it off and starting from scratch. Not only will this make it easier for you to take off your falsies at the end of the day, but it’s also a way to ensure that too much glue doesn’t get on or around your eyes.

PRIMP TIP: Apply Lash Couture Strip Lash Adhesive on the eyelids like an eyeliner then apply your favorite pair of lashes. Its easier and quicker to apply the lashes plus it is just less messier overall. Lee wished she came up with this brilliant beauty trick but she actually received it from Raye Boyce.

Tip #2: Don’t Pull Them Off 

Time to take off your lashes for the day? Don’t start pulling them off, tugging or scrubbing. You won’t get all the glue off your lashes, and you risk getting glue in your eyes. What’s worse? You’re going to end up ripping your own lashes. 

Tip #3: Use a Gentle Eye Makeup Cleanser

eyelash glue

Instead, to get your fake lashes and glue off cleanly, Lee recommends using a soft and gentle eye makeup remover. For years I’ve been using the Lancôme Bi Facil Double Action Eye Makeup Remover; it’s the best for getting rid of lash glue. Just pour some onto a cotton pad and dab it over your lashes until the strip falls off cleanly. Plus, you can also use the product to clean glue off your falsies so they’re good as new for reapplication. 

POSTS YOU’LL LOVE:

BETTER TOGETHER: LANCÔME TEINT IDOLE FOUNDATION AND OIL-IN-GEL CLEANSER

We all want our makeup to help us achieve flawless, imperfection-free skin. That’s why we’re constantly searching for the best foundations on the market and practicing the best application methods for our base products. But a common mistake is assuming an even, smooth complexion starts with makeup when it really starts with your skincare. It’s important to have not only a great foundation in your stash but also a top-rated cleanser — and Lancôme has a solution for both. 

lancome-teint-idole-foundation-and-oil-in-gel-cleanser-review

The Lancôme Teint Idole Ultra 24H Long Wear Foundation is one of the best long-wear foundations on the market. With 50 medium- to full-coverage shades available, it’s earned a spot in many beauty lovers’ makeup routines, including our editors. It offers long-lasting, velvety-smooth coverage for hours after application without the risk of transferring, melting or smudging. Thanks to its oil-free liquid formula, even those with oily skin can benefit from its skin-blurring effects. When it comes time to remove it after a long day of wear, look no further than the Lancôme Absolue Nurturing & Brightening Oil-in-Gel Cleanser with Grand Rose Extracts to get the job done. 

lancome-teint-idole-foundation-and-oil-in-gel-cleanser-review

The unique transforming oil, gel, and milky cleanser melts away makeup with ease. It contains a rich blend of oils that simultaneously lift away dirt and reveal refreshed skin. As you work it into your complexion, you can visibly see even waterproof makeup products wipe away. What’s left behind is silky, hydrated skin that feels soft to the touch — and ready for your next round of makeup application.

When you treat your skin on both ends of your beauty routine — during the skin-care phase and the makeup phase — you’ll be able to see a real difference in your complexion.

Read More:

Processing…
Success! You're on the list.

HOW TO COMBINE LIQUID AND POWDER HIGHLIGHTER MAKEUP FOR A BLINDING DREAM

In the makeup world, foundation and bronzer have always gotten most of the glory. They’re go-to staples that people turn to for coverage and color. However, today we want to talk about highlighter, which has been stealing the spotlight lately.

In our opinion, highlighters are just as important as the two aforementioned makeup products because they deliver luminosity and brightening qualities that can completely transform your complexion. To show our devotion to highlighters everywhere, we’re breaking down the basics of both liquid and powder illuminators so you never have to question their roles in your life again.

A Tale of Two Highlighters

First and foremost, let’s be clear that liquid and powder highlighters are not the same, and therefore serve different purposes. Liquid illuminators are typically more pigmented than powder formulas and should be used to accentuate or brighten specific spots on the face. You know the strobing craze that’s been hitting the beauty scene? Liquid illuminators are perfect for that!

Powder illuminators typically have softer application and deliver more of a sheer, shimmery finish. These types of products work well over foundation or blush to lend your skin that all-over dewy look.

Liquid Highlighter

When using a liquid highlighter, make sure you use a blending sponge or finger to work it into your skin. After applying foundation — before you reach for concealer — dot the liquid along the areas of the face that are naturally hit by the sun (the top of cheekbones, bridge of nose, brow bone, Cupid’s bow, etc.).

Make sure to not go overboard and apply thick streaks of the formula, as it will look too drastic. The key is for the liquid to blend into skin naturally and subtly.

If you’ve got a bad case of under-eye bags or dark circles, simply dot highlighter under the eye area and in the inner corners, blending downward toward the lower cheekbone. This will brighten your eyes and make you look more awake (even if you’re running on a couple hours of sleep).

Product Recommendations: NYX Born to Glow Liquid IlluminatorMaybelline Dream Lumi Touch Highlighting ConcelearYSL Touche Éclat

Powder Highlighter

When using a powder-based illuminator, use either a medium-sized fluffy powder brush or an angled powder brush for application. After applying foundation, dust highlighter on the cheeks, chin, nose and top of forehead. Because the application is less localized than that of liquid highlighter, the result is more of an all-over dewy glow, as opposed to a contoured one. You can also swipe a little along the top of the brows to accentuate their shape!

Product Recommendations: L’Oréal True Match Lumi Powder Glow IlluminatorMaybelline Mineral Power IlluminatorNYX Illuminator

Mixing Liquid and Powder Highlighter

This is a practice for the more maximalist makeup guru out there, but minimalist beauty lovers, hear us out. Start by applying a liquid illuminator or drops — our current favorite certainly has to be the Lancôme Teint Idole Custom Highlighting Drops in Rose Glow — to your cheekbones, down your nose and on your cupids bow. One to two drops is all you’ll need for this, and blend it out with your fingers or use a stippling brush. Next, lightly apply the center shades of Lancôme Bronze & Glow Palette in It’s Time To Glow overtop with a fan brush for the silkiest, sparkliest and softest touch. Your highlight will be officially blinding and beautiful, garnering double takes from far and wide (insert smirky emoji).

SHOP THIS STORY