SOS! My Makeup Is Pilling — How Can I Fix It?

Do you ever find that your foundation balls up on your skin after you apply your favorite sunscreen or face cream? Similar to when your knitwear has seen better days and small balls of fabric sit on the material, this is called pilling — and it’s the fastest way to ruin your skin-care and makeup in one fell swoop.

Pilling is one of the most frustrating things that can happen when applying your skincare and makeup, due to the fact it takes extra time to blend, correct, and can waste more of your expensive beauty products.

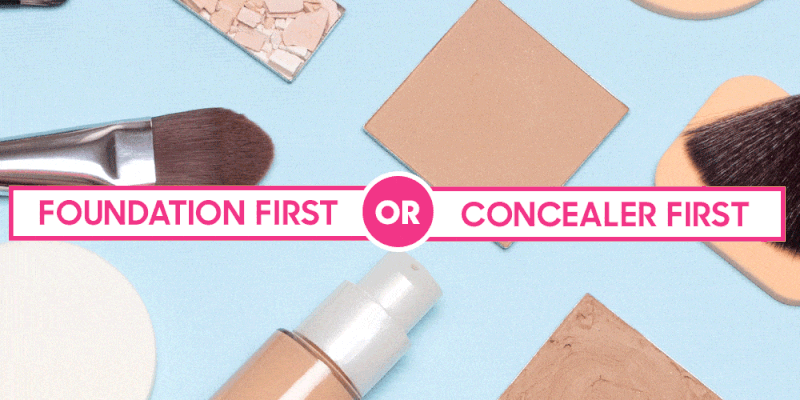
Makeup pilling is no fun, especially after you just applied a full face of makeup and your foundation starts sliding off in tiny pieces. Pilling occurs when two makeup or skin-care ingredients don’t mesh well together on your skin, and although there are ways to avoid this (more on that below), we wanted to know if there’s any way to salvage your full beat in this scenario. Ahead, we spoke with NYC-based makeup artist Mary Irwin to find out how.

Advertisements

What Causes Pilling

When your skincare or makeup pills, it looks like flakes or globs of product on your skin.

Advertisements

Pilling happens when products haven’t absorbed into the skin, whether due to:

🤍 the type of ingredient

🤍 the amount applied

🤍 the other products you’re using

🤍 the condition of your skin

🤍 The tools you are using to apply your skincare and makeup

With so many of us experimenting with multi-step skincare routines, the pilling struggle is all too real!

Here are some best tips if you’re dealing with this issue.

Can You Fix Makeup Pilling?

Irwin gets straight to the point: “Unfortunately, aside from taking a damp makeup sponge and trying to blend it in, there’s not much you can do besides take it off.” If your foundation begins to pill, wet a sponge (the L’OrĂ©al Paris Infallible Blend Artist Foundation Blender is our fave) and tap it over the areas where it pilled off. Once you’ve blended it out, set it with a loose powder like the Maybelline New York Lasting Fix Banana Setting Powder and don’t touch it. “Don’t add anything cream or liquid over it after the fact.”

Advertisements

WE know and understand that you don’t want to remove the makeup that you spent hours perfecting so for that to not happen, the first thing you want to make sure you’re doing is exfoliate on a regular basis.

To be clear, the little balls that form are composed of product, not dead skin. But it’s still important to maintain a good exfoliation routine, because it will help your products to absorb more effectively, rather than remaining on top of a surface layer of dead skin. 

Advertisements

How to Avoid Pilling

Irwin recommends paying attention to the ingredients you’re placing on your skin to avoid pilling all together. “Use products that have a similar formula — silicone with silicone, water with water, etc.” When applying cream makeup products (which have the most tendency to pill), she recommends starting with thin layers and building them up slowly. “Also avoid layering cream over powder, because this can result in pilling too.”

The more you touch your skin, the more you disturb the products and encourage them to pill. It goes without saying that rubbing your face is a a big no-no, as this will only cause surface residue to bunch and roll up. Use light, patting motions to apply your products, and resist the urge to touch your face any more than absolutely necessary.

Advertisements

Just give yourself plenty of time in between layers and after the final layer. That will ensure you’ve absorbed most of the beneficial ingredients.

Here are 3 more videos that can be helpful when it comes to pilling:

Have you experienced product pilling?
What has helped you to prevent it?

RELATED POSTS:

WHAT COMES FIRST — FOUNDATION OR CONCEALER? HERE’S WHAT YOU NEED TO KNOW

Having a flawless canvas is exactly what an artist needs to build his or her masterpiece — and the same applies to your face pre-makeup application. Knowing how to make the most of your foundation and concealer for smoother, brighter skin and a more even complexion is key in creating and maintaining a full-coverage, smooth look. Ahead, we broke down the best products to try, plus all the tools, products and insider tips you never knew you needed.

There are so many different formulations of foundation out there, so ultimately, the choice depends on the coverage level you’re looking for, your skin type, the amount of time you have to apply and the price you’re willing to pay. The most classic form of foundation, liquid, offers medium-to-full coverage for all skin types and is a sure-fire way to achieve a smooth base.

NYX Professional Makeup Total Control Drop Foundation allows you to customize the exact amount of coverage you want, making it even more versatile than the amazingly affordable formula already is. If you’re looking for lighter coverage, try a BB or CC cream, which offer skin a ton of benefits (think: antioxidants, hyaluronic acid, illuminators) in one tube.

The IT Cosmetics CC+ Matte Cream is beloved for many reasons. Not only is it your foundation, moisturizer, primer and sunscreen all in one, but it also offers a great amount of coverage and keeps you matte for hours.

And we haven’t even gotten into the other types of formulas that could technically live in the liquid family. Take the La Roche-Posay Toleriane Teint Mattifying Mousse Foundation, for example. It’s a practical choice for oily skin types because it deflects any sebum or oil from building up throughout the day with a lighter-than-air feel.

If you’re looking to really build and customize the amount of color, try a cream foundation, like the Giorgio Armani Crema Nuda Supreme Glow. It’s loved by makeup artists for its non-comedogenic water base as well as light-blurring particles that give your complexion an Insta-filter effect.

Oily, acne-prone skin will benefit from a cream consistency foundation like the Dermablend Cover Creme Foundation, which gives you full coverage like a liquid foundation but with the consistency of a concealer — in fact, you could use this for your foundation as well as your blemish and spot concealer.


If you’re feeling like your skin is dull and dry, opt for the NYX Professional Makeup Born To Glow! Radiant Foundation. This formula is made with luminous pigments that help to brighten and maintain major glow all over the face for hours.

Different Types of Concealers, Explained

Before you even look into concealer formulas, it’s important to know that there are two kinds of concealers, because like your body, your skin isn’t a one-size-fits-all kinda deal. You should use a concealer two shades lighter than your foundation for your under-eye area (and formulated to ward off puffiness, darkness and bags), and a separate formula for spots, zits and redness.

We love Maybelline New York Instant Rewind Eraser Dark Circles Treatment Concealer, which has a cushion applicator and skin-tightening goji berry extract. Cream concealers work well under eyes as they’re blendable and can provide sheer or full coverage, depending on your needs.

For blemishes, dark marks and other corrections, a pencil can be incredibly easy to use — easier than a stick, even — as it requires no brush, and the waxy formulation stays put without the help of foundation, powder or setting spray. Cue the NYX Professional Makeup Wonder Pencil for your next beat.

Perhaps the most important type of concealer is the corrective type, and it is most effective in a liquid formula, like the La-Roche Posay Toleriane Teint Corrective Pen, which has corrective colors to help tone down ruddiness, fade the appearance of hyperpigmentation, and yes, even cover up any irritating blemishes.

If you need extra luminosity and dark-circle coverage, we also recommend the NYX Professional Makeup Born To Glow Concealer or the Maybelline New York Superstay Under-Eye Concealer for a long-lasting finish.

What Order Do You Apply Foundation and Concealer?

Start by laying your foundation first. The only exception is when using a treatment concealer to cover blemishes or scarring. In that case you will apply a color corrector or thin layer of concealer first. Otherwise, it’s foundation and then concealer. If you apply your concealer first, you will end up using a lot more than necessary and can risk looking cakey. 

Primp Tip: Apply primer, concealer, finishing powder, foundation then finishing powder and setting powder

How to Properly Apply Foundation

To apply any foundation formula, skin must be hydrated and smoothed. Start with a spritz of rosewater or face mist like the Garnier SkinActive Soothing Facial Mist with Rose Water. Using a foundation brush — like the Clarisonic Sonic Foundation Brush — apply a dime-size amount of smoothing primer like the NYX Professional Makeup Bare With Me Cannabis Sativa Seed Oil Radiant Perfecting Primer that will fill in any fine lines and wrinkles while also having a blurring effect. Let it set for approximately five minutes’ otherwise you’ll risk wiping off the entire layer of primer you just put on.

Next, grab your application tool of choice — like the L’Oréal Paris Infallible Blend Artist Foundation Blender or the Clarisonic for a more even spread. Start by applying foundation using short strokes, starting from the center of your face and sweeping outwards and downwards, ensuring that the color seamlessly blends past your jawline and down your neck. A brush provides fuller coverage with each swipe, but a sponge makes any formula more buildable.

Which Formulas Work Best Together?

When it comes to picking the perfect pairing, you should use cream with cream, liquid with liquid, and so forth. For powder foundations, use a concealer with a drier consistency, ideally one with a waxy base, such as the Wonder Pencil or any concealing palette, which allows you to customize your colors.

GIVE YOURSELF A SALON-LIKE PEDICURE AT-HOME WITH THESE 9 EASY STEPS

As tempting as it is to dish out money for a salon pedicure (I mean, the massage, you guys), it’s not always doable. Thankfully, it is possible to achieve salon-quality results at home. Ahead, find out the must-have products and a step-by-step tutorial on how to DIY a salon-quality Pedi in the comfort of your own home — for a fraction of the price.

DIY Pedicure Step #1: Let Your Nail Polish Remover Do Its Thing

Completely remove any nail polish that’s still on your nails using nail polish remover and a cotton pad. If you don’t have any leftover polish, you should still run remover over your nails to remove any excess oil on the nail bed.

DIY Pedicure Step #2: Soak Your Feet Like You’re at the Spa

Fill your tub with warm water and soap (body wash will do!) and let your feet soak for 15 minutes. (Pro tip: While you’re in the rest and relaxation mode, break out a face mask.) 

DIY Pedicure Step #3: Get Rid of Dead Skin

After drying off your feet, use a foot file to remove any dead skin from calloused, hard areas. Pay attention to the balls of your feet, the sides of your feet and your heels. Scrape these areas until they feel smooth, but don’t overdo it — you could end up causing irritation. 

DIY Pedicure Step #4: File and Shape Your Nails

Use a nail trimmer to achieve the length and shape you want. We recommend cutting straight across and then going in with a nail file to buff out the corners. According to Hadley, a big mistake people make is cutting their cuticles. “Trimming or cutting cuticles during a Mani or Pedi is purely cosmetic and sometimes it doesn’t benefit the nail in any way,” says Hadley. “The cuticle is a barrier to protect your surrounding skin and protect against infection.”

DIY Pedicure Step #5: Apply Cuticle Oil

Apply cuticle oil like Essie Apricot Cuticle Oil to the base of your nail. “Cuticle oil doesn’t just keep your feet soft and moisturized, but it also keeps your polish from chipping,” says Hadley. 

DIY Pedicure Step #6: Moisturize

Moisturize your feet with an unscented lotion to keep the skin hydrated and smooth. “Scented lotions with synthetic fragrances can cause your nail polish to crack.” We love La Roche-Posay Lipikar Daily Repair Body Lotion for this step. 

DIY Pedicure Step #7: Prep Your Toes

Use toe separators (you can buy a 12-pack for cheap online) to make painting your toes easier and avoid making a mess.

DIY Pedicure Step #8: Apply Your Polish

“Don’t forget your base coat because it gives your nail polish something to sink into besides your actual nails,” says Hadley. After about two minutes, the base coat should be dry. Then, you’re ready to go in with a color. Apply two to three coats of nail polish, making sure each coat has dried. Make sure to build thin coats of polish; thick strokes will have the paint looking clumpy and take longer to dry. 

DIY Pedicure Step #9: Finish With a Quick-Drying Top Coat

Finish with a top coat so your nails maintain high shine and luster. Because nail polish takes about 12 hours to harden, Hadley recommends sticking your feet in cold water for a few minutes to help your nail polish solidify. 

Processing…
Success! You're on the list.