Healthy Habits: Why You Should Be Drinking Rose Water and How to Make It at Home

Here at BeautyLeeBar.com, I believe that beauty begins from the inside out. I try to be mindful of what is going into my body to ensure that I stay strong and healthy, because, to me, that is beautiful. I’ve also never been the one to shy away from trying a new detox or testing out a buzz-worthy health trend. That brings me to today’s topic. You’ve seen me rave about the benefits of refreshing lemon water, lime water, cucumbers, cherries, honey and now I’m adding rose water to the list of infused sips on my radar.

While I’ve used rose petals on certain things in the past, putting them in water is my new favorite way to reap the benefits of the fragrant blooms. Trust me when I say that rose water is so much more than a flavorful way to stay hydrated. By applying rose water to your skin or drinking it the old-fashioned way, you are benefiting your complexion as well as ingesting essential vitamins. Since this all sounded too good to be true, I did a little research to see why I should be adding rose water to both my diets and beauty regimens, stat. Keep scrolling to see what I learned as well as a simple at-home recipe to make this concoction yourself…

Your skin’s new BFF.
By adding rose water to your daily skincare regimen, you are doing so much more than keeping your face hydrated (which is also a pretty big bonus!). Rose water can help your skin maintain its pH balance by controlling excess oil production while keeping it supple and moisturized. Rose water is also known for its soothing elements which reduce redness and irritation linked to skin conditions such as eczema, acne, and dermatitis.
Rose water contains antibacterial and antifungal properties, allowing your skin to better heal scars and other wounds.

I don’t know about you, but I’m always looking for natural remedies to improve my complexion. By applying rose water to your skin, you are cleansing, toning and even reducing fine lines and wrinkles. That sounds like a win-win to me! There are a few ways that you can incorporate rose water into your routine. Start your day by using rose water as a toner after washing your face by evenly distributing it with a cotton ball. You can even purchase a spray bottle and lightly mist your face throughout the day, with or without a full face of makeup. A little spritz here and there can be rejuvenating!

Why you should be drinking rose water.
In addition to adding this fragrant concoction into your beauty routine, consuming rose water also poses multiple benefits. Rose water contains vitamins A, C, E and B and contains anti-inflammatory qualities. It is also said that rose water can help reduce stress and moodiness (something we can all benefit from at some point or another, right?). If you’re looking for a fragrant and healthy way to stay hydrated, opt for a bottle of rose water the next time you’re at your local health food store. But like any health food fad, it’s always a good idea to ask your doctor if you have questions or concerns.

How to make it at home.
If you are interested in making rose water right in the comfort of your own home, you’re in luck! Making your own batch of fresh rose water is simpler than you think and I have a recipe to prove it.

rose-water.jpg.653x0_q80_crop-smart

Here’s what you’ll need:
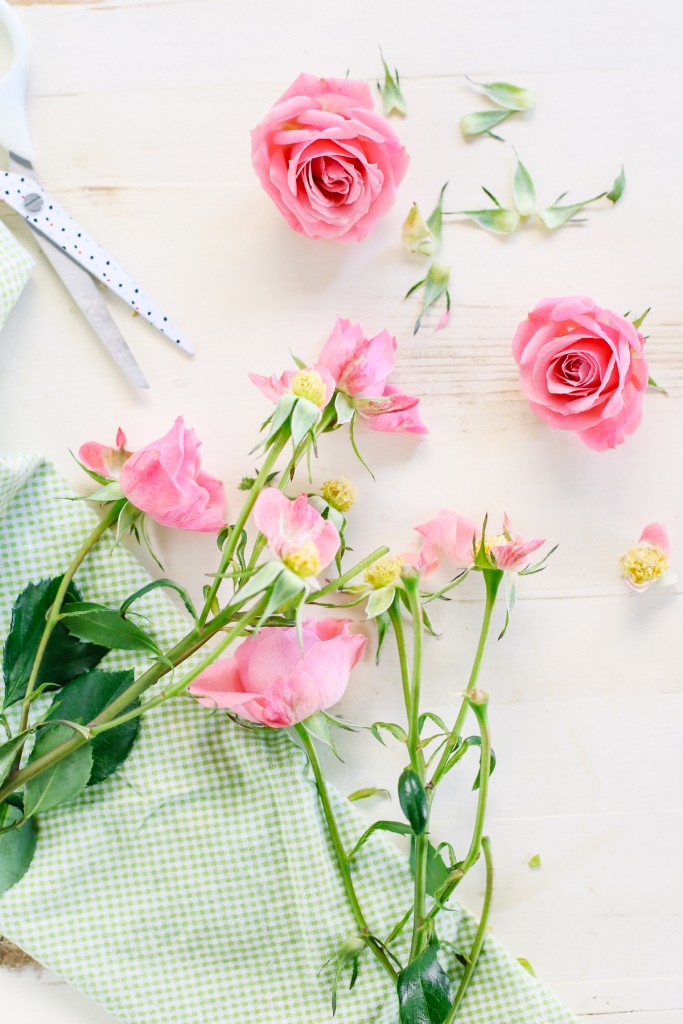
1. 5-7 stems of organic pink roses
2. water
3. large pot

Instructions:

1. Begin by plucking the rose petals off of each stem and rinsing them thoroughly under warm water. It is important to note that you use organic roses, rather than the kind that you can just pick up at any grocery store. It’s best to steer clear of any harmful pesticides and any other chemicals that could have been used on the stems.
2. Place the rose petals into a large pot and pour just enough water in to cover all of the petals.
3. Boil the water and rose petals over medium-high heat. Once the water is boiling, cover the combination and reduce heat to a simmer.
4. Let the petals simmer for 30 minutes or until they begin to lose their vibrant color.
5. Remove the petals from the water with a strainer.
6. You now have your very own homemade rose water! Be sure to refrigerate or store your rose water in a cool place. Your homemade batch should last between 1 and 4 weeks.

And there you have it! I’ve been intrigued by this trend and hope you all will try it too! And, now I’m convinced that my beauty regimen can’t live without it.

Have you ever tried using or drinking rose water?

Let me know your thoughts in the comments!

**FTC: This post is not sponsored. No monetary compensation was received for this post, however, products were sent to me. Opinions are 100% my own, of course.

DIY Gift Guide: Wine Charms


tac3a7as-3
There is a fine line between giving someone a lovely homemade gift and giving someone something that looks like a disastrous school project. While the former can be thoughtful, it’s important that DIY presents have some level of practicality to them…and they shouldn’t look too homemade if you know what I mean. Ideally, you want to make something that the recipient would otherwise buy himself or herself. In light of these parameters, I thought today’s DIY gift would be the perfect project to share: homemade wine charms.

I love this idea because you can really tailor it to your recipient’s personality and tastes, and because they are very practical. (If you’re unfamiliar with wine charms, they are basically little drink tags that you affix to the stem of a wine glass so people can keep track of which drink is theirs.) Plus they are very quick and easy to put together, making them excellent last-minute gifts. Without further ado, here’s how you can make your own gift set of wine charms…

What You Will Need

  • thin, malleable wire
  • wire cutters
  • beads
  • needle nose pliers

Quick Tip: The beads are a great opportunity to really personalize your gift. Pick shapes and colors that are reflective of the person’s aesthetic.

NzHEBzzPYBGn5ZVNQNSAXHWb

Instructions

  1. First, decide how many charms you want to make. I would recommend a set of six, eight, or ten.
  2. Cut your wire into 3-inch pieces.
  3. Shape each wire piece into a semi-circle.
  4. String beads onto wire piece.
  5. Using needle nose pliers, bend both ends of the wire piece so you create a little hook. Finally, hook the ends together and you’ve got yourself a wine charm!

One of my favorite ways to present these charms is by stringing them onto a ribbon and tying the ribbon onto a nice bottle of wine or bubbly. Otherwise, you can box them up or simply tie them with ribbon, too.

What do you think? Are you going to give this DIY a try?

Also, if you have a great DIY gift idea, be sure to share it in the comments below.

For more gift ideas, click here. Happy crafting!

XO Lee

P.S. Looking for more gift ideas? Check out my Beauty Buff Gift Guides.

Primp Tip: How to Make Any Lipstick Matte

I have a confession to make… I’m an absolute sucker for the latest beauty trends. After all, we are in the age of YouTube sensations and 1-minute Instagram tutorials. Mastering the art of contour: check, Mastering the art of winged eyeliner: check. Buying all of the matte lipsticks available: major check. I have a lot of lipstick colors in my drawer that don’t fit the matte bill. That doesn’t make them less beautiful, but right now I’m head-over-heels for that nudish brown look. Instead of letting my non-matte lipsticks go to waste, I decided to do a little research on what I could do to incorporate them into the mix. So I thought it would be fitting to address a question I’ve found myself asking a lot lately—is it possible to make an ordinary lipstick matte?

The answer is yes, you can make an ordinary lipstick matte (yay!). All you need is your favorite shade of non-matte lipstick and a few beauty products that you may already have in your makeup drawer. Keep scrolling to find out how you can transform your lipstick into this season’s hottest beauty trend…

lipsticks_giphy

Here’s what you’ll need:

translucent powder
tissue
makeup brush
your favorite non-matte lipstick
corresponding lip liner (optional)

Here’s how to do it:

1. Line your lips with your lip liner pencil. This step will help ensure that your finished look will last through wear and tear throughout the day.

2. Apply your non-matte lipstick on top of your lip liner. If you’re a perfectionist like me, I’ll sometimes line my lips again after I apply lipstick so that my lines are as sharp as possible.

3. Take your tissue and separate the layers so that you have one fine sheet.

4. Lay the single tissue sheet over your lips and, taking your makeup brush, dust your translucent powder over your lips. By placing the tissue between your lips and the makeup brush you are essentially filtering the amount of powder applied to your lips. It’s best to start small and build up so that you can reach your desired texture without over doing it.

5. Remove the tissue and dust the translucent powder directly onto your lips one final time.

Viola! You have now created a rich, matte texture without breaking the bank on new beauty products. I love a good DIY makeup hack, don’t you?


Will you be trying this matte lipstick beauty hack?

Related image