HOW TO APPLY FAKE EYELASHES, ACCORDING TO A LASH PRO

If there’s one makeup skill that can make even the most veteran beauty editor quake, it’s applying fake eyelashes. It’s not everyday we decide to break these babies out, but when we do, it’s usually for a special occasion, so we need them to look as natural as possible. Think of them as the cherry on top of an ice cream sundae.

We don’t know exactly where it all goes wrong, but somewhere between adding the glue and placing the faux lash strip on our eye, things tend to get a little messy. To help us master how to apply fake eyelashes once and for all, we tapped celebrity makeup artist Carolina Gonzalez. Keep reading to find out all her false lash tips and tricks.

STEP 1: Apply Mascara

The first step to applying fake lashes doesn’t actually involve any falsies. β€œI like to start with a light coat of mascara,” says Gonzalez. This helps the lash strip blend with your real lashes better. She calls it β€œcamouflage” for falsies. One of our favorites is the Maybelline New York Falsies Lash Lift Mascara.

how-to-apply-fake-eyelashes

STEP 2: Fit the Strip to Your Eye
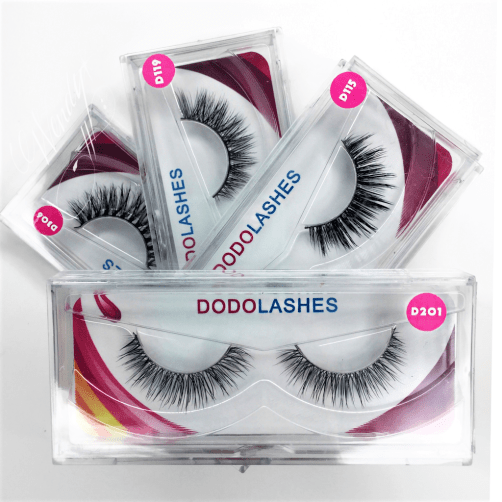
β€œIf you’re using a strip, you want to fit them first, then trim if need be,” explains Gonzalez. To properly trim a fake lash strip, you want to always cut excess off at the outer corners. Try the DodoLashes D328 3D styles (apply code: BEAUTYLEEBAR for money off) or the Lily Lashes for a subtle look.

STEP 3: Glue

Once the eyelashes are the proper size, it’s time to apply the glue. You can either brush a light coating of glue directly onto the lash strip or apply a dab of glue to the back of your hand and run the strip through it. No matter which method you choose, just be sure you don’t glob on too much product. Lightly blow on the glue until it becomes less wet and more tacky, then you’re ready to apply. Gonzalez’s favorite glue is the KISS Lash Couture Strip Lash Adhesive in Black

how-to-apply-fake-eyelashes

STEP 4: Apply Your Lashes

Now time for the tricky part β€” application. β€œStaring downward into a mirror, place the lashes and push with [your] fingers as close to the root of your lash,” says Gonzalez. Looking down is the key here; it will help you get the fake lash strip as close to your real lash line as possible. 

HOW TO MAKE FAKE EYELASHES LOOK REAL 

Let’s be honest, the ultimate goal here is to make our fake lashes look like the real deal β€” right? To do so, Gonzalez recommends applying your fake lashes after you do the rest of your eye makeup. β€œIf done before, eyeshadow tends to fall onto the tops of the lashes,” she explains. 

Another hack: Opt for individual lashes instead of a strip. It may seem like more work, but for truly natural-looking lashes, individually placed fake lashes mesh better with your real ones. Just be sure to mix in different lengths β€” small medium and long β€” to help them blend nicely. Try the KISS Ever Ez Trio Lash to get this look.

how-to-apply-fake-eyelashes

Gonzalez loves one of KISS’ newest products, Falscara, to achieve I woke up like this lashes. β€œThey are perfectly wispy and instead of applying above the lash, you apply underneath, which is why you also can’t detect the lash weft,” she says. β€œThey are great for those of us who love that lash extension look.”

HOW TO REMOVE FAKE LASHES FOR MINIMAL DAMAGE

While peeling away fake eyelashes can be very satisfying, taking them off the wrong way can pull at your real lashes. To avoid any tugging in this sensitive area, reach for a makeup remover. β€œI like to use an oil-based remover, paying close attention to the roots. They will literally slide off.”

HUDA BEAUTY FALSE LASHES TUTORIAL:

How To Apply False Lashes – For Beginners:

If you’re still struggling – we feel your pain – then try cutting the strip into three pieces. We know this sounds weird, but it will be SO easy to apply the tiny blocks of lashes individually – trust us, it will revolutionize your lash game. Once you’ve trimmed the lash to the right length, cut it evenly into three pieces. Then, start to apply the pieces, starting from the outside of your eye, working your way in.

How to apply false lashes

What we love about this technique is that because the pieces are separate, they fit the shape of your eye really comfortably, and you don’t get the corners pinging off halfway through the day! This way of applying lashes is so perfect that Huda Beauty herself created a lash inspired by the technique, the Huda Beauty Eazy Lash – Harmony, $18.

How To Choose Lashes To Suit Your Eye Shape

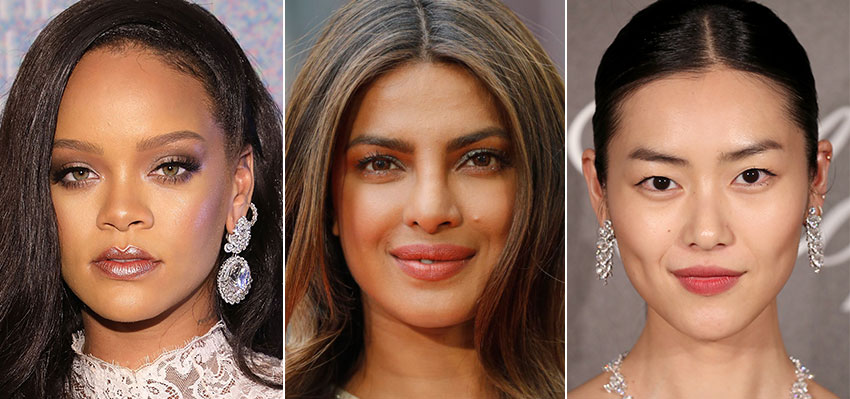
The beauty of false lashes is that they can open up your eyes, alter the shape, and make them look bigger and sexier. But, if you choose the wrong pair of lashes, they can do the complete opposite. Depending on the shape of your eye, whether it’s almond, round, hooded, deep-set or monolid, the lash style needs to change. So, while almond-shaped eyes can get away with almost any lashes and deep-set eyes can go extra glam, round eyes will look even more sultry with a whispy lash that has more drama at the outer lash, and hooded lids need to go a little smaller. Check out Huda Beauty full guide on theirΒ fave lashes to suit every eye shape here.

How To Easily Clean False Lashes

False lashes can be expensive, but spending money on quality lashes is totally worth it and cost-effective in the long run if you know how to clean them properly. Lashes are super delicate, so the most important thing to remember is that you need to be gentle with them. Whenever you’re cleaning them, always hold them firmly at the base of the lashes so that the lashes aren’t pulled from the band. Check out this video to see how easy Huda Beauty lash cleaning method is:

Storing the lashes back in the original package is the best way to keep your falsies clean and safe. If you attach them firmly to the band and press them down this will helpΒ them to stay curled.

How To Safely Remove False Lashes

Removing false lashes can be dangerous – if you’ve ever caught your own eyelashes in the process, you’ll know the pain is real! The trick is to soak a cotton pad with your weapon of choice (micellar water, eye-makeup remover, or cleansing oil) and let it sit on your eye for at least 20 seconds to loosen and dissolve the glue. Then gently peel away the lash with your fingers. If the lash still isn’t easy to remove, soak another cotton pad in solution and let it sit on your eye for longer and then try again. Et voila! You’re lash-free with your natural lashes still intact!

Let us know if you guys have any more questions about false lashes in the comments below.

Ways to Make Your FACE LOOK MORE DEFINED

We’ve all experienced it. We apply that finishing swipe of subtle highlighter and feel a quick flash of confidence before stepping out … just to be tagged in a photo later that feels like someone cruelly photoshopped in an extra chin. Captured our worst angle. Some ominous shadows. Some poor light. Hide from profile immediately.

While the camera may not always capture your true essence, there are ways to combatΒ puffinessΒ and tricks of the makeup trade to make your face look sculpted without undergoing the knife or needle.

Play with Bronzer

If going full contour on the daily isn’t your thing, we hear you. But a little strategic application of the right blush tones in the right place can make a big difference. Use aΒ bronzerΒ or a blush with more brown tones. Red blush, especially applied to the apples of your cheeks, can round out the face in a child- or doll-like way. Keep the color just under the cheekbone, and swipe out to the middle of the ear and blend. This creates a more chiseled appearance, as well as adds depth to your look. You can even apply a light layer of bronzer just under the jawline to create the illusion of a shadow, aka a little more chin definition if that’s your worry zone.

Go for More Angular Brows

A higher arch can give the shape of your face a slimmer, more elongated look. Natural brows are very in, but try playing around with the arches in how you pencil them in and brush them up. You don’t necessarily need to go for shock or surprise with the final finish, but the shape of your brows has the power to drastically change your look.

Use Liner Only on the Top Lash Line

Eyes that pop will slim down the rest of your face, so go for a liner applied only on the top lash line (on the bottom lash line will make your eyes appear smaller or closer together). Going for a feline eye and angling up for a more dramatic effect can also elongate the line of your cheekbones, especially if you pair this trick with our bronzer suggestion.

Always Highlight

You don’t need to blind anyone with an ultra-statement reflective highlight, but a soft, dewy look will go a long way when applied to your upper cheekbones and brow bones. It will deepen the use of bronzer or blush so that you can use less with a more architectural effect.

Try Facial Massage

Have you ever noticed that after a great facial, you look more chiseled and awake? Your eyelids are perky, your cheekbones poppin’. It’s not just the amazing treatments, potions, and balms, but more about how they are applied. Massage not only helps your quality products penetrate deeper so that you get true bang for your buck, but it brings blood to the surface and softens up tension in the face so that important muscles can do their thing and let your natural bone structure shine.

While it won’t be exactly the same, you can do aΒ version of this at home. Make sure to β€œlube up” with your favorite serum, followed by an oil or emollient moisturizer. Use your fingers in an almost pinching position to glide up and down your jaw, your cheekbones, and your eye sockets. Don’t be afraid to be rigorous, but always be more gentle around your eye area. If 30 seconds is all you have, that’s fine. But a longer session while you’re watching your favorite show or even in bed after lights out will have you waking up looking rejuvenated.

Use Facial Tools

Stone instruments like jade rollers andΒ gua shaΒ have had some serious fame recently, but not without good reason. Firstly, they are not newβ€”they’ve been used for ages in Eastern beauty and wellness practices. They are usually made with a beautiful and energetically charged stone such as rose quartz or jade, which retains a cooler temperature even after several passes on our warm skin, so they are fabulous for depuffing.

They are also great for increasing circulation similarly to facial massage, because they also massage and bring blood and nutrients to the surface of the skin. However, they are instrumental in assisting with depuffing because they help promote lymphatic drainage, so stagnant water retention doesn’t hang out along your jawline, cheeks, and under-eyes.

Reduce Your Sugar and Salt Intake

Excess sugar and salt will promote water retention and bloat, which isn’t just bad news for your waistline. While massage and tools can help combat the aftermath of said decisions, getting ahead of them when you can is a safe bet. Making sure you stay hydrated and supplement with minerals will bring a plumpness to your skin sans the bloat, so don’t slip on your hydration gameβ€”always be sipping.

WHY YOUR BLUSH LOOKS SPLOTCHY β€” AND HOW TO FIX IT

Patchy, streaky and blotchy blush is certainly not ideal. It happens to the best of us: One minute, you haveΒ rosy cheeks, and the next, you have hot pink product clumps that resemble clown makeup. While a botched blush job can leave much to be desired, theΒ correct blush application and productsΒ can help give you a naturally flushed, rosy and fresh complexion. To help you say goodbye toΒ blush mishapsΒ once and for all, we’ve listed our top tips for avoiding too-pink, streaky cheeks, ahead.Β 

Blush Tip #1: Exfoliate Your Skin

One of the best ways to ensure smooth makeup application is by creating a smooth base. If your skin is dry and flaky, your blush β€” or anything else for that matter β€” will look streaky and uneven. Lightly exfoliate once or twice a week with a gentle scrub like theΒ LancΓ΄me Exfoliating Rose Sugar Scrub. It will help remove dead skin cells and flakes that could be messing with your makeup.

Blush Tip #2: Prime Your Complexion

Make sure to moisturize. A hydrated base helps create a supple canvas for makeup. To take it a step further, use a pea-size amount of primer to help blur imperfections and give you a more flawless foundation application that will stay on and look fresh throughout the day. Recently, we’ve been loving theΒ Giorgio Armani Luminous Silk Hydrating Primer.Β 

Blush Tip #3: Use the Right Tools for Application 

In the same vein of keeping things smooth, it’s important to have an even base of foundation before applying your blush on top. We like to use a beauty sponge or foundation brush, like theΒ IT Cosmetics Heavenly Luxe Complexion Perfection Brush #7, so that the product is distributed evenly across the face. (Pro tip: If you have naturally oily skin, opt for a matte foundation so that your skin’s natural oils don’t interfere with cream or powder blush.)Β 

Blush Tip #4: Select the Right Cheek Product 

Selecting the right formula can have a big impact on how your product applies and wears throughout the day. If you have dry skin (thanks, winter!) look for formulas that are cream or liquid and easily blendable to help your complexion stay hydrated throughout the day. We’re obsessed with theΒ Maybelline New York Cheek Heat. It gives a natural looking flush, comes in six different shades, is buildable and leaves behind a gorgeous glow.Β 

Blush Tip #5: Use a Clean Brush

Blush brushes are designed to have tightly packed bristles for splotch-free application. They’re normally tapered or angled for even distribution and a naturally blended look. But, if your blush brush hasn’t been cleaned in a while, all the excess makeup and oil from your skin will build up on the bristles and keep your blush from going on smoothly. Be sure to wash your brushes around every two weeks. If you’ve cleaned your trusted blush brush and are still experiencing splotches, it may be because the density and shape of your brush may have changed. Try switching it out for theΒ IT Cosmetics Heavenly Luxe Boutique Blush Brush #4Β β€” our personal favorite.Β 

Blush Tip #6: Blend it Out 

After applying blush to the apples of your cheek, make sure you blend out the product with your brush or a makeup sponge (ideal for gel or cream products) to create a natural, diffused look. If you’re using a gel-like blush, you can also use your fingers.

Blush Tip #7: Set it! 

As the day wears on, your blush tends to wear off. Once the flush fades away, it can start to look blotchy as the pigment breaks down. To avoid this, after blending your makeup, set everything in place. Do a quick spritz of setting spray before walking out the door. We’re loving theΒ Urban Decay All Nighter Long Lasting Setting Spray.Β 

Read More:

This $2 Treatment Will Give You Thick, Super Strong Hair

While there are hundreds of hair care products that claim to boost growth, add shine, and improve the health of your hair β€œin just one wash,” very few products actually do (Olaplex is one that can)! Fortunately, we know a $2 DIY that really does help strengthen the hair. In fact, this DIY has hundreds of years of experience, science, AND a world record to back it up. Intrigued?

The DIY we’re referring to is a rice water hair rinse that has been used by women in China and Japan for centuries. There’s even a village in China, Huangluo, known as the land of Rapunzels because it holds the Guinness World Record as the β€˜world’s longest hair village.’ And guess what they use? Rice water! The ritual of washing the hair with rice water has been passed down from generation to generation and the women in the Huangluo village have the shiniest, healthiest and longest hair thanks to their rice water shampoo.

rice water for hair
Source: Dmitry Chulov/ Shutterstock

The great thing is rice water is amazing for all hair types, from thin and fine hair to thick, curly, and afro-textures. We actually heard about it as we were admiring our friend’s super defined 3A/ 3B curls, who told us her trick was to spritz rice water in her hair after washing, which she claimed had amazing detangling and hair strengthening abilities – naturally, we had to look into it. Here’s the science behind why this natural DIY really works…

How Rice Water For Hair Works

Rice water is literally bursting with natural proteins, vitamins, and minerals that help restore and hydrate your hair. Firstly, it contains inositol, a carbohydrate that replenishes dry, damaged hair by strengthening and rebuilding the elasticity of the hair, which prevents it from becoming brittle and split ends from forming.

Even after the rice water is rinsed off, it’ll continue to seal in moisture, shielding your hair from damage. It’s also packed with proteins and amino acids that hydrate and restore the hair strand so that it’s less likely to frizz. Plus, it’s a rich source of vitamins including B, C, and E, which can help boost growth while adding shine.

Fermented Rice Water

If you ferment the rice (by leaving the rice water out for 24 to 48 hours), it’ll further enhance the nutrient levels as, during fermentation, a substance called pitera is produced, which is rich in minerals and amino acids. It’ll also alter the pH levels of the rice water so that it better matches the natural pH of your hair, which is slightly acidic. This will help close the hair cuticle, preventing moisture loss and protecting your hair. The only issue is fermented water can smell a little but you can add a drop of essential oil to the water to improve this – in Huangluo they add ginger slices and orange peel to the fermented rice water.

rice water DIY
Source: ThamKC/Shutterstock

How To Make A Rice Water Hair Rinse

There are two ways of making rice water; you can either boil rice in plenty of extra water and keep the excess water, or you leave the rice to soak in water and use the strained water. If you do this last method, you can leave it out to ferment, which makes the rice water more potent.

Ingredients:

1/2 cup of organic brown or white rice
The rind of an orange or lemon (optional)

Take half a cup of rice, give it a rinse, then soak it in two cups of water. Leave it to soak for at least 30 mins, or even overnight (this will give more time for the water to absorb the nutrients and vitamins from the rice). Once the water is cloudy, squeeze the rice in the water a little, then strain the rice so you’re left with only the water. You can either store this water or let it ferment.

Fermenting rice water: To ferment the rice water, leave it out for a day or two at room temperature (the warmer the room, the quicker it ferments). This will make the formula more potent, so once the rice has fermented, add a cup of water to dilute it slightly, and add the rind of an orange or lemon, and store the mix in the fridge for up to one week.

How to Use Rice Water

You can either use this as a rinse for your hair after shampooing and conditioning, or you can put it into a spray bottle (preferably glass) and store it in the fridge for up to a week, and use it as a β€˜leave-in conditioner.’ We find using it as a leave-in treatment post-washing (by spritzing into wet hair) works best for curly and coily hair, and really helps to detangle, define and boost curls. For straight and fine hair, use it as a rinse post-shampoo and conditioner. Let the rice water sit for 10 to 20 minutes depending on the thickness of your hair (the thicker your hair, the longer you can leave it), then rinse the hair. If you have curly or coily hair, you can use it as a rinse and a leave-in treatment.

If you do this regularly (every week), you will soon begin to see a big difference in the health and condition of your hair. For more DIY haircare solutions, check out how to make your own dry shampoo.

Let us know if you’ve ever tried rice water in your hair in the comments below.