Hello Beauties, by now everyone knows how Lee and her other Editors are obsessed with skincare. If you didn’t know then you have either been living under a rock or new here; so ” Welcome To BeautyLeeBar ” aka your new favorite beauty go-to blog. Of course, we are still learning about our skin and learning about what oils, creams, and cleansers are the best for clear bright skin! But, when we find a product and a hack that works, we live by it religiously.
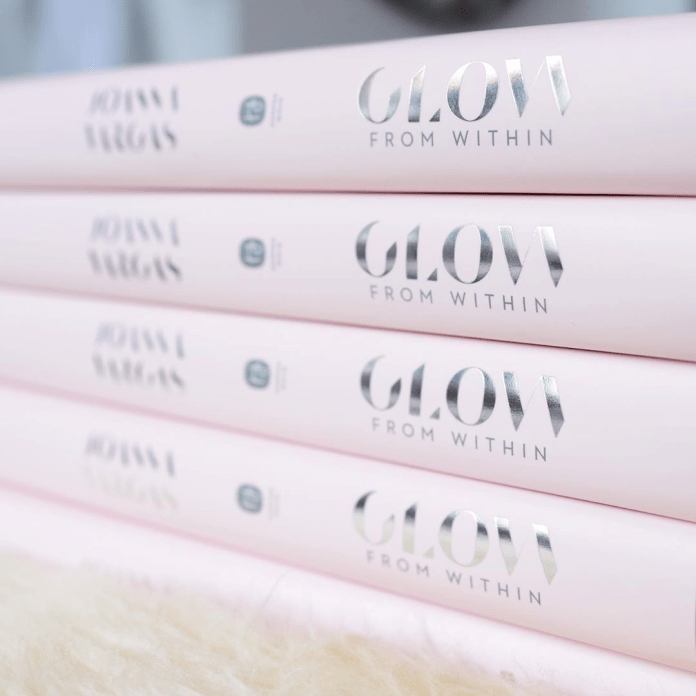
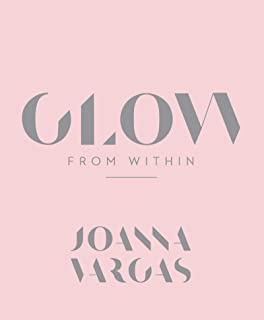
Today, I’m sharing a few tips and tricks I learned from Vargas’s book, Glow From Within. For even more tips and advice on skincare, nutrition, and self-care for glowing skin that shines from the inside, read the book. It includes juice recipes, DIY masks, and way more tips for good skin that would take me years to type out!
1. Your towel is a beauty tool
If you’re breaking out and can’t figure out why, it might be the towel you’re using on your face. For starters, Joanna explains that if you’re using a regular terrycloth towel while cleansing your face, it might be too abrasive. It also can easily harbor bacteria, fungus, mold, and mildew. Plus, dead skin cells and environmental debris can get into the fibers of the cloth from being used on your face. If you are going to use a towel to wash your face, Vargas recommends bamboo, muslin, or soft cotton towels.
When it comes time to dry your face after washing, she says to use a different towel than what you used on your body, as this towel can have body wash, shampoos, and fragrances that you wouldn’t want on your face, as well as holding germs, mold, and the like. She also explains that you should hang the towel you use for your face outside of the bathroom to dry because of all the moisture that can build up in that room. Although not the environmentally-conscious choice, Vargas explains that those with acne-prone skin could try using paper towels instead of regular towels to dry their face, as to not spread bacteria.
2. Focus on stress
If you’ve ever gotten a stress pimple, you’re aware of the cycle. Stressed out about work, friends, boyfriend, etc. → breaks out → stressed about breakout → breaks out more. According to Vargas, our body reacts to the fight-or-flight system we experience when we have chronic stress by producing cortisol and adrenaline, which do a lot of scientific things you don’t want me to attempt to explain—but they also signal our sebaceous glands to produce more oil, which can lead to clogged pores, pimples, and blackheads. But stress can also cause dullness (lack of blood flow to the face because it’s reserved for your heart which is pounding out of your chest way too often), dry patches from a decrease in your body’s natural hyaluronic acid, and a breakdown of collagen. As you can see, stress is just not good for your skin. So, how does Joanna recommend stopping it? Well, she’s aware it’s easier said than done, but adding one or two stress-relieving activities to your schedule every day can decrease your body’s reaction to stress and reduce the likelihood of all that bad stuff happening.
Vargas also goes into depth on why exercise, adequate sleep, and confidence play a part in the health of your skin. It’s no surprise that the way we treat our bodies (and minds) affects our appearance, but truly good skin can’t just rely on creams and cleansers.
Primp Tip
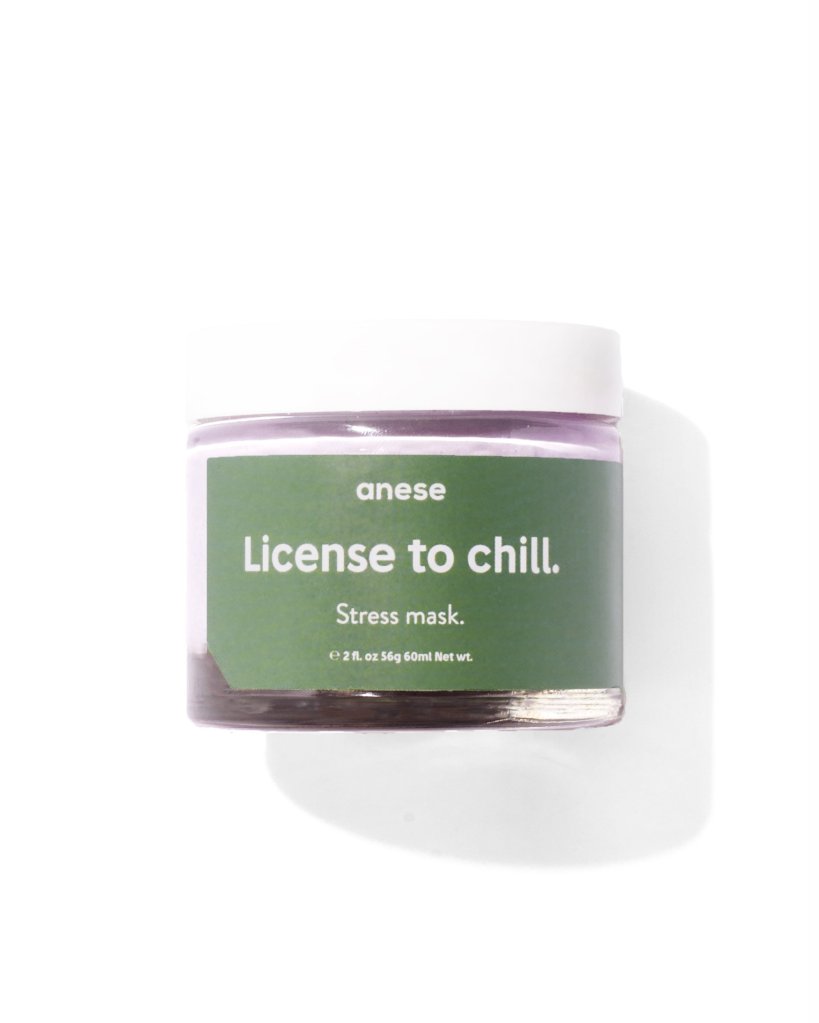
My all-time favorite brand to this day is AneseCo! Try Anese License to Chill The Stress Mask ( $33 ). Description: kick chronic and hormonal acne to the curb. Say byyye to clogged pores as a result of commuting, stressed-out skin from late nights, and tight deadlines. It can be used as a spot treatment or as a full mask. What Is It? License to Chill The Stress Mask, infused with relaxing eucalyptus oil, and made for the ultimate chill session. This product helps with Acne/blemishes, dullness, and softness. Feels clarifying and moisturizing. Skin is nice and soft afterward and is just a nice evening treat-myself ritual. I use it for about roughly twice a week.
- Texture: Clay, thick and creamy.
- Scent: naturally with eucalyptus oil.
- Cruelty-free
- Gluten-free
- Paraben-free
- Vegan
3. Follow a routine
Vargas detailed her foolproof 5-step skincare routine that anyone can do regardless of skin type. She goes into much more detail in the book, but her routine consists of:
- Double-cleanse with a micellar water or oil/balm and foam cleanser
- Serum—her favorite ingredients are argan or jojoba oil, hyaluronic acid, omega fatty acids and vitamin C
- Eye Cream– Lee new favorite eye cream
- Moisturize—ideally with a product that contains antioxidants, emollients, and products that replenish moisture and collagen levels
- Sunscreen during the day
Following a routine is about more than just the products you put on your skin; it’s about consistency and order. I’ve added products in to follow this routine, but I’ve done it slowly to make sure that I keep up with doing it every night, even when all I want to do it get to bed ASAP.
4. Add in extras as needed
Along with her magic 5-step routine, Vargas recommends adding in those little extra indulgences. However, she says it’s good practice to get your routine down first before you add those in. This is where exfoliation (more on that later), masks, retinol, and toners come in. Once I got my routine down pat, I began adding these back in. It was helpful because I wasn’t relying on the extras to make my skin look good; that was the job of my daily routine. These just made my skin glow extra, helped with hyperpigmentation, and kept skin at bay.
Primp Tip:
When it comes to dry skin, more is A+. Anese Can I Speak to your Manager? Facial Toner ( $24 ) gives your skin a healthy dose of I’m not going to settle for less. Packed with herbal extracts, antioxidants, and vitamins that cleanse, balance, and calm your skin. Don’t skip the toner, dirt is like a lingering ex-boyfriend. It’s time to take action and tone. This product helps with firming/plumping, Dryness, discoloration, and softness. This spray is amazing. It smells like I’m bathing in roses. If you don’t like the scent of roses, then I wouldn’t recommend. It feels so nice and refreshing to mist on after washing my face each night. The bottle is also much bigger than I expected, and the glass feels so thick and makes the bottle seem high-quality.
Claims: Paraben free, sulfate free, not tested on animals, vegan, non-comodegenic, hypoallergenic.
What is it: A non-alcoholic toner made with over 5 botanical extracts that balances the pH level of your skin after using a harsh cleanser.
Texture: Clear, fine mist
Scent: Naturally and lightly scented
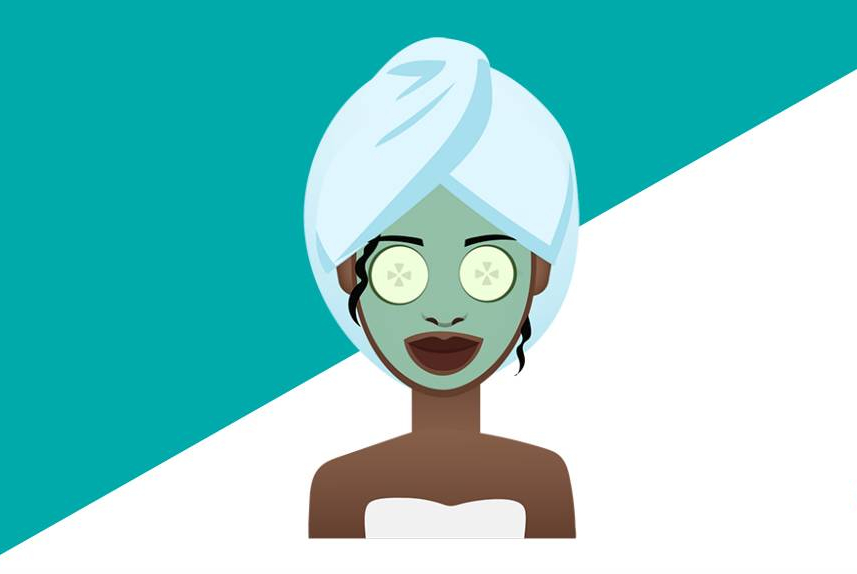
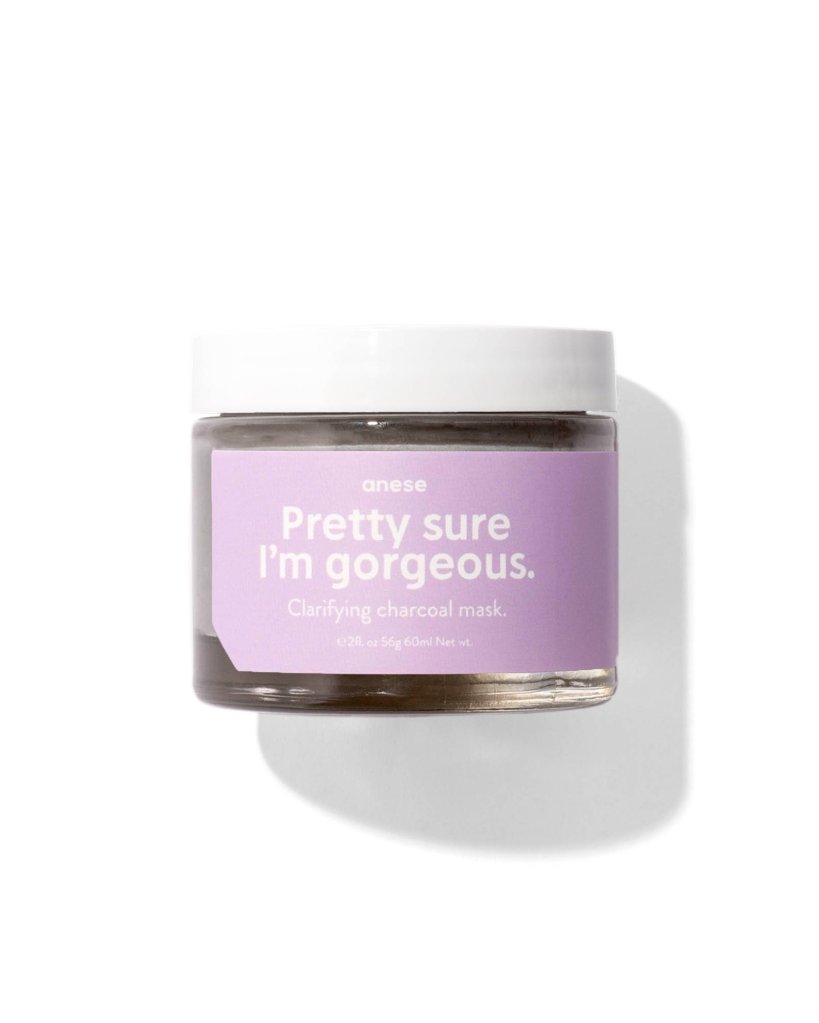
But wait, for more hydration, try Anese Pretty Sure I’m Gorgeous Clarifying Hydration Mask ($23 ). A clarifying and hydrating mask for when your skin and ego needs a boost. Tell acne-prone skin, large pores, and blemishes to chill. This mask is gentle and creamy. Say byyye to dirt, oil, and hello to hydration and tone. Apply a thick layer to cleansed skin, avoiding eye area. Rinse off after 10 minutes. Repeat twice a week. Use Anese Facial Toner Can I Speak To Your Manager afterward to seal the deal.
What is it: A clarifying charcoal creme mask for when your skin needs a boost. Perfect for acne prone and oily skin. Reduces the appearance of large pores and blemishes.
- Texture: Creamy, gray natural color from activated charcoal.
- Scent: Clean, fresh scent.
Ingredients that Stand Out: Activated charcoal, Organic Rooibios, Hyraluronic Acid, DMAE
Lee has struggled with terrible skin most of her life. She doesn’t have combination skin but did have to deal with blackheads and period/food acne. Since using Pretty Sure I’m Gorgeous Clarifying Hydration Mask, she has experience glowing skin and minimizes breakouts. Blackheads are gone and are highly impressed.
5. Exfoliate with both methods
Vargas refers to exfoliation as “a facial in a jar,” explaining that a good exfoliation can go a long way in helping texture, acne, dullness, dehydration, and more. However, you can choose to exfoliate with an acid (such as AHAs/BHAs) or with a physical scrub (typically made of sugar or sand—avoid anything with microbeads as they’re terrible for the environment!). She says you can really choose to do either, but by doing both, you remove the dead skin cells with an acid and then physically remove them (along with dry patches!) with a scrub. Whatever you do, she explains to not exfoliate too often because you can irritate your skin or cause sensitivity.
She also explains it is good practice to follow exfoliation with a good sheet mask or night cream, as they will nourish the skin after using a chemical or physical exfoliant. She also said she recommends clients use any kind of mask, especially clay masks, after exfoliating because it penetrates the skin and pores deeper.
Primp Tip:
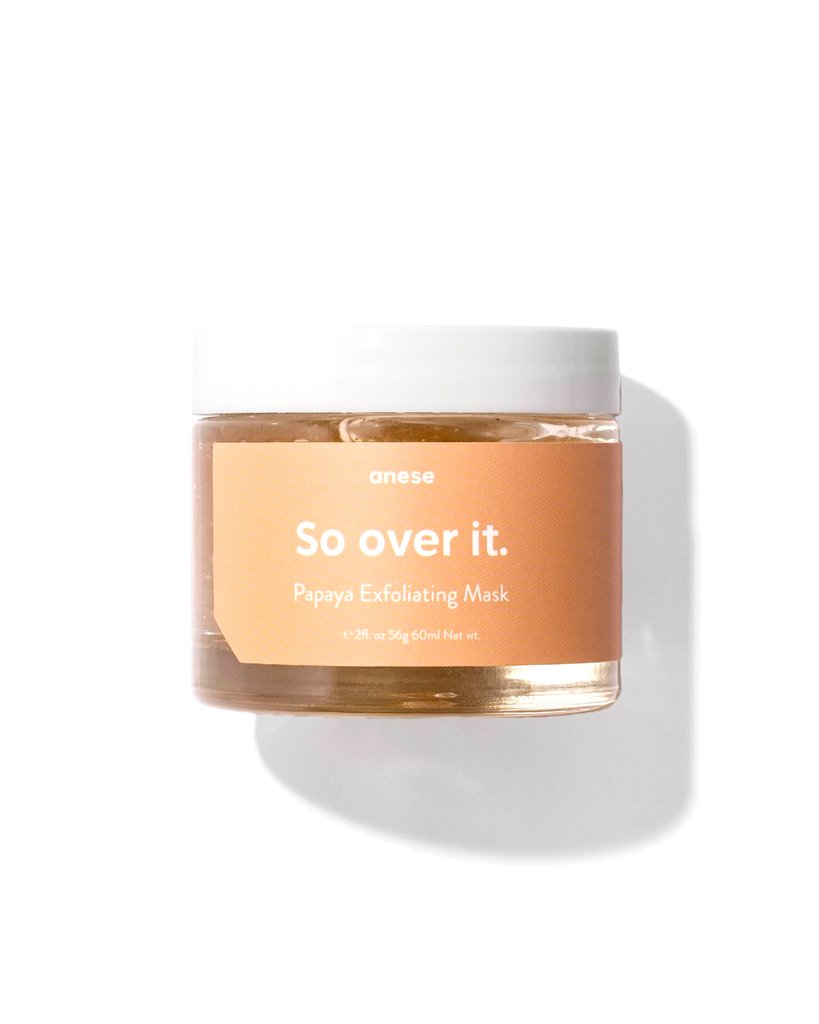
Anese So over it Exfoliating enzyme mask ( $23 ) is perfect for those who have super over dry, flaky patches on their t-zone or if you desire that dewy look. So Over It is going to be your fresh face champion.
What it is: A gentle enzymatic exfoliant made with papaya and pineapple enzymes.
- Texture: Clear gel with hibuscus
- Scent: Not scented
- Claims: Vegan, paraben free, phthalates free, cruelty free
I have tried all of their masks now. I love them all for different reasons, but this is the favorite. I love how ridiculously smooth and soft it makes my face. It helps so much with the texture of my skin. It doesn’t overdry my skin though. Been a staple in my routine!
6. Hot date tomorrow? Try these tips
Vargas gives a few tips to prepare your skin when you have one day between you and a big day (such as a date, a party, a photoshoot, or just a regular old Tuesday). After going through your typical night routine, she says to sleep in a mask (or leave it on as long as you can). If you have any active breakouts, use a clay mask as a spot treatment and use a hydrating or soothing mask everywhere else.
Then, she explains to do a facial massage the day of the event as you’re applying your skin prep before makeup to reduce puffiness and promote brighter skin.
Primp Tip:
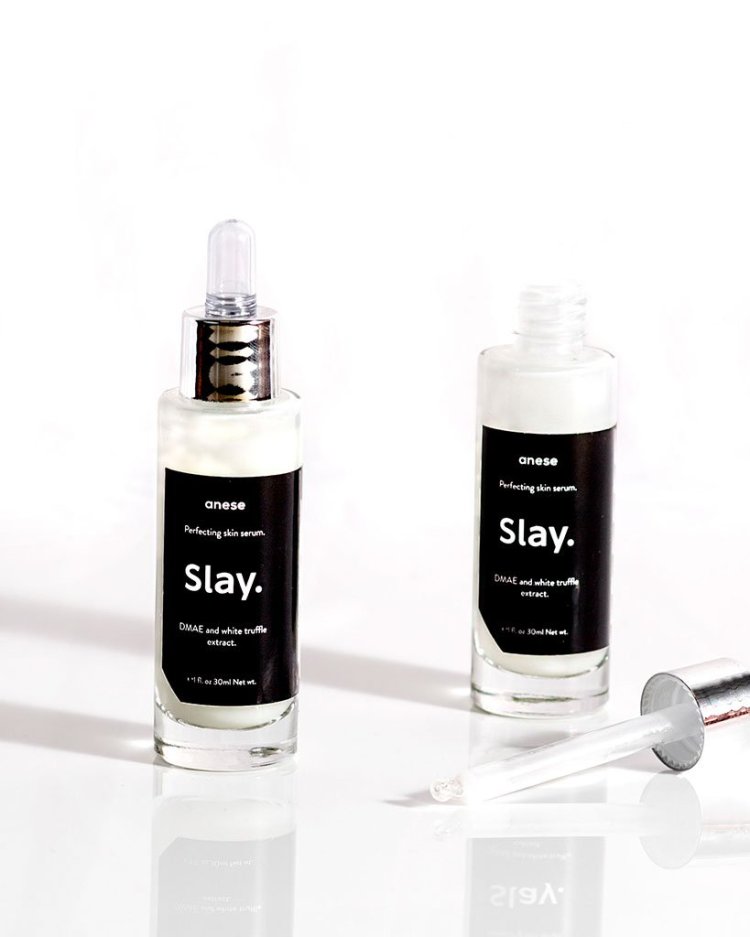
Anese Slay Skin Perfecting Serum ( $49 ) is the ultimate facial serum made from DMAE, Vitamin E and Green Algae. Tell dry skin and fine lines to chill the F out. Who doesn’t want an upgrade in skin elasticity, firmness, and hydration?
What it is: The ultimate facial serum. Use this on your face after cleansing to firm, moisturize and reduce fine lines.
Apply a layer of slay before your makeup or before bed, after cleansing. You can also apply a thicker than usual layer as an extreme hydrating mask.
- Texture: Creamy, white.
- Scent: No scent, no fragrance added.
- Claims: Vegan, cruelty free.
- Ingredients that Stand Out: DMAE, Vitamin E, Organic Blue Green Algae.
SHOP STORY:
What is the best beauty tip you’ve learned so far? Comment down below!