8 Bad Skin Habits to Kick

When it comes to our skin, we’re all just out trying to do our best, right? We test out products, wash our faces regularly, moisturize... but it turns out that some of our most persistent habits can be very bad for our skin. The good news is that most of them have easy fixes—so you can turn bad habits into good ones.

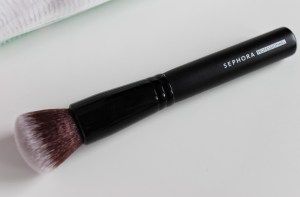
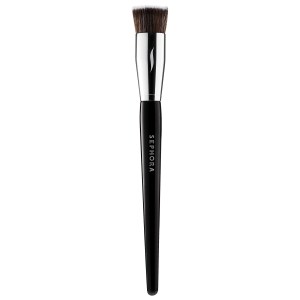
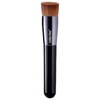
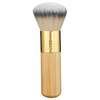
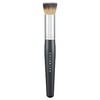
1. You don’t clean your makeup brushes.
Besides being good for keeping your makeup looks #onfleek, cleaning your makeup brushes on a regular basis is also a fundamental aspect of a good skin care routine. “If not properly cleaned, makeup brushes can carry hordes of bacteria that can cause serious damage to the skin. “Not to mention the buildup that gathers on dirty makeup brushes causes them to deteriorate quicker, affecting your makeup application.”

Tragic all around. But the key to avoiding this travesty is simple: Clean your tools regularly. You should spritz your brushes once a week with a cleansing spray and deep clean them once a month with shampoo or gentle soap. This is the best way to prevent buildup from causing infection, as well as problems like acne and irritation.

2. Not Exfoliating
exfoliation. As you get older, your need for regular exfoliation increases. Plus, when you’re using potent anti-aging products, you want to make sure they are being well absorbed.

Of course, there is such a thing as too much exfoliation, so you need to find a balance. For most people, a couple times a week does the trick. As you age, this may be closer to 3 or 4 times a week.

Here are my two favorite body scrubs  that I have been using for a while:

Hold my drink has a soft and fluffy texture and can be used as a daily exfoliator. Coconut oil and vitamin E seeps into your skin as you exfoliate and tease out ingrowns. Bonus, it literally smells like a coconut in a jar without any added artificial fragrance.

What It Does

-Moisturizing organic coconut oil melts into your skin.

– Natural sugar cane gently buffs away dead skin. Perfect for dry legs, arms and even your lips.

-Vitamin E is full of antioxidants and amazing at targeting fine lines and dryness.

Goddess Body Scrub is a gentle, salt-based body exfoliant that hydrates skin with organic coconut oil, scented with dry lavender buds and few drops of lavender essential oil. Goddess Body Scrub is highly moisturizing and gently exfoliating blend of organic coconut oil. It leaves the skin silky, soft, glowy, and hydrated with light scent of lavender.

These amazing scrubs exfoliates while providing nutritive minerals. It’s the perfect thing to use before putting on a moisturizing mask. If you have oily skin or otherwise sensitive skin, be careful not to exfoliate too vigorously. 

3. Leaving Your Makeup on Overnight
You’re tired. Your eyelids are closing against your will. You’re almost considering sleeping in your jeans. Stop! Wait! It’s time to wash off your makeup.

Naked skin is happy skin. Especially if you’re wearing chemical makeup brands, you want to give your skin a break over night.

In the same vein, make sure to wash your makeup off before working out. When you break a sweat and your pores open up, dirt, oil and, yep, makeup will get in there.

Also, unless you want to wash your pillow cases every day (Ouch! Said mother earth) you should do your best to keep them clean in between washes. Another reason that washing your face before bed is a must!

4. Overcleansing
Don’t consider this a free pass to skip washing off your makeup at night: If your skin is dry skin, lather up less often, since doing so strips away natural oils. Wash with a creamy or oil-based cleanser at night (they’re gentler on dry skin) and rinse with just water when you wake up. “It’s enough to clean your skin in the morning, and you’ll retain more of your own moisturizing oils,” says Ellen Marmur, a dermatologist in New York City. Try L’Oréal Paris Pure-Clay Purify & Mattify Cleanser and/or St.Ives Blackhead Clearing Green Tea Scrub. 

5. Not Sleeping Enough…
Getting less than seven hours of shut-eye can make your skin duller and fine lines (like the ones around your eyes) more obvious. Your skin can rebound from the occasional late night, especially when you’re young, but a few in a row will catch up with you. If you have trouble falling asleep, don’t start watching Black Lightning or The Good Doctor reruns: Bright screens suppress melatonin, a hormone that makes us sleepy and regulates our circadian rhythms. That second part is a biggie. When melatonin levels drop and your circadian rhythm gets thrown off, your skin cells can’t turn over as efficiently, causing even more wrinkles and dullness over time, says Phyllis C. Zee, the director of the Center for Circadian and Sleep Medicine at Feinberg School of Medicine, Northwestern University Hospital in Chicago. A warm shower or bath before bed is much better for inducing sleep, says Michael Breus, an author, a psychologist and sleep medicine expert.Image result for white pillow on white bed sheets blog post

 …And Not Sleeping Smartly
Your sleeping conditions matter. First things first: your pillowcase. “It collects oil, dead skin cells, bacteria, and excess night creams. “As you toss and turn, all of that is deposited right into your pores. I recommend changing them at least once a week (twice is better). While you’re at it, swap out the regular cotton version for something smoother, like satin, silk, or Egyptian cotton, since rough pillowcases can actually cause wrinkles. And if I can convince you to make just one more change, plug in a humidifier. It counteracts the skin-drying effects of air conditioning and heat.

6. Overlooking Sunscreen in Certain Areas  Related image
Slathering SPF over your entire face (even in the winter) is a good start, but you can’t ignore the rest of your body—and certain areas are missed too often. “In my practice, I’m seeing an epidemic of skin cancer along the hairline, the jawline, and the ears,” says Dennis Gross, a dermatologist in New York City. Apply a broad-spectrum sunscreen with an SPF of 30 or higher all over your face and exposed skin from the neck down. And keep in mind that light cotton clothes won’t totally protect skin on their own in the summer. 

7. Forgetting Face Wipes
Washing your face before bed or after spin can be a pain. We get that. But letting makeup, dirt, and bacteria linger can cause breakouts, dullness, and even wrinkles over time. Which brings me to face-cleansing wipes: A single towelette removes a day’s worth of grime, and you won’t need to haul yourself to the sink. Try Neutrogena Makeup Remover Cleansing Towelettes, AVEENO ULTRA-CALMING MAKEUP REMOVING WIPES, and AVEENO POSITIVELY RADIANT MAKEUP REMOVING WIPES. Keep them on your nightstand or in your purse so you actually remember to use them.

8. Smoking Image result for no more cigarette gifs
Please, I beg of you, just quit. On top of a long list of evils, smoking breaks down elastic fibers in the skin (which is why smokers’ complexions look yellow) and revs up the enzyme responsible for breaking down collagen (and that definitely leads to wrinkles), says Francesca Fusco, a dermatologist in New York City. Your skin can bounce back once you quit. “Within two weeks, you see improvements,” she says. “The texture improves; it’s a little smoother. Over time, the brightness comes back.

You can achieve the skin you want! By ditching some of your bad habits and adopting some good ones, you could find yourself waking up to younger, more radiant looking skin!

What skin habits do you want to break? Have you broken any of these already? Tell me in the comments below!


Beauty 911: What Are Your Breakouts Telling You?

In recent weeks, I’ve become fascinated with the Eastern tradition of face mapping. Face mapping, which combines modern dermatology with ancient Chinese medicine, is the idea that there’s a correlation between your internal organs and different zones of your face. 

Face mapping makes a lot of sense when you consider the fact you’re your skin is an organ too (the largest organ in your body, in fact). My aesthetician can also tell when I’ve just been sick or am about to get sick based on the area right above my brows. I don’t know about you, but I find it all very fascinating! Besides just being an interesting topic, educating yourself about face mapping can actually help to clear up your skin. Once you’ve identified what’s causing your acne, it’s easier to prevent it. While some causes are unavoidable (monthly hormone swings, for instance), diet and lifestyle changes can definitely help to clear up your skin.

Without further ado, here are what your breakouts are telling you in five different zones of your face…

1. Forehead. Breakouts across the forehead are often triggered by stress or sleep deprivation. Make sure to log 7 to 9 hours of beauty rest a night to keep your forehead clear.
2. Above the brow. The area above the brow is affected by your immune system. Breakouts here tend to happen right before, after, or during a cold or flu. If you notice a breakout in this zone, slow down for a couple days, drink plenty of water and eat these 10 immune boosting foods.
3. Between brows. Breakouts between the brows can be caused by overindulgence of unhealthy foods or a food allergy. Cutting back on sugar, dairy, rich foods, and alcohol can help clear up skin in this zone.
4. Cheeks. Your cheeks are linked to your respiratory system. Smoking or breathing polluted air can cause breakouts here.
5. Side of chin. The sides of your chin are affected by hormones. Breakouts here occur around the time of your period and happen on one side or another depending on which ovary is ovulating that month.

Let me know what beauty crisis you’d like me to cover in my next Beauty 911 post!

XO, Lee

Primp Tip: Brush, Sponge, or Fingers?

For some of us, putting on makeup is almost second nature. We have our routines down and can even step away from the mirror in 5 minutes flat. But for others, the application process can pose more questions than productivity. When there are so many ways to apply your makeup, it’s easy to get confused on which way is the correct way to go about it. Which brings me to my latest Primp Tip… Today I will be debunking the brush vs. sponge vs. fingertip debacle.

While there are pros and cons to each tool, it all comes down to personal preference. In order to find out which technique works for you, I recommend experimenting to see which applicator you feel most comfortable using. While trial and error is always a good way to determine the winner, below I’ve broken down each applicator and it’s specific benefits. So if you’re still deciding between a brush, sponge or your fingertips, keep reading…

Brush

Using a brush to apply your makeup is a great way to give your skin an airbrushed finish. Brushes are known for their precision and also for their blendability. Whether you’re using powder or cream, brushes are versatile enough to get the job done. Tip: It’s important to start with a small amount of product and build up to your desired look. With a brush you tend to get a more concentrated amount of product and color, so blending it all out is essential.

Sponge

Similar to using a brush, sponges are known for their blended out, flawless finish. For an even distribution of product, wet the sponge before using a liquid foundation. By doing this you should get a sheer and lightweight look that is easily buildable. Like brushes, there are a variety of sponges used for different makeup techniques (highlighting, contouring, etc.). The only thing to be mindful of when using a sponge is that they soak up more product than a brush or your fingertips does.

4fbd15de73d7ce2331ad04fda9c4b588--makeup-tips-makeup-productsFingertips

Last but not least, using your fingers to apply makeup is just as effective as using a brush or sponge. The warmth of your fingertips makes for more blendability—but be careful because you’re going to get more of a concentrated application. For colorful eye shadow and cream blushes, your fingertips will give you the best color payoff. If you’re going to use your fingers, be gentle! Always use a tapping motion with your ring finger and don’t use too much pressure.

While there isn’t a dramatic difference between each technique, the end results should be similar as long as your product is blended into your skin. You never want a harsh line! It ultimately comes down to practice and preference. I find that I use my fingers when I’m in a rush as opposed to a brush or sponge when I want a more done-up look.

So, which method do you prefer?  85367ab070c62321d54dd32c58d13edd

Let me know your thoughts in the comments! 

Click here to find out which tool(s) I prefer

Beauty Note: Why I Switched to a Foundation Brush—and Why I’ll Never Go Back

20161025_brushsoniakashuk2510_2copie

It all started on a routine trip to Target. I can’t help but make a detour through the cosmetics section every time I walk into the store—I swear it’s like a magnet! A small voice in my head convinces me that there’s something new that I need to try. During one of my more recent visits, Target had just remodeled the makeup brush section and I found myself comparing and contrasting every single one. After all, one needed to come home with me and I wanted it to be something I used on a regular basis. That day I became the proud owner of my first Sonia Kashuk foundation brush.

For the past few years I’ve been applying my foundation with a makeup sponge, and for the most part I had no complaints. After all, each application process has its pros and cons. Since I’m the kind of person that likes to test out the latest beauty trends to see what all of the hype is about, my curiosity is what ultimately lead me to the brush aisle at Target that day. I know that using a brush to apply foundation is not a new concept, and I have used makeup brushes before. But it been a while since I used brushes and there have been so many brushes that has been out that I needed to find out has there been a change for myself and I’m so glad I did. Keep scrolling to see why I’ve converted to using makeup brushes…

Why I’m ditching my makeup sponge.

All in all, makeup sponges work great when applying everything from foundation to concealer and even highlighter. After using a damp makeup sponge to apply my foundation for quite some time (I’m talking years), I found myself getting fed up with the lack of consistent coverage it was creating. Did you know that makeup sponges soak up a lot of the product that you’re using? I found that because of this, my makeup was looking blotchy in areas where there was more product and I was running out of foundation faster than I care to admit. Using a makeup sponge was proving to be more wasteful than helpful.

Why I’m sold on foundation brushes.

When it came time to test the makeup sponge against the foundation brush, the results were evident immediately. It cut my application time in half and it left me with polished and airbrushed looking results. The biggest difference for me was how even my skin looked—finally! Foundation brushes give you the option to build up as much coverage as you want, giving you full control of the look you’re wanting to achieve. These were the kind of results I was lacking with a makeup sponge.

After four weeks of using the foundation brush to apply my makeup, I can confidently say that I will not be reverting back to a sponge. If you’ve been curious about what they can do for you, I encourage you to make the switch! Not only will your product last longer, but you’ll be giving yourself an effortless airbrushed look every time you apply foundation. That’s a win win in my book!

Here are a few of my favorite foundation brushes:

What are your thoughts on foundation brushes?

(Let me know your opinion in the comments below!)