Beauty Note: Why I Switched to a Foundation Brush—and Why I’ll Never Go Back

20161025_brushsoniakashuk2510_2copie

It all started on a routine trip to Target. I can’t help but make a detour through the cosmetics section every time I walk into the store—I swear it’s like a magnet! A small voice in my head convinces me that there’s something new that I need to try. During one of my more recent visits, Target had just remodeled the makeup brush section and I found myself comparing and contrasting every single one. After all, one needed to come home with me and I wanted it to be something I used on a regular basis. That day I became the proud owner of my first Sonia Kashuk foundation brush.

For the past few years I’ve been applying my foundation with a makeup sponge, and for the most part I had no complaints. After all, each application process has its pros and cons. Since I’m the kind of person that likes to test out the latest beauty trends to see what all of the hype is about, my curiosity is what ultimately lead me to the brush aisle at Target that day. I know that using a brush to apply foundation is not a new concept, and I have used makeup brushes before. But it been a while since I used brushes and there have been so many brushes that has been out that I needed to find out has there been a change for myself and I’m so glad I did. Keep scrolling to see why I’ve converted to using makeup brushes…

Why I’m ditching my makeup sponge.

All in all, makeup sponges work great when applying everything from foundation to concealer and even highlighter. After using a damp makeup sponge to apply my foundation for quite some time (I’m talking years), I found myself getting fed up with the lack of consistent coverage it was creating. Did you know that makeup sponges soak up a lot of the product that you’re using? I found that because of this, my makeup was looking blotchy in areas where there was more product and I was running out of foundation faster than I care to admit. Using a makeup sponge was proving to be more wasteful than helpful.

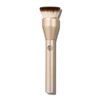
Why I’m sold on foundation brushes.

When it came time to test the makeup sponge against the foundation brush, the results were evident immediately. It cut my application time in half and it left me with polished and airbrushed looking results. The biggest difference for me was how even my skin looked—finally! Foundation brushes give you the option to build up as much coverage as you want, giving you full control of the look you’re wanting to achieve. These were the kind of results I was lacking with a makeup sponge.

After four weeks of using the foundation brush to apply my makeup, I can confidently say that I will not be reverting back to a sponge. If you’ve been curious about what they can do for you, I encourage you to make the switch! Not only will your product last longer, but you’ll be giving yourself an effortless airbrushed look every time you apply foundation. That’s a win win in my book!

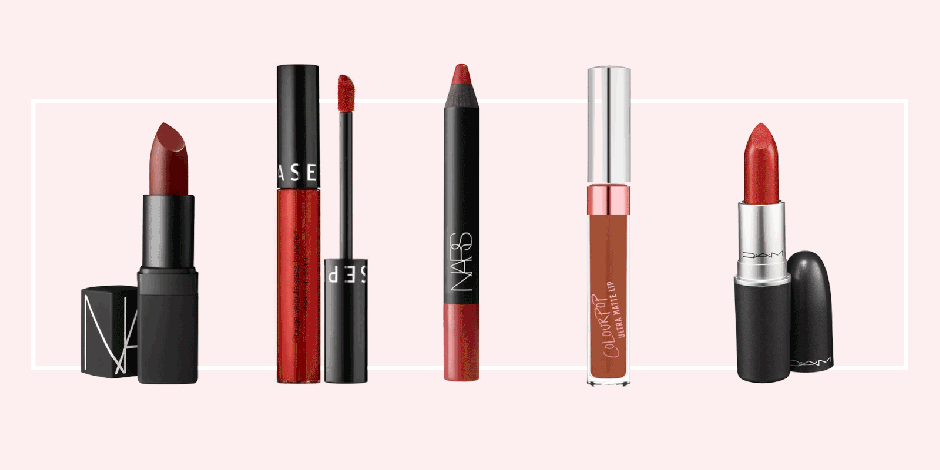
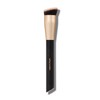
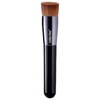
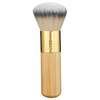
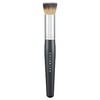
Here are a few of my favorite foundation brushes:

What are your thoughts on foundation brushes?

(Let me know your opinion in the comments below!)


Primp Tip: How to Make Any Lipstick Matte

I have a confession to make… I’m an absolute sucker for the latest beauty trends. After all, we are in the age of YouTube sensations and 1-minute Instagram tutorials. Mastering the art of contour: check, Mastering the art of winged eyeliner: check. Buying all of the matte lipsticks available: major check. I have a lot of lipstick colors in my drawer that don’t fit the matte bill. That doesn’t make them less beautiful, but right now I’m head-over-heels for that nudish brown look. Instead of letting my non-matte lipsticks go to waste, I decided to do a little research on what I could do to incorporate them into the mix. So I thought it would be fitting to address a question I’ve found myself asking a lot lately—is it possible to make an ordinary lipstick matte?

The answer is yes, you can make an ordinary lipstick matte (yay!). All you need is your favorite shade of non-matte lipstick and a few beauty products that you may already have in your makeup drawer. Keep scrolling to find out how you can transform your lipstick into this season’s hottest beauty trend…

lipsticks_giphy

Here’s what you’ll need:

translucent powder
tissue
makeup brush
your favorite non-matte lipstick
corresponding lip liner (optional)

Here’s how to do it:

1. Line your lips with your lip liner pencil. This step will help ensure that your finished look will last through wear and tear throughout the day.

2. Apply your non-matte lipstick on top of your lip liner. If you’re a perfectionist like me, I’ll sometimes line my lips again after I apply lipstick so that my lines are as sharp as possible.

3. Take your tissue and separate the layers so that you have one fine sheet.

4. Lay the single tissue sheet over your lips and, taking your makeup brush, dust your translucent powder over your lips. By placing the tissue between your lips and the makeup brush you are essentially filtering the amount of powder applied to your lips. It’s best to start small and build up so that you can reach your desired texture without over doing it.

5. Remove the tissue and dust the translucent powder directly onto your lips one final time.

Viola! You have now created a rich, matte texture without breaking the bank on new beauty products. I love a good DIY makeup hack, don’t you?


Will you be trying this matte lipstick beauty hack?

Related image

10 Benefits of Warm Water and Lemon in the Morning


Related image

Warm lemon water works all kinds of miracles. I initially started drinking it to aid with weight loss, but have since found numerous benefits that I thought I would share with you all too. There’s really no reason not to be taking advantage of this morning health ritual and everyday detox drink.

INSTRUCTIONS

Squeeze 1/2 lemon (organic if possible) into a cup of lukewarm filtered water, first thing in the morning. Avoid using boiling or ice cold water as it takes longer for your body to digest and uses more energy in the process.

BONUS: try adding freshly grated ginger or a little cayenne for a boost.

THE BENEFITS

1. Aids digestion. It flushes out unwanted materials & toxins from the body. It also helps to relieve symptoms of indigestion, such as heartburn and bloating.

2. Boosts your immune system. Lemons are filled with vitamin C, which helps fight colds. They’re high in potassium which stimulates brain and nerve function.

3. Detoxes your system. It acts as a natural diuretic, releasing toxins at a faster rate as the citric acid maximises enzyme function which stimulates the liver.

4. Balances pH levels. Due to the alkalising properties of lemons, they help remove uric acid in your joints, which is one of the main causes of inflammation.

5. Clears skin. The antioxidants and vitamin C in lemons help decrease wrinkles and blemishes. The alkaline nature also kills some types of bacteria known to cause acne.

6. Aid in weight loss. Lemons are high in pectin fiber, which helps fight hunger cravings.

7. Energizes & enhances your mood. Lemons contain negative charged ions which provides your body with energy when it enters the digestive tract. The smell and scent of lemon can brighten your mood and help clear your mind. Lemon can also help reduce anxiety and depression.

8. Promotes Healing. Ascorbic acid found in abundance in lemons, promotes wound healing, and is an essential nutrient in the maintenance of healthy bones, connective tissue, and cartilage.

9. Freshens breath. It’s also been known to help relieve tooth pain and gingivitis. However, be aware that citric acid can erode tooth enamel. It is best to brush your teeth first.

10. Hydrates Your Lymph System. Warm water and lemon juice supports the immune system by hydrating and replacing fluids lost by your body. When your body is deprived of water, you can definitely feel the side effects, which include: feeling tired, sluggish, decreased immune function, constipation, lack of energy, low/high blood pressure, lack of sleep, lack of mental clarity and feeling stressed, just to name a few.


Related image  Do you drink warm lemon water in the morning?

How do you take your lemons?

5 Summer Beauty Hacks You Need to Know Now

Beauty hacks are probably some of my favorite kind — because who doesn’t love a get-gorgeous pro tip and a time-saving, life-made-easier trick rolled into one? Just in time for summer, I put together some of my favorites to get you going and glowing fast.

Related image

5. Use Blotting Paper
Keep blotting paper handy for the times when your face is threatening to become an oily mess. Use this to soak up the extra oil by gently dabbing the paper on your face, and follow up with compact powder. Voila! Your face is looking fabulous again.

2f13477f1314136a3f90501157e9c3b9

4. Spray On Facial Mist
When it feels like your face is melting, and the sun is being rather harsh, a facial mist could save the day. Spray generously for some instant freshness!

pixi-multimist

3. Prevent Those Sunglass Marks
We love our sunnies, but they are notorious for leaving unflattering marks around the nose. Fret not; apply compact powder on the nose pads of the sunglasses, and a little loose powder on the nose… There! An instant fix. Go on, try it. You can thank me later.

image 2

2. Make Your Perfume Last Longer
If 10 minutes in the sun has your deodorant giving up, the struggle to smell good gets real. Take some Vaseline, and apply it on your pulse points. Now, spray perfume on these areas to smell good all day.

Image result for Make Your Perfume Last Longer cartoon

1. Ouai Dry Shampoo Foam  Image result for using Ouai Dry Shampoo Foam gifs cartoon
I don’t know about you but in the summer months my hair could seriously do with a daily shampoo what with the grease and the sweat…I know, nice. But if you don’t want to dry your hair out by over-washing, but also hate the feel of regular dry shampoo in your hair, this foam will become your new BFF. 

Rather than filling your hair with powder to soak up excess oil, this foam absorbs oil, product build up and other impurities, leaving behind zero residue. Massage it into your roots just like you would a hair mousse and it will leave you with squeaky clean, dry hair.