HOW TO COMBINE LIQUID AND POWDER HIGHLIGHTER MAKEUP FOR A BLINDING DREAM

In the makeup world, foundation and bronzer have always gotten most of the glory. They’re go-to staples that people turn to for coverage and color. However, today we want to talk about highlighter, which has been stealing the spotlight lately.

In our opinion, highlighters are just as important as the two aforementioned makeup products because they deliver luminosity and brightening qualities that can completely transform your complexion. To show our devotion to highlighters everywhere, we’re breaking down the basics of both liquid and powder illuminators so you never have to question their roles in your life again.

A Tale of Two Highlighters

First and foremost, let’s be clear that liquid and powder highlighters are not the same, and therefore serve different purposes. Liquid illuminators are typically more pigmented than powder formulas and should be used to accentuate or brighten specific spots on the face. You know the strobing craze that’s been hitting the beauty scene? Liquid illuminators are perfect for that!

Powder illuminators typically have softer application and deliver more of a sheer, shimmery finish. These types of products work well over foundation or blush to lend your skin that all-over dewy look.

Liquid Highlighter

When using a liquid highlighter, make sure you use a blending sponge or finger to work it into your skin. After applying foundation — before you reach for concealer — dot the liquid along the areas of the face that are naturally hit by the sun (the top of cheekbones, bridge of nose, brow bone, Cupid’s bow, etc.).

Make sure to not go overboard and apply thick streaks of the formula, as it will look too drastic. The key is for the liquid to blend into skin naturally and subtly.

If you’ve got a bad case of under-eye bags or dark circles, simply dot highlighter under the eye area and in the inner corners, blending downward toward the lower cheekbone. This will brighten your eyes and make you look more awake (even if you’re running on a couple hours of sleep).

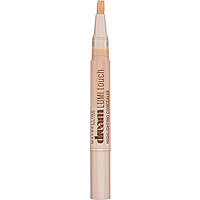
Product Recommendations: NYX Born to Glow Liquid IlluminatorMaybelline Dream Lumi Touch Highlighting ConcelearYSL Touche Éclat

Powder Highlighter

When using a powder-based illuminator, use either a medium-sized fluffy powder brush or an angled powder brush for application. After applying foundation, dust highlighter on the cheeks, chin, nose and top of forehead. Because the application is less localized than that of liquid highlighter, the result is more of an all-over dewy glow, as opposed to a contoured one. You can also swipe a little along the top of the brows to accentuate their shape!

Product Recommendations: L’Oréal True Match Lumi Powder Glow IlluminatorMaybelline Mineral Power IlluminatorNYX Illuminator

Mixing Liquid and Powder Highlighter

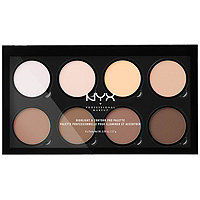
This is a practice for the more maximalist makeup guru out there, but minimalist beauty lovers, hear us out. Start by applying a liquid illuminator or drops — our current favorite certainly has to be the Lancôme Teint Idole Custom Highlighting Drops in Rose Glow — to your cheekbones, down your nose and on your cupids bow. One to two drops is all you’ll need for this, and blend it out with your fingers or use a stippling brush. Next, lightly apply the center shades of Lancôme Bronze & Glow Palette in It’s Time To Glow overtop with a fan brush for the silkiest, sparkliest and softest touch. Your highlight will be officially blinding and beautiful, garnering double takes from far and wide (insert smirky emoji).

SHOP THIS STORY

YES, YES, YES! AN ACTIVE SEX LIFE IS THE KEY TO MAKING YOUR SKIN GLOW

I’ve always wondered how orgasms affect your skin. I mean, everyone knows that sex rivals the treadmill when it comes to cardio. And then there’s that whole post-coital glow that people talk about, which I swear is real. So with those two factors combined, one would think that there’s a scientific reason behind having good skin after an orgasm. Right?

After some research, I’ve stumbled upon some good news: orgasms will make you look younger and glowier! Seriously, after-sex skin is a real thing, and by that we mean super glowy, literally lit-from-within skin. It sounds too good to be true, and you’re probably thinking, well that glow’s not gonna last long, but here’s where it gets really interesting; there are tons of studies that show having more orgasms will actually make you look younger while the short term benefits include decreasing stress, helping with sleep, and improving your skin. Even if you’re still not convinced, it’s worth a try, right?!

The thing is, having an orgasm as often as you can could be the cheapest wellness hack you discover this year. Oh, and for the record, Medical News describes an orgasm as “a powerful feeling of physical pleasure and sensation, which includes a discharge of accumulated erotic tension. Having a successful orgasm has numerous health benefits like your body releases serotonin, dopamine, oxytocin, and prolactin,” says Shirley Chi, MD, a California-based dermatologist. “What that cocktail does is basically reduce the effects of the stress hormone—cortisol—that’s in your body and creates a deep sense of relaxation.” Here’s all the proof and all the ways orgasms are going to make you look and feel ten times better.

Orgasms Will Make You Look Younger

One study examined 3,500 people and found that women who had three orgasms a week looked, on average, 10 years younger than the women who only had two! Another study, which came to the same conclusion, revealed the reasons behind why having orgasms can make you look so much younger:

Endorphins: The release of the ‘feel good’ chemical, endorphins, naturally acts as a painkiller and helps to reduce anxiety, thereby helping you sleep better – and sleep is the key to health!

Human growth hormones: Orgasms cause human growth hormones to release, which helps improve the skin’s elasticity.

Another study by the University of Michigan showed that orgasms increase estrogen levels, which also has anti-aging benefits: it maintains collagen, which we all know is a protein that promotes more youthful skin. Higher estrogen levels also help skin thickness and elasticity, and may even help lock in the skin’s moisture, thereby keeping the skin plumper and more resistant to wrinkles.

Orgasms Will Make You Feel Better

Okay, so that’s obvious, but it will make you feel better in the unobvious ways! When you orgasm, your body releases what people refer to as the love hormone, aka oxytocin. Oxytocin helps to decrease stress by lowering cortisol levels and it also helps release tension by stimulating feelings of warmth and relaxation.

All this oxytocin and de-stressing leads to better sleep, decreased inflammation in the body – less inflammation means less acne and puffiness – while the lower levels of cortisol improve collagen production, helping the skin to heal better.

Orgasms Will Make Your Skin Glow

After an orgasm, the increased rate of blood flowing through your body coupled with blood-vessel dilation means your system is flooded with oxygen, which boosts collagen production that stimulates and repairs the skin. All that increased blood flow also gives your cheeks what’s referred to as an ‘orgasm flush’ – hence the name behind NARS’ iconic Orgasm Blush – as your body pushes all the blood to your skin to make your face look flushed.

Finally, increased blood flow means more water is transferred to your skin (your largest organ), and we all know hydration is essential for a glowy complexion.

So, other than the initial glowier appearance that you’ll get after an orgasm, the results of orgasm often are actually much longer lasting than you’d think – not just for your skin and body, but for your mental well-being too! And the best thing about orgasms is they’re completely free, and you don’t need anyone else to help you!

This of course doesn’t mean you should ditch your skin-care regimen for a more actively-seeking-orgasm life all in order to get a glow. “Sex and masturbation aren’t the answer to acne, but they’re definitely not bad for the skin,” says Dr. Chi. Sounds like doctors orders to me. If you don’t have time to orgasm you can always fake it – no, not like that! – with makeup!

For the ultimate glowy skin, check out this after-sex skin makeup look that Huda Beauty shared:

The Celebrity DIY Facial That Will Cost You Less Than $1

The facial in question is an ice bath  yes, we’re serious! We’ve got to admit we were a little shocked when we heard just how many celebs do this before a big event. But seeing as it’s definitely the cheapest of all the celebrity facial trends, we thought we should look into it. And let us tell you the benefits are MAJOR. Just take a look at the Victoria’s Secret Angels to see the results, because word on the street is they all gave themselves an ice bath before the big show. This slightly crazy facial gives your skin an instant glow, shrinks the size of your pores, and tones your skin. Honestly, the next time you’re getting ready for an event and you want to look snatched AF, do this before you start your skin and beauty prep.

So how exactly does it work?

All you have to do is fill a large bowl with ice and then add enough water so that all of the cubes are submerged. Then scoop the water into your hands and splash it onto your face for 30 seconds. We swear this feels harsher on your hands than it does on your face  it’s actually SO refreshing. The cool water constricts the skin’s circulation by reducing the natural heat in the skin, which instantly tightens your pores, reduces any puffiness, and revitalizes your skin.  It’ll also appear to smooth fine lines and wrinkles while making your skin look more firm. But we wouldn’t recommend giving yourself an ice bath every day (tempting, we know!), as it’s such a powerful treatment it could actually damage the capillaries if it’s done too frequently. We’d suggest it just for special occasions and events, or if you’re doing a runway show!

Ice Cube DIY

For those of you not quite brave enough to give yourself an ice facial just yet, then this ice cube DIY is an ideal alternative. All you have to do whisk together 3 tablespoons of honey and 3 tablespoons of olive oil, and then pour the mixture into an ice cube tray and freeze overnight. In the morning, massage the ice cubes onto your face until they dissolve and then wash your face with cool water  this will give intense hydration, toning, and nourishment.

Another super easy ice cube DIY is to simply add a drop of your favorite essential oil into each ice cube before you freeze it. You can then use these ice cubes individually or as part of your larger ice bath facial.

Let us know if you’re brave enough to try it in the comments below!

HOW TO DIY THE PERFECT AT-HOME PEDICURE IN 10 EASY STEPS

As tempting as it is to dish out money for a salon pedicure (with the soaking, foot scrubbing, massage — the works) it’s not always doable, especially when you already splurged on makeup in the beginning of the week and are left to question your self-control. So if you currently find yourself in a similar position and are in desperate need of a pedi, we’re here to prove that it’s possible to achieve salon-quality results pedicure in the comfort of your own home — for a lot less money.

STEP 1: Let Your Nail Polish Remover Do Its Thing

Completely remove any nail polish that’s still on your toenails using nail polish remover and a cotton pad. If you don’t have any leftover polish, you should still run nail polish remover over your nail to remove any excess oil.

Primp Tip: If you’re left with any weird stains or a yellow tinge (you’ll usually see this after removing darker colors, like red or black), rub cuticle oil over the surface of your nails to lighten any residue.

STEP 2: Soak Your Feet Like You’re at the Spa

Okay, before you start soaking, your first job—and this is important—is to go around your house and gather every candle you can find. Oh, and get yourself a glass of wine while you’re at it. The trick to making an at-home pedicure feel like a spa experience instead of, you know, rubbing your own feet in your too-small-for-comfort apartment is setting the ~mood~ at your makeshift pedicure station.

Once the ambiance is right, you’re ready to soak your feet—which softens tough skin and cuticles (and is downright relaxing). Lennon suggests using a basin (aka a really big bowl) if you have one, but your bathtub is also a sound option. Fill ’er up with warm water and add a liberal scoop of skin-soothing bath salts (Lennon recommends Côte Re-Treat Himalayan Pink Salt Soak, but you can also try my favorite Kneipp Mineral Bath Salts or just use a cup of kosher salt). Let your feet soak for a few minutes before moving to the next step. This is a great opportunity to multitask and try out that new face mask.

STEP 3: Get Rid of Dead Skin

After drying off your feet, use a foot file to remove any dead skin from callused (hard) areas. Parts to pay attention to are the balls of your feet, the sides of your feet and your heels. Scrape these areas until they feel smooth, but don’t overdo it. Try a pumice stone or foot file to gently smooth the skin. Then, switch your feet and repeat.

STEP 4: File and Shape Your Nails

Use a nail trimmer to achieve the length and shape you want (we recommend trimming nails straight across). Follow by filing the corners of your nails and buffing to make them smooth. According to Hadley, a big mistake people make at this point in the process is cutting their cuticles. “Trimming or cutting cuticles during a manicure or pedicure is purely cosmetic and sometimes it doesn’t benefit the nail in any way,” she explains. “The cuticle is a barrier to protect your surrounding skin and protect against infection.”

STEP 5: Apply Cuticle Oil

Apply cuticle oil to the base of your nail. Cuticle oil doesn’t just keep your feet soft and moisturized, but it also keeps your polish from chipping.

STEP 6: Moisturize

Take both feet out of the tub and dry them off with a towel. With a foot cream or body lotion, begin massaging your toes, feet, and calves until, well, you wanna stop. Moisturize your feet with an unscented lotion. “Scented lotions with synthetic fragrances can cause your nail polish to crack.”

STEP 7: Prep Your Toes

Use toe separators (you can buy a 12-pack for cheap online) to make painting your toes easier and avoid making a mess.

If you don’t have toe separators, Lennon suggests tearing off a piece of paper towel, rolling or twisting it into a rope, and weaving it through your toes to prevent the polish from smudging.

STEP 8: Apply Your Base Coat

Then, apply a thin layer of base coat on each nail. Follow with two thin coats of your color of choice, letting the paint dry for a few minutes between each coat.

STEP 9: Finally, Do the Damn Thing

Paint on your base coat and wait at least two minutes to ensure it’s dry. Don’t forget your base coat because it gives your nail polish something to sink into besides your actual nails.

STEP 10: Finish With a Quick-Drying Top Coat

Finish with a top coat so your nails maintain high shine and luster. Because nail polish takes about 12 hours to harden.

Primp Tip: Recommends sticking your finished toenails into cold water for a few minutes to make your nail polish harden faster and help it solidify.

Tell me: Do you do your own nails?