Dry Hand Tips

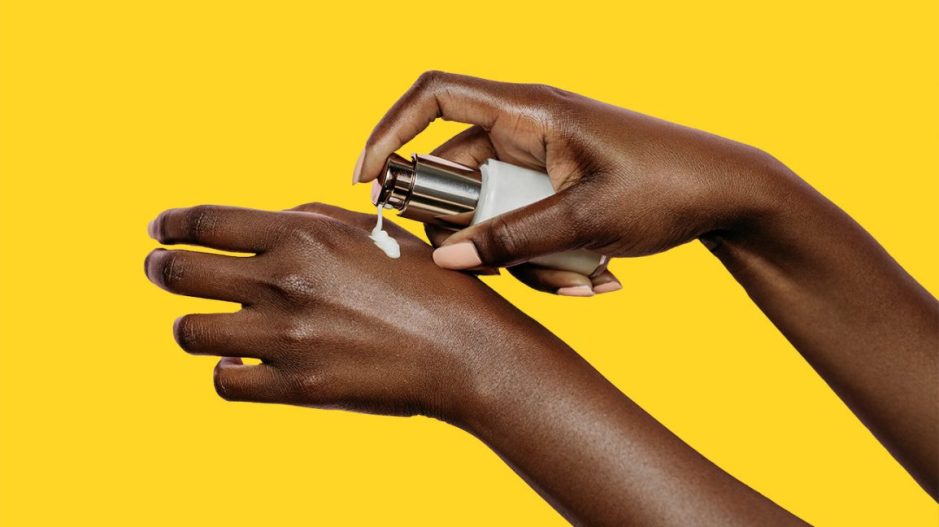
If you’re constantly washing your hands and using sanitizer around the clock, your hands are probably dry AF. While it’s important to wash your hands as often as possible, it can wreak havoc on your skin. Your skin is your body’s first defense against bacteria, so you need to ensure you keep your hands hydrated. Cracked, dry hands and damaged skin means a weakened skin barrier, which makes it easier for germs to enter.

Fortunately, we’ve got some easy solutions so you can say goodbye to dry hands, for good!

Find a Nourishing Hand Wash

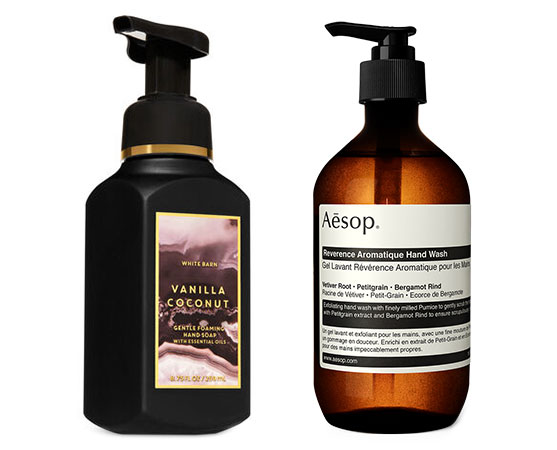
Many celebrity dermatologists recommends avoiding bars of soap as they can seriously dry out your skin. They explains, β€œSoaps have a special molecule that finds oils and strips them from the skin. We need our natural oils for retaining moisture.” Therefore, trade-in your traditional soaps for a nourishing hand wash instead. We’re currently using the Bath & Body Works Gentle Foaming Hand Soaps, $8.50, as they’re infused with essential oils, as well as vitamin E to nourish and clean the skin. Plus, they foam into a rich lather that smells so good – it makes washing your hands feel luxurious! Another hydrating soap that’s a little more boujee is the Aesop Resurrection Aromatique Hand Wash, $52. The formula boasts orange, rosemary, and lavender essential oils to cleanse and restore the skin.

If you already have a liquid handwash, you can try adding in a tablespoon of coconut, olive or grapeseed oil, which will help to lock in moisture while you wash. After you wash your hands, try to follow with a moisturizer almost immediately.

Posts You’ll Love:

Use Oils

If you don’t have any hand creams use oil instead and massage it into your hands. Our favorite oil to use is extra virgin olive oil, a recommendation we got from Julia Roberts. It’s super-hydrating and packed with vitamins, antioxidants, and fatty acids that help hydrate while repairing damaged skin. It’s also suitable for all skin types and is anti-microbial. If you don’t have olive oil in your cabinet, you can use coconut oil (our go-to DIY oil), or any other oil.

If your hands are super dry, create a DIY hand mask by massaging oil into your hands, then put on a pair of plastic gloves. If you don’t have gloves, you can wrap your hands in clingwrap. Try to leave them covered for up to an hour for super soft, hydrated skin.

Apply a Rich Cream or Balm

As you can probably guess, applying hand cream RN is essential. In fact, we’ve gotten into the routine of applying lotion immediately after we use hand sanitizer. You can also keep hand cream next to your sink for easy access after hand washing.

Look for a hand moisturizer that contains rich, hydrating ingredients like shea butter and oils like apricot and avocado oil, as they’re packed with natural goodness that will help seal in moisture and repair the skin. Here are three of our faves:

soft hands

Vaseline Intensive Care Lotion, $16.26: While this may not be the most luxe hand cream on our list, it’s a household staple. The fast-absorbing formula is clinically proven to heal dry skin within five days. Plus, it doesn’t leave your skin feeling greasy or tacky.

L’Occitaine Honey Harvest Hand Cream, $29: This hand cream leaves our skin feeling so smooth! The rich combination of shea butter and honey hydrates while strengthening the skin, helping prevent future moisture loss.

Kiehl’s Ultimate Strength Hand Salve, $28: This cream is infused with sesame oil, avocado oil, and olive, which are all packed with essential fatty acids to nourish and repair dry skin.

Check out more of our all-time fave hand creams here.

What’s your fave hand cream? Let us know in the comments below.

10 EYESHADOW TIPS EVERYONE SHOULD KNOW

Your eyes are arguably one of your strongest assets. They are the so-called windows to your soul after all, which is all the more reason to brush up on your eyeshadow skills. But applying eyeshadow like a pro can be tricky. What are all those different sections of a palette for? What type of brush should you use? Let’s go back to the basics. Ahead, find our ten golden rules for applying eyeshadow and you’ll be golden, too.

STEP #1: Always Use Primer 

An eyeshadow primer creates a clean canvas for you to work with, and it acts as a barrier between your eyeshadow and the natural oils in your skin. That way, your makeup stays put so you can keep touch-ups to a minimum. Try a formula like Urban Decay Eyeshadow Potion Primer.

STEP #2: Enhance Your Natural Eye Color 

You want to choose an eyeshadow shade that accentuates your natural eye color. Finding colors that best complement your eyes takes some experimenting, but here’s a good place to start:

Blue Eyes: Shadows with bronze or peachy tones help blue eyes pop. Slate gray is another great option.

Green Eyes:A plum-colored shadow looks very flattering if you have green or hazel eyes. Rusty shades are also gorgeous.

Brown Eyes:If you’re a brown-eyed girl like me, we’re lucky because most shades look great on us. But gold or purple hues are especially flattering

STEP #3: Know Your Eye Shape 

Do you have deep-set eyes? Close-set? Hooded? Determining the shape of your eye helps you decide which shading technique is right for your specific features and plays up your natural beauty.

STEP #4: Decode Your Palette

You might be tempted to open an eyeshadow palette and just have at it, but it’s important to know which sections correspond to each part of your eye. Trust us, there’s a method to all this palette madness! There’s a variety of palettes out there, but here’s a general breakdown of your basic eyeshadow quad palette (the NYX Professional Makeup Ultimate Eyeshadow Palette in Warm Neutrals is a great one to start with). 

Lightest color: This is your base color. Apply this shade from your upper lash line all the way up to right beneath your brow. You can also use this color in the inner corner of your eye to add a bit of brightness.

Second lightest: This is your lid color, as it’s slightly darker than the base. Brush this over your lid from your upper lash line to your crease.

Second darkest: This is applied to the crease for a contouring effect. This should go over the area where your brow bone meets your lid to create definition.

Darkest color: Finally, the liner. Using an angled brush, apply it to your upper lash line (and lower lash line if you want a bold boost), making sure to brush where the root of your lashes meets your lid so there’s no visible gap.

STEP #5: Blend, Blend, Blend

We can’t stress this one enough! Blending your edges can be the difference between your eyeshadow looking flawless and looking like … well, a hot mess. Don’t smear. Use a light touch and gently sweep your brush along your lid, blending harsh lines. To blend like a pro, you need the right brushes, which brings us to step #6.

STEP #6: Invest in the Right Brushes

There are so many eyeshadow brushes out there in every shape and size, it can get confusing. Here are the three most important ones you should own:

Basic eyeshadow brush:The bristles are flat and stiff, and you use this for all-over color.

Blending brush:The bristles are soft and fluffier for seamless blending.

Angled eyeshadow brush:This is a precision brush that is perfect for lining your eyes.

STEP #7: Take Care of Your Tools

Cleaning your eyeshadow brushes is probably at the bottom of your to-do list, but it’s really important. We’re talking about your eyes here, so cleanliness is key. Run your brush under lukewarm water and then pour a nickel-sized amount of baby shampoo into your hand. Swirl the brush in the shampoo, rinse well and pat dry with a clean cloth.

STEP #8: Choose Your Formula Wisely

Pressed eyeshadows are your basic, most common formula. They’re a great, mess-free option. Cream shadows are perfect if you want a dewy sheen, but they can crease easily β€” especially if you have oily lids. Loose shadows usually come in a small pot, and while you’ll feel like a professional makeup artist using them, they are definitely the messiest of the three.

STEP # 9: Let a Bold Eye Shine 

A smoky eyeshadow looks gorgeous on its own, but once you add a dramatic lip into the mix, the two can overwhelm each other. Don’t be afraid to go bold, but just make sure your overall look has balance.

STEP 10: Keep it All in Place With a Setting Spray 

Get the most mileage out of your makeup by using a setting spray as your final step. Hold the bottle at arm’s length from your face and spritz away. We love the Urban Decay All Nighter Ultra Matte Setting Spray.

Read More:

HOW TO APPLY FAKE EYELASHES, ACCORDING TO A LASH PRO

If there’s one makeup skill that can make even the most veteran beauty editor quake, it’s applying fake eyelashes. It’s not everyday we decide to break these babies out, but when we do, it’s usually for a special occasion, so we need them to look as natural as possible. Think of them as the cherry on top of an ice cream sundae.

We don’t know exactly where it all goes wrong, but somewhere between adding the glue and placing the faux lash strip on our eye, things tend to get a little messy. To help us master how to apply fake eyelashes once and for all, we tapped celebrity makeup artist Carolina Gonzalez. Keep reading to find out all her false lash tips and tricks.

STEP 1: Apply Mascara

The first step to applying fake lashes doesn’t actually involve any falsies. β€œI like to start with a light coat of mascara,” says Gonzalez. This helps the lash strip blend with your real lashes better. She calls it β€œcamouflage” for falsies. One of our favorites is the Maybelline New York Falsies Lash Lift Mascara.

how-to-apply-fake-eyelashes

STEP 2: Fit the Strip to Your Eye

β€œIf you’re using a strip, you want to fit them first, then trim if need be,” explains Gonzalez. To properly trim a fake lash strip, you want to always cut excess off at the outer corners. Try the DodoLashes D328 3D styles (apply code: BEAUTYLEEBAR for money off) or the Lily Lashes for a subtle look.

STEP 3: Glue

Once the eyelashes are the proper size, it’s time to apply the glue. You can either brush a light coating of glue directly onto the lash strip or apply a dab of glue to the back of your hand and run the strip through it. No matter which method you choose, just be sure you don’t glob on too much product. Lightly blow on the glue until it becomes less wet and more tacky, then you’re ready to apply. Gonzalez’s favorite glue is the KISS Lash Couture Strip Lash Adhesive in Black

how-to-apply-fake-eyelashes

STEP 4: Apply Your Lashes

Now time for the tricky part β€” application. β€œStaring downward into a mirror, place the lashes and push with [your] fingers as close to the root of your lash,” says Gonzalez. Looking down is the key here; it will help you get the fake lash strip as close to your real lash line as possible. 

HOW TO MAKE FAKE EYELASHES LOOK REAL 

Let’s be honest, the ultimate goal here is to make our fake lashes look like the real deal β€” right? To do so, Gonzalez recommends applying your fake lashes after you do the rest of your eye makeup. β€œIf done before, eyeshadow tends to fall onto the tops of the lashes,” she explains. 

Another hack: Opt for individual lashes instead of a strip. It may seem like more work, but for truly natural-looking lashes, individually placed fake lashes mesh better with your real ones. Just be sure to mix in different lengths β€” small medium and long β€” to help them blend nicely. Try the KISS Ever Ez Trio Lash to get this look.

how-to-apply-fake-eyelashes

Gonzalez loves one of KISS’ newest products, Falscara, to achieve I woke up like this lashes. β€œThey are perfectly wispy and instead of applying above the lash, you apply underneath, which is why you also can’t detect the lash weft,” she says. β€œThey are great for those of us who love that lash extension look.”

HOW TO REMOVE FAKE LASHES FOR MINIMAL DAMAGE

While peeling away fake eyelashes can be very satisfying, taking them off the wrong way can pull at your real lashes. To avoid any tugging in this sensitive area, reach for a makeup remover. β€œI like to use an oil-based remover, paying close attention to the roots. They will literally slide off.”

HUDA BEAUTY FALSE LASHES TUTORIAL:

How To Apply False Lashes – For Beginners:

If you’re still struggling – we feel your pain – then try cutting the strip into three pieces. We know this sounds weird, but it will be SO easy to apply the tiny blocks of lashes individually – trust us, it will revolutionize your lash game. Once you’ve trimmed the lash to the right length, cut it evenly into three pieces. Then, start to apply the pieces, starting from the outside of your eye, working your way in.

How to apply false lashes

What we love about this technique is that because the pieces are separate, they fit the shape of your eye really comfortably, and you don’t get the corners pinging off halfway through the day! This way of applying lashes is so perfect that Huda Beauty herself created a lash inspired by the technique, the Huda Beauty Eazy Lash – Harmony, $18.

How To Choose Lashes To Suit Your Eye Shape

The beauty of false lashes is that they can open up your eyes, alter the shape, and make them look bigger and sexier. But, if you choose the wrong pair of lashes, they can do the complete opposite. Depending on the shape of your eye, whether it’s almond, round, hooded, deep-set or monolid, the lash style needs to change. So, while almond-shaped eyes can get away with almost any lashes and deep-set eyes can go extra glam, round eyes will look even more sultry with a whispy lash that has more drama at the outer lash, and hooded lids need to go a little smaller. Check out Huda Beauty full guide on theirΒ fave lashes to suit every eye shape here.

How To Easily Clean False Lashes

False lashes can be expensive, but spending money on quality lashes is totally worth it and cost-effective in the long run if you know how to clean them properly. Lashes are super delicate, so the most important thing to remember is that you need to be gentle with them. Whenever you’re cleaning them, always hold them firmly at the base of the lashes so that the lashes aren’t pulled from the band. Check out this video to see how easy Huda Beauty lash cleaning method is:

Storing the lashes back in the original package is the best way to keep your falsies clean and safe. If you attach them firmly to the band and press them down this will helpΒ them to stay curled.

How To Safely Remove False Lashes

Removing false lashes can be dangerous – if you’ve ever caught your own eyelashes in the process, you’ll know the pain is real! The trick is to soak a cotton pad with your weapon of choice (micellar water, eye-makeup remover, or cleansing oil) and let it sit on your eye for at least 20 seconds to loosen and dissolve the glue. Then gently peel away the lash with your fingers. If the lash still isn’t easy to remove, soak another cotton pad in solution and let it sit on your eye for longer and then try again. Et voila! You’re lash-free with your natural lashes still intact!

Let us know if you guys have any more questions about false lashes in the comments below.

Ways to Make Your FACE LOOK MORE DEFINED

We’ve all experienced it. We apply that finishing swipe of subtle highlighter and feel a quick flash of confidence before stepping out … just to be tagged in a photo later that feels like someone cruelly photoshopped in an extra chin. Captured our worst angle. Some ominous shadows. Some poor light. Hide from profile immediately.

While the camera may not always capture your true essence, there are ways to combatΒ puffinessΒ and tricks of the makeup trade to make your face look sculpted without undergoing the knife or needle.

Play with Bronzer

If going full contour on the daily isn’t your thing, we hear you. But a little strategic application of the right blush tones in the right place can make a big difference. Use aΒ bronzerΒ or a blush with more brown tones. Red blush, especially applied to the apples of your cheeks, can round out the face in a child- or doll-like way. Keep the color just under the cheekbone, and swipe out to the middle of the ear and blend. This creates a more chiseled appearance, as well as adds depth to your look. You can even apply a light layer of bronzer just under the jawline to create the illusion of a shadow, aka a little more chin definition if that’s your worry zone.

Go for More Angular Brows

A higher arch can give the shape of your face a slimmer, more elongated look. Natural brows are very in, but try playing around with the arches in how you pencil them in and brush them up. You don’t necessarily need to go for shock or surprise with the final finish, but the shape of your brows has the power to drastically change your look.

Use Liner Only on the Top Lash Line

Eyes that pop will slim down the rest of your face, so go for a liner applied only on the top lash line (on the bottom lash line will make your eyes appear smaller or closer together). Going for a feline eye and angling up for a more dramatic effect can also elongate the line of your cheekbones, especially if you pair this trick with our bronzer suggestion.

Always Highlight

You don’t need to blind anyone with an ultra-statement reflective highlight, but a soft, dewy look will go a long way when applied to your upper cheekbones and brow bones. It will deepen the use of bronzer or blush so that you can use less with a more architectural effect.

Try Facial Massage

Have you ever noticed that after a great facial, you look more chiseled and awake? Your eyelids are perky, your cheekbones poppin’. It’s not just the amazing treatments, potions, and balms, but more about how they are applied. Massage not only helps your quality products penetrate deeper so that you get true bang for your buck, but it brings blood to the surface and softens up tension in the face so that important muscles can do their thing and let your natural bone structure shine.

While it won’t be exactly the same, you can do aΒ version of this at home. Make sure to β€œlube up” with your favorite serum, followed by an oil or emollient moisturizer. Use your fingers in an almost pinching position to glide up and down your jaw, your cheekbones, and your eye sockets. Don’t be afraid to be rigorous, but always be more gentle around your eye area. If 30 seconds is all you have, that’s fine. But a longer session while you’re watching your favorite show or even in bed after lights out will have you waking up looking rejuvenated.

Use Facial Tools

Stone instruments like jade rollers andΒ gua shaΒ have had some serious fame recently, but not without good reason. Firstly, they are not newβ€”they’ve been used for ages in Eastern beauty and wellness practices. They are usually made with a beautiful and energetically charged stone such as rose quartz or jade, which retains a cooler temperature even after several passes on our warm skin, so they are fabulous for depuffing.

They are also great for increasing circulation similarly to facial massage, because they also massage and bring blood and nutrients to the surface of the skin. However, they are instrumental in assisting with depuffing because they help promote lymphatic drainage, so stagnant water retention doesn’t hang out along your jawline, cheeks, and under-eyes.

Reduce Your Sugar and Salt Intake

Excess sugar and salt will promote water retention and bloat, which isn’t just bad news for your waistline. While massage and tools can help combat the aftermath of said decisions, getting ahead of them when you can is a safe bet. Making sure you stay hydrated and supplement with minerals will bring a plumpness to your skin sans the bloat, so don’t slip on your hydration gameβ€”always be sipping.