Raising Brows: Wax, Thread, or Tweeze?

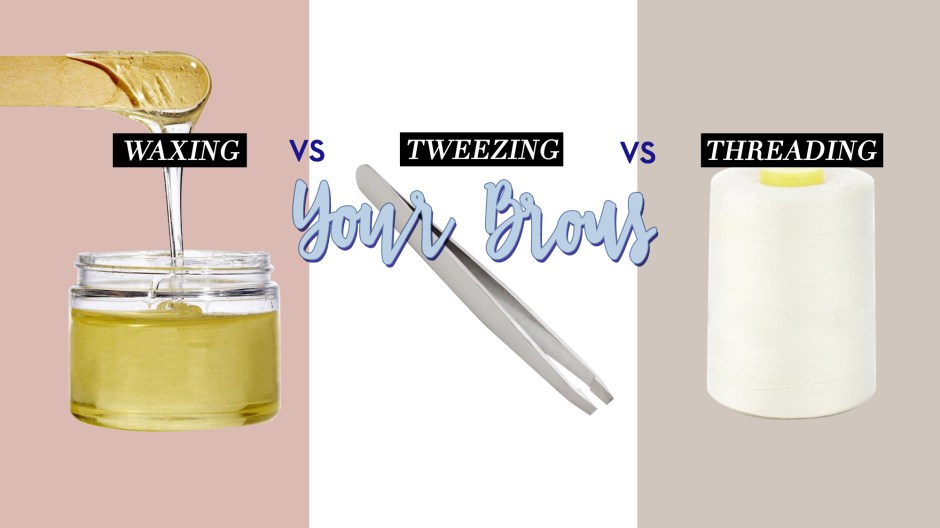
Eyebrows are one of the most important features that you can control on your face. With that being said, proper upkeep is essential. Many people ask me how I maintain my brows and which method I prefer: waxing, threading, or tweezing. All of these are great options and some techniques work better for some and not others. To simplify your life, I’ve put together the following quickie guide to help you decipher which means of brow grooming is best for you…

If you have sensitive skin…

Thread! Threading uses a string to remove hair and is a great option for those of you with delicate skin (or even Rosacea). While waxing tugs at the skin, threading barely has any contact with your skin so it doesn’t lead to irritation. Additionally, threading doesn’t remove the top layer of skin like waxing does so your makeup will stick to your skin properly and it won’t lead to irritation if you’re using a topical prescription cream either.

If you have coarse hair…

Wax! If you have thicker hair that grows back quickly, waxing is definitely the best option for you. Not only do most people see thinner, softer regrowth, they can also go longer in between waxes since the results are fairly long lasting. There are a few drawbacks though: 1. It can be expensive, 2. It can irritate skin (but the irritation typically goes away after a few hours), 3. It can remove tiny (virtually invisible) hairs on your face that help makeup stay in place.

If you don’t want to break the bank…

Tweeze! Not only does tweezing give you a lot more control, it’s also the most inexpensive way to maintain your brows. The most important thing to remember when plucking is to exercise restraint. Yes, you may want to pluck regrowth everyday, but be careful not to take it too far.

At the end of the day, the best recommendation I can make to you is to experiment with all three methods. Everyone’s body reacts differently to things so it’s important to see what works best for you. You may have coarse hair and find that you love the results threading yields. Or you may prefer waxing… Personally, I would love to wax my brows, but when I do I tend to breakout and get red around that area. Plus, the pain is too much for me. My go-to options are tweezing or threading. But like it said, road test a few methods and see what you like best.

Which method do you prefer and why?

XO Lee

Beauty School: Brush Guide

There is a bevy of brushes out there, but do you really need seven different eye shadow brushes? Unless you’re Pat McGrath backstage at Paris Fashion Week, probably not. Quality makeup brushes can be expensive so it’s important to know what you need. One distinction to note is the difference between synthetic and natural bristles. Natural bristles hold and distribute pigment evenly. Opt for natural bristle brushes when applying anything powdered. Liquids will soak into natural bristles and cause them to clog or degrade. So reach for synthetic bristles when applying foundation or any cream formulas.

Now that you’ve mastered the makeup brush basics, I recommend you stock your beauty arsenal with these essential brushes…

Foundation: A synthetic brush. Can also be used for applying cream blush.
Concealer: A narrow, synthetic brush with a slightly tapered edge.
Powder: A big, soft natural-fiber brush.
Contouring: A soft brush with a flat, angled edge. Also used for bronzing.
Blush: A soft medium-full round brush. Natural fiber is best.
Eye Shadow: A tapered, flat brush that is good for blending.
Fan Brush: A light brush that is great for highlighter. It’s also good for brushing away loose eye shadow.
Eyeliner: A narrow, angled brush for applying gel liner or shadow as liner.
Eyelash and Brow Comb: The side with the small, plastic comb is used for removing mascara clumps from lashes. The bristled side is for grooming eyebrows.
Eyebrow: A firm, angled brush used for filling in eyebrows with brow powder. Go for something with coarser bristles.

And never underestimate the power of the original makeup brush—your fingertip. Because of the heat of your skin, fingers make unbeatable blending tools. For covering under eye circles, I like to use a clean ring finger (the ring finger applies the least amount of pressure) to blend away the edges of the concealer.

What brushes are indispensible to your beauty routine?

Also, which of my beauty looks do you want to learn how to recreate most?

XO Lee

Beauty 911: Locked & Loaded

Today I’m sharing 12 things every girl ought to have in her beauty ammo whether she’s on the clock or not…

Here’s the scenario: It’s Monday morning. Your beautiful dress is full of static, you’ve still got breakfast in your teeth (darn those mangos), your T-zone is shiny…and it’s only 10am. So what’s a girl to do? Whip out her Beauty Emergency Kit (lovingly known as a “beautE-Kit”)

There are a few tried-and-true items every working (or school-aged) lady must have close at hand. This is what I keep in my beautE-Kit…

beauty-911-locked-and-loaded

Static Guard. It may sound strange, but this is an absolute must. Not only will it come in handy when your new dress is sticking to your legs, it can also be used in lieu of hair spray to tame flyaway. Just spritz a little on your fingertips and lightly dab unruly hairs into place.

Floss Pick. After each meal, give your pearly whites a quick clean. If you spot any leftovers, dislodge them using a floss pick. Floss picks can also be used to de-clump mascara or remove dirt from under your nails. However, please remember to perform such forms of maintenance in the privacy of the ladies room.

Mini Mirror. It’s always a good idea to keep a small pocket mirror close at hand. You’ll never wonder if you have lipstick on your teeth again!

Lotion. Usually, offices are either too cold or too hot, which can lead to chapped hands–especially when you’re washing them constantly after using the restroom. To prevent dry, cracked hands moisturize throughout the day by using your favorite hand lotion. Your hands (and nails) will thank you.

Hand Sanitizer. Sneeze, cough or blow your nose? Do your co-workers a favor and disinfect. No need to pass around an unwanted bug.

Blister Blockers. Is there anything worse than breaking in a new pair of shoes? Keep a stash of extra strong blister bandages at your desk, just in case.

Vaseline. This is one of the most underrated beauty products out there. Use it to quench dry lips, smooth it over your heel if your shoe is rubbing, or swipe it over your cuticles for a quick pick me up.

Deodorant. Keep a travel-sized deodorant stashed in your kit. You’ll never have to sweat the small stuff again (like forgetting to put it on as you rushed out the door this morning).

Stain Remover. Food should be in your mouth, not on your clothes. And the same goes for coffee. Never worry about walking into a meeting with marinara polka dots again!

Snack. It sounds silly, but I keep little bites in my puse. A case of the hangrys (hungry + angry = hangry) is never becoming.

Meds. Whether you’re team Tylenol or you’re an ibuprofen fan, having a stash of goodies to combat headaches is a smart way to keep your head clear. Also, having a few Tums on hand isn’t a bad idea either…

Bobby Pins. Nix bedhead, windy-day-hair or I-was-in-a-rush-this-morning head with a few bobby pins. A topknot, ballerina or fun bun can always tame unruly hair with the help of a few hairpins.

Those are my essentials. If you’re stranded at your desk, these 12 items will get you through. Next week, I’ll be posting a blog about office items that double as beauty products!

Want to win a copy of my personal beautE-Kit?

Leave a comment below telling me about an office item that plays double beauty duty (Note: It must be a common office item such as a paperclip and you need to tell me how it can be used as a beauty product/tool). The winner with the most creative idea will win! I’ll announce the winner and I’ll feature my favorite 5 suggestions in next week’s post too!

XO LEE

Beauty Note: Why I Switched to a Foundation Brush—and Why I’ll Never Go Back

20161025_brushsoniakashuk2510_2copie

It all started on a routine trip to Target. I can’t help but make a detour through the cosmetics section every time I walk into the store—I swear it’s like a magnet! A small voice in my head convinces me that there’s something new that I need to try. During one of my more recent visits, Target had just remodeled the makeup brush section and I found myself comparing and contrasting every single one. After all, one needed to come home with me and I wanted it to be something I used on a regular basis. That day I became the proud owner of my first Sonia Kashuk foundation brush.

For the past few years I’ve been applying my foundation with a makeup sponge, and for the most part I had no complaints. After all, each application process has its pros and cons. Since I’m the kind of person that likes to test out the latest beauty trends to see what all of the hype is about, my curiosity is what ultimately lead me to the brush aisle at Target that day. I know that using a brush to apply foundation is not a new concept, and I have used makeup brushes before. But it been a while since I used brushes and there have been so many brushes that has been out that I needed to find out has there been a change for myself and I’m so glad I did. Keep scrolling to see why I’ve converted to using makeup brushes…

Why I’m ditching my makeup sponge.

All in all, makeup sponges work great when applying everything from foundation to concealer and even highlighter. After using a damp makeup sponge to apply my foundation for quite some time (I’m talking years), I found myself getting fed up with the lack of consistent coverage it was creating. Did you know that makeup sponges soak up a lot of the product that you’re using? I found that because of this, my makeup was looking blotchy in areas where there was more product and I was running out of foundation faster than I care to admit. Using a makeup sponge was proving to be more wasteful than helpful.

Why I’m sold on foundation brushes.

When it came time to test the makeup sponge against the foundation brush, the results were evident immediately. It cut my application time in half and it left me with polished and airbrushed looking results. The biggest difference for me was how even my skin looked—finally! Foundation brushes give you the option to build up as much coverage as you want, giving you full control of the look you’re wanting to achieve. These were the kind of results I was lacking with a makeup sponge.

After four weeks of using the foundation brush to apply my makeup, I can confidently say that I will not be reverting back to a sponge. If you’ve been curious about what they can do for you, I encourage you to make the switch! Not only will your product last longer, but you’ll be giving yourself an effortless airbrushed look every time you apply foundation. That’s a win win in my book!

Here are a few of my favorite foundation brushes:

What are your thoughts on foundation brushes?

(Let me know your opinion in the comments below!)