THE TRUTH ABOUT KYLIE SKIN!

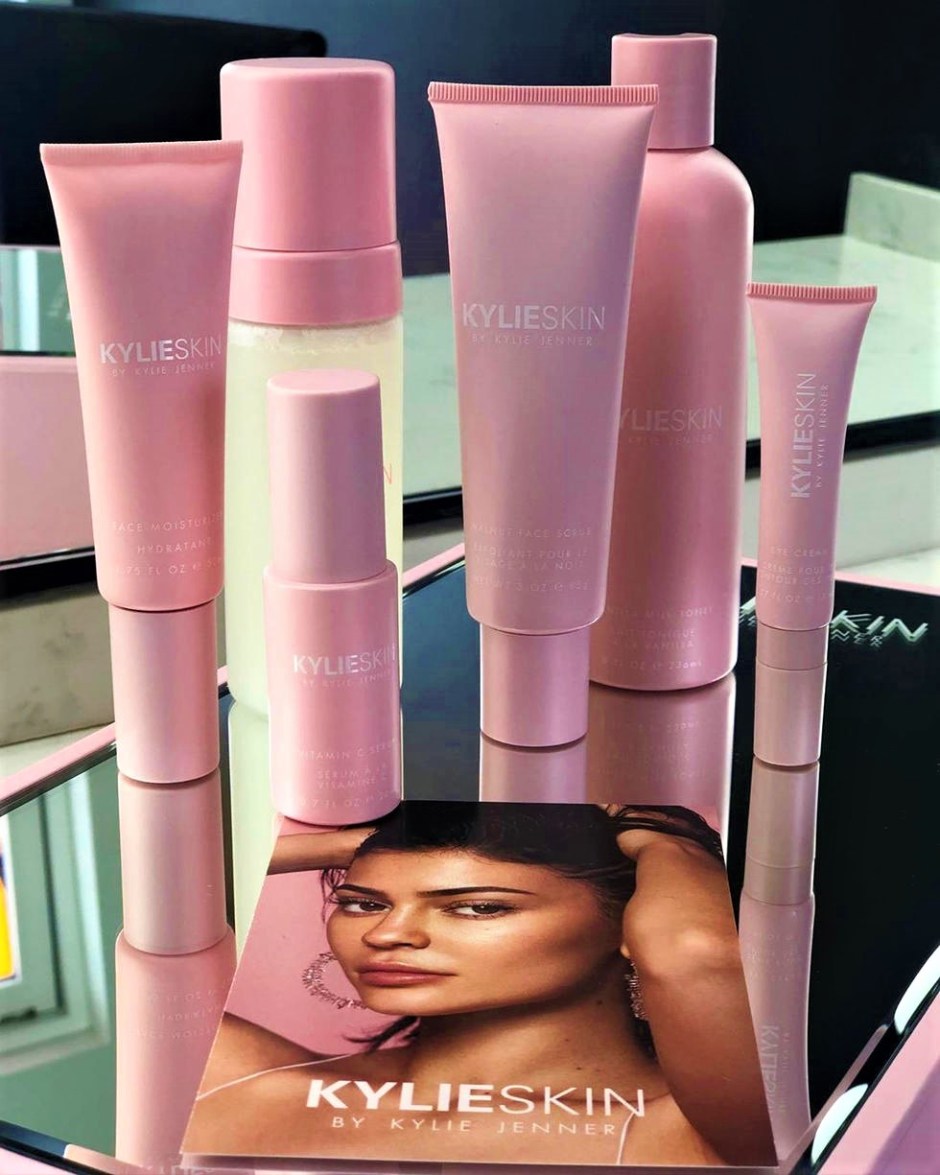
So as soon as Kylie mentioned she was moving into skincare, the beauty world held its breath in anticipation and penciled the release date in their calendars – we needn’t remind you that Kylie cosmetics typically sell out in 24 hours! Like I said in my Kylie Skin Review, since its’ launch, many people including beauty gurus have been praising the line as well as critiquing it.

The main concerns from the public are about the two ingredients used in her product line – squalane and hydroxyacetophenone. The issues seem to be around the sourcing of these ingredients, which I don’t find to be a problem (read on). Instead, my only issue is the use of vitamin C and sodium benzoate in the Kylie Skin cleanser.

Kylie Skin — Squalane and Hydroxyacetophenone Controversy

After reviewing multiple critiques about the issue, I want to take defense for Kylie Skin about these two ingredients. The official website and Kylie herself stated that all Kylie Skin products are vegan and cruelty-free. However, according to the widespread critiques, in Kylie Skin products’ ingredient list, squalane, which is found in both the Kylie Skin Vanilla Milk Toner and Kylie Skin Walnut Face Scrub, is derived from sharks; Hydroxyacetophenone, used in Foaming face wash and Vanilla Milk Toner, is derived from beavers. If this were true, that would make the ingredients the products decidedly un-“cruelty-free” since these are taken from animals.

However, it’s important to know that there are alternative ways to obtain these ingredients, and such alternatives can make Kylie’s products compatible with being vegan and cruelty-free. For instance, chemists used to derive solely squalane from shark liver oils, but they’ve now found ways to derive squalane from olives and sugarcane.

I actually just wrote a comprehensive blog post that explains the difference between these two types of squalane, and we found that both sugarcane-derived squalane and olive-derived squalane are high-quality and actually more economical to source than shark livers, especially sugarcane in the latter regard. In fact, most skincare products nowadays have already stopped using the shark-derived squalane, instead using plant-derived squalane. Think about it this way, if you can get the same quality of squalane from olives or sugarcane, why do you want to take it from sharks that are very costly and may make your brand nefarious to ever-increasing numbers of people who want cruelty-free ingredients? Besides, as Kylie clarified later, her squalane is from olives.

Another controversial ingredient was hydroxyacetophenone, which is used in the Kylie Skin Foaming Face Wash and Kylie Skin Vanilla Milk Toner. There are three types of hydroxyacetophenone: 2-Hydroxyacetophenone, 3-Hydroxyacetophenone, and 4-Hydroxyacetophenone. Of these, only the 3-Hydroxyacetophenone is from mature beavers and it can’t even be used as an ingredient in personal care products. According to Chemicalbook.com, 3-Hydroxyacetophenone is a hazardous chemical compound which may cause skin irritation, eye irritation, and respiratory irritation. It’s even recommended for lab researchers to wear protective clothing and wash hands thoroughly after handling this material due to its harm to skin. And unlike many ingredients that are warned about in only very high concentrations, small amounts of 3-hydroxyacetophenone can be a problem. As you can see, it’s quite obvious that this is not the type of Hydroxyacetophenone used in the Kylie Skin ingredients.

However, 4-Hydroxyacetophenone is the one that was used in Kylie Skin products — a completely different compound. 4-Hydroxyacetophenone is an ingredient that can be commonly used in pharmaceutical drugs, and it’s found in needles and mycorrhizal roots of Norway spruces, which makes it compatible with being vegan. It works with preservatives to boost its efficacy and prevent skincare products from corrosions.

My Actual Concern: Kylie Skin Foaming Face Wash

Rather than these two ingredients, I have more concerns about the formula used in Foaming Face Wash. The official websites describes this cleanser as “infused with ultra-nourishing kiwi seed oil, packed with Vitamin C and E to help maintain moisture and improve elasticity.”

However, in the ingredient list I’ve found a debating combination: Vitamin C and sodium benzoate. These two ingredients are known to create benzene together in the presence of light and air. Kylie Skin foaming face wash’ transparent package is apparently not enough to protect the contents from light, and may leave the product vulnerable to outside light, so I wouldn’t want to use it. Further, it’s a known fact that skin care products contain Vitamin C should be stored in opaque and airless containers. Kylie Skin did a great job on airless packaging as none of its product is stored in jars, but the transparent packages of face wash again can make the beneficial ingredients inside like vitamin C lose its potency due to the exposure to light.

Last but not least, walnut scrub is one product that receives a lot of critiques about its main ingredient: walnut shell powder. It’s scientifically shown to be impossible to make walnut shell particles smooth, and therefore may cause microscopic scrapes on skin during the usage. It does sound frightening, but it works pretty much the same way as all physical exfoliators do. Typically, physical exfoliators are more harsh, and more difficult to handle since some of them may bring irritation and sensitivities to skin. That’s why the majority of dermatologists recommend using chemical exfoliators instead, since chemical exfoliators are proven to work more effective and more gentle on skin. My recommendation for using the walnut face scrub is to use carefully and gently, use it less often than you did with other exfoliators, most importantly, pay attention to how your skin react and adjust your way of using it based on your skin conditions.

Bottom Line

I like the Kylie Skin line overall, and do find it to be cruelty-free, despite the controversy you might read online elsewhere. But I would avoid the Kylie Skin Foaming Face Wash, if for no other reason than its combination of vitamin C and sodium benzoate, which I do not like.

Sign up for our newsletter!

Disclaimer:

The purpose of this blog is for skin care and beauty-related reviews and tips only. It is not intended as and does not substitute for medical advice. Information posted should not be construed as personal medical advice. Posts are not intended to diagnose, treat, or cure disease.

YES, YES, YES! AN ACTIVE SEX LIFE IS THE KEY TO MAKING YOUR SKIN GLOW

I’ve always wondered how orgasms affect your skin. I mean, everyone knows that sex rivals the treadmill when it comes to cardio. And then there’s that whole post-coital glow that people talk about, which I swear is real. So with those two factors combined, one would think that there’s a scientific reason behind having good skin after an orgasm. Right?

After some research, I’ve stumbled upon some good news: orgasms will make you look younger and glowier! Seriously, after-sex skin is a real thing, and by that we mean super glowy, literally lit-from-within skin. It sounds too good to be true, and you’re probably thinking, well that glow’s not gonna last long, but here’s where it gets really interesting; there are tons of studies that show having more orgasms will actually make you look younger while the short term benefits include decreasing stress, helping with sleep, and improving your skin. Even if you’re still not convinced, it’s worth a try, right?!

The thing is, having an orgasm as often as you can could be the cheapest wellness hack you discover this year. Oh, and for the record, Medical News describes an orgasm as “a powerful feeling of physical pleasure and sensation, which includes a discharge of accumulated erotic tension. Having a successful orgasm has numerous health benefits like your body releases serotonin, dopamine, oxytocin, and prolactin,” says Shirley Chi, MD, a California-based dermatologist. “What that cocktail does is basically reduce the effects of the stress hormone—cortisol—that’s in your body and creates a deep sense of relaxation.” Here’s all the proof and all the ways orgasms are going to make you look and feel ten times better.

Orgasms Will Make You Look Younger

One study examined 3,500 people and found that women who had three orgasms a week looked, on average, 10 years younger than the women who only had two! Another study, which came to the same conclusion, revealed the reasons behind why having orgasms can make you look so much younger:

Endorphins: The release of the ‘feel good’ chemical, endorphins, naturally acts as a painkiller and helps to reduce anxiety, thereby helping you sleep better – and sleep is the key to health!

Human growth hormones: Orgasms cause human growth hormones to release, which helps improve the skin’s elasticity.

Another study by the University of Michigan showed that orgasms increase estrogen levels, which also has anti-aging benefits: it maintains collagen, which we all know is a protein that promotes more youthful skin. Higher estrogen levels also help skin thickness and elasticity, and may even help lock in the skin’s moisture, thereby keeping the skin plumper and more resistant to wrinkles.

Orgasms Will Make You Feel Better

Okay, so that’s obvious, but it will make you feel better in the unobvious ways! When you orgasm, your body releases what people refer to as the love hormone, aka oxytocin. Oxytocin helps to decrease stress by lowering cortisol levels and it also helps release tension by stimulating feelings of warmth and relaxation.

All this oxytocin and de-stressing leads to better sleep, decreased inflammation in the body – less inflammation means less acne and puffiness – while the lower levels of cortisol improve collagen production, helping the skin to heal better.

Orgasms Will Make Your Skin Glow

After an orgasm, the increased rate of blood flowing through your body coupled with blood-vessel dilation means your system is flooded with oxygen, which boosts collagen production that stimulates and repairs the skin. All that increased blood flow also gives your cheeks what’s referred to as an ‘orgasm flush’ – hence the name behind NARS’ iconic Orgasm Blush – as your body pushes all the blood to your skin to make your face look flushed.

Finally, increased blood flow means more water is transferred to your skin (your largest organ), and we all know hydration is essential for a glowy complexion.

So, other than the initial glowier appearance that you’ll get after an orgasm, the results of orgasm often are actually much longer lasting than you’d think – not just for your skin and body, but for your mental well-being too! And the best thing about orgasms is they’re completely free, and you don’t need anyone else to help you!

This of course doesn’t mean you should ditch your skin-care regimen for a more actively-seeking-orgasm life all in order to get a glow. “Sex and masturbation aren’t the answer to acne, but they’re definitely not bad for the skin,” says Dr. Chi. Sounds like doctors orders to me. If you don’t have time to orgasm you can always fake it – no, not like that! – with makeup!

For the ultimate glowy skin, check out this after-sex skin makeup look that Huda Beauty shared:

HOW TO DIY THE PERFECT AT-HOME PEDICURE IN 10 EASY STEPS

As tempting as it is to dish out money for a salon pedicure (with the soaking, foot scrubbing, massage — the works) it’s not always doable, especially when you already splurged on makeup in the beginning of the week and are left to question your self-control. So if you currently find yourself in a similar position and are in desperate need of a pedi, we’re here to prove that it’s possible to achieve salon-quality results pedicure in the comfort of your own home — for a lot less money.

STEP 1: Let Your Nail Polish Remover Do Its Thing

Completely remove any nail polish that’s still on your toenails using nail polish remover and a cotton pad. If you don’t have any leftover polish, you should still run nail polish remover over your nail to remove any excess oil.

Primp Tip: If you’re left with any weird stains or a yellow tinge (you’ll usually see this after removing darker colors, like red or black), rub cuticle oil over the surface of your nails to lighten any residue.

STEP 2: Soak Your Feet Like You’re at the Spa

Okay, before you start soaking, your first job—and this is important—is to go around your house and gather every candle you can find. Oh, and get yourself a glass of wine while you’re at it. The trick to making an at-home pedicure feel like a spa experience instead of, you know, rubbing your own feet in your too-small-for-comfort apartment is setting the ~mood~ at your makeshift pedicure station.

Once the ambiance is right, you’re ready to soak your feet—which softens tough skin and cuticles (and is downright relaxing). Lennon suggests using a basin (aka a really big bowl) if you have one, but your bathtub is also a sound option. Fill ’er up with warm water and add a liberal scoop of skin-soothing bath salts (Lennon recommends Côte Re-Treat Himalayan Pink Salt Soak, but you can also try my favorite Kneipp Mineral Bath Salts or just use a cup of kosher salt). Let your feet soak for a few minutes before moving to the next step. This is a great opportunity to multitask and try out that new face mask.

STEP 3: Get Rid of Dead Skin

After drying off your feet, use a foot file to remove any dead skin from callused (hard) areas. Parts to pay attention to are the balls of your feet, the sides of your feet and your heels. Scrape these areas until they feel smooth, but don’t overdo it. Try a pumice stone or foot file to gently smooth the skin. Then, switch your feet and repeat.

STEP 4: File and Shape Your Nails

Use a nail trimmer to achieve the length and shape you want (we recommend trimming nails straight across). Follow by filing the corners of your nails and buffing to make them smooth. According to Hadley, a big mistake people make at this point in the process is cutting their cuticles. “Trimming or cutting cuticles during a manicure or pedicure is purely cosmetic and sometimes it doesn’t benefit the nail in any way,” she explains. “The cuticle is a barrier to protect your surrounding skin and protect against infection.”

STEP 5: Apply Cuticle Oil

Apply cuticle oil to the base of your nail. Cuticle oil doesn’t just keep your feet soft and moisturized, but it also keeps your polish from chipping.

STEP 6: Moisturize

Take both feet out of the tub and dry them off with a towel. With a foot cream or body lotion, begin massaging your toes, feet, and calves until, well, you wanna stop. Moisturize your feet with an unscented lotion. “Scented lotions with synthetic fragrances can cause your nail polish to crack.”

STEP 7: Prep Your Toes

Use toe separators (you can buy a 12-pack for cheap online) to make painting your toes easier and avoid making a mess.

If you don’t have toe separators, Lennon suggests tearing off a piece of paper towel, rolling or twisting it into a rope, and weaving it through your toes to prevent the polish from smudging.

STEP 8: Apply Your Base Coat

Then, apply a thin layer of base coat on each nail. Follow with two thin coats of your color of choice, letting the paint dry for a few minutes between each coat.

STEP 9: Finally, Do the Damn Thing

Paint on your base coat and wait at least two minutes to ensure it’s dry. Don’t forget your base coat because it gives your nail polish something to sink into besides your actual nails.

STEP 10: Finish With a Quick-Drying Top Coat

Finish with a top coat so your nails maintain high shine and luster. Because nail polish takes about 12 hours to harden.

Primp Tip: Recommends sticking your finished toenails into cold water for a few minutes to make your nail polish harden faster and help it solidify.

Tell me: Do you do your own nails?


BEAUTY Q&A: HOW MUCH SHOULD YOU TIP YOUR HAIRSTYLIST?

Your hair appointment shouldn’t be shrouded in fear of tipping the wrong amount. Cutting your hair too short? Maybe. Making a huge mistake by getting bangs in the middle of summer? Definitely. Dealing with the pressure of wanting to leave the salon looking like your best damn self (even though the whole thing is kind of out your hands) is enough to deal with without factoring in tipping-related stress. So if you’ve been preemptively wondering how much extra cash you should bring with you to your appointment, quit Googling and stopping asking your friends because everyone’s going to have a different opinion. To answer this ever-so-popular question once and for all, we reached out to New Jersey-based hairstylist Jennifer Geoghan.

“Twenty percent of the cost of your service is a good rule of thumb for tipping,” says Jennifer. Simply plug the price of your haircut right into your phone’s calculator and multiply it by .20 to get the dollar amount you should give your stylist. For example, a $50 haircut will lend itself to a $10 tip; a $100 haircut $20, and a $200 haircut $40. “Hairstyling is a work of art,” Jennifer adds. “A stylist’s price depends on their education, skill, number of years in their careers, continued education and keeping their tools and products up to date. Keep in mind when paying for a service and tipping a hairstylist, you are paying for their history, not just the service itself.”

And what about the washer or assistant who had a hand in the whole thing? “Tipping the washer or assistant is ultimately up to you, but $3-$10 is always helpful and appreciated,” says Jennifer. “Even though it may seem that the assistant or hair washer isn’t doing much in the scheme of things, their wages aren’t super high, mostly because they are barely getting hours. So, the assistants and hair washers really rely on their tips. Plus, they’re helping out the hairstylist a lot behind the scenes to ensure you have a calm, successful and happy appointment. If you know that they played a big role in making your hair fabulous (say, washing it or blowing it dry) consider tipping, so they know their work was appreciated.

READ MORE: