5 Benefits of Using Milk and Honey for Face

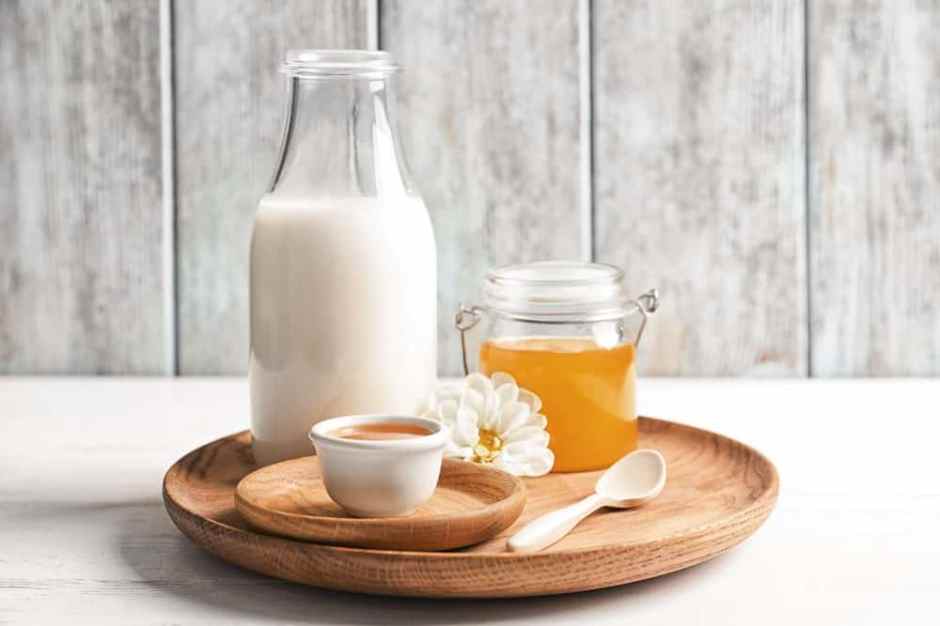
If you are looking for the ultimate home remedy to keep your skin hydrated and glowing, we have a solution. Try milk and honey. The DIY milk and honey mask benefit your skin in numerous ways.

Scroll through this article to understand how they may help and learn ways to use milk and honey to keep your skin happy.

Advertisements

Milk And Honey for Face: What Are the Benefits?

Milk and honey can have age-defying effects on your skin. According to the legend, Cleopatra used to bathe in milk every day to keep her skin young, radiant, and clear. This combination can have certain benefits as stated below:

Advertisements
  1. Help Moisturize Your Skin

Lactic acid is one of the naturals AHA (alpha-hydroxy acids) found in sour milk that acts as an excellent moisturizer. It is a part of the natural moisturizing complex of your skin (1). Honey is an emollient and a humectant that can bind moisture to your skin and keep it soft and moisturized (2). For these very reasons, most skincare products use milk and honey in their formulas.

Advertisements
  1. Milk Keeps the Skin Firm and Smooth

A study found that 12% of topical lactic acid can help improve skin appearance by reducing fine lines and wrinkles. It also makes the skin firm and smooth (3). Milk has a mild exfoliating effect. Applying it to your face can have similar results.

  1. Honey Maintains Skin pH

Maintaining skin pH is crucial to prevent breakouts and rashes. An imbalance in skin pH disturbs the natural barrier of your skin. This can lead to skin irritation. Honey helps regulate skin pH levels (2).

  1. Honey Can Heal Wounds

Honey’s antimicrobial properties and methylglyoxal (one of the active compounds) can help heal your wounds effectively. It is also suitable for healing burn wounds and other skin issues such as psoriasisdandruff, diaper rash, seborrhea, and tinea (2).

  1. Honey Treats Acne 

A study found that applying honey to acne lesions can promote faster healing. Honey can also inhibit the growth of both P. acnes and S. aureus bacteria (4).

Both milk and honey have a lot to offer to your skin. In the next section, we will explore the different ways you can use this combination on your face.

Advertisements

How To Use Milk and Honey on Face

1. Milk and Honey as a Face Wash

Both honey and milk can moisturize the skin and inhibit acne-causing bacteria. This way, they can help keep your facial skin healthy and clear.

You Will Need

  • 1 tablespoon of raw honey (you may use Manuka honey)
  • 2 tablespoons of milk
  • 1 bowl
  • 1 cotton pad

Method

  1. Mix the two ingredients in the bowl till you achieve a cream-like consistency.
  2. Dip the cotton pad into the mixture and apply it to your face in circular motions.
  3. Let the mixture sit on your face for 10 minutes.
  4. Wash your face with cool water and massage gently.
  5. You may follow up with a gentle cleanser if desired.
  6. Pat your skin dry and follow up with a toner and a moisturizer.
Advertisements

2. Milk and Honey as a Face Mask

This face mask helps soothe your skin. Both the ingredients have moisturizing properties, making this face mask especially beneficial for dry skin. However, the mask is suitable for all skin types.

You Will Need

  • 1 tablespoon of raw Honey
  • 1 tablespoon of milk
  • 1 microwave-safe bowl

Method

  1. Mix the honey and milk in the bowl until you have a thick consistency.
  2. Put the bowl into the microwave and heat for a few seconds. Ensure the mixture is warm to the touch and not too hot.
  3. Use a brush (or your fingers) to spread the mask on your skin.
  4. Let the mask stay for at least 15 minutes.
  5. Wash your face with cool water. You may use a gentle cleanser as well.
  6. Follow up with a toner and a moisturizer.
Advertisements

3. Milk and Honey as a Scrub

Oats, Fuller’s earth and ground almonds have a coarse texture. These work excellently well in exfoliating your skin without causing damage. The milk and honey in the scrub keep your skin hydrated.

You Will Need

  • 1 teaspoon of raw honey
  • 1 teaspoon of milk
  • 1 tablespoon of ground oats/Fuller’s earth/ground almonds
  • 1 bowl

Note: If you have sensitive skin, use oats. If you have oily skin, use Fuller’s earth. If you have normal skin, you may use any of the three options.

Method

  1. Mix the milk and honey in the bowl.
  2. Add ground oats or Fuller’s earth or ground almonds.
  3. Adjust the quantity of milk (especially if you are using Fuller’s earth) to get a desired paste-like consistency.
  4. Apply the mixture to your face and gently massage, avoiding the area around your eyes.
  5. After massaging for 5 minutes, wash with cool water.
  6. Pat your skin dry and follow up with a toner and a moisturizer.
Advertisements

These are some effective ways to use milk and honey for improving your skin health. If you already use DIY face masks, you can try introducing this combination as well. However, before using honey, do a patch test to check for any allergies. Raw honey may contain pollen and can cause allergic reactions in some individuals.

Frequently Asked Questions

Q: Is it good to drink milk with honey?

A: Yes, drinking milk with honey could promote health. The best way to do so is to let the milk cool down and then add honey to it. Ayurveda doesn’t recommend consuming warm honey (mixed in any warm beverage or food) as it is considered to harm health. However, studies in this regard are inconclusive.

Q: How long should I leave milk on my face?

A: You may leave milk on your face for 5-10 minutes.

Q: Can milk and honey be applied to the whole body?

A: Yes, you can apply the combination to your whole body. You may prepare a bathtub-soak with honey and milk. Soak in it for 15-20 minutes.

Advertisements

Sources

Articles on BeautyLeeBar are backed by verified information from peer-reviewed and academic research papers, reputed organizations, research institutions, and medical associations to ensure accuracy and relevance. Check out our editorial policy for further details.

How To Use Rose Water For Dry Skin

Come winter, and all those skin issues start peeping out again. Don’t you think your skin needs to be prepared for winter’s arrival? That is why you need to incorporate rose water for dry skin in your skincare regimen. Yes, to prepare your skin to face the harsh winter, you need to give it extra care and protection.

Your skin hydration plays a crucial role in achieving fresh and healthy skin. If you have dry skin, you need to be extra careful with the products you choose and how you care for your skin. A balanced skincare routine is all you need to be tension-free during the winter. Wondering how to use rose water for your dry skin? Well, we can help you. This article discusses the benefits of rose water and how you can use it. Keep reading.

Advertisements

Is Rose Water Good for Dry Skin?

Rosewater by itself is not going to do wonders for your skin, but in combination with other moisturizing ingredients, it helps keep your skin feeling hydrated for longer while also improving its texture. The reason this fragrant liquid suits dry skin is because of how efficiently it refines your pores without drying your skin out. Rosewater is usually used as an additive in skin care treatments. It can be used by itself as a toner or in combination with other moisturizing ingredients for dry skin. Here, I’ve put together 4 rose water treatments that are keeping my skin feeling great this winter.

Advertisements

1. Rose Water for Dry Skin

You Will Need

  • 1 tbsp pure rose water
  • Cotton pad
  • Towel
  • Facial cleanser
  • Moisturizer

Prep Time

2 minutes

Treatment Time

5 minutes

Method

  1. Wash your face with a facial cleanser and pat dry.
  2. Saturate a cotton pad with the rose water and dab it onto your face.
  3. Let it dry.
  4. Once dry, moisturize your face.
Advertisements

How Often?

Twice a day.

Why This Works

Cleansing, toning, and moisturizing your face is an essential part of any skincare routine. This rose water toner, unlike most toners available on the market, is extremely gentle on your skin. It helps get rid of residual dirt and grime without drying out your skin. It leaves your skin feeling fresh and hydrated.

Advertisements

2. Glycerin, Lemon, And Rose Water for Dry Skin

You Will Need

  • 3 tbsp glycerin
  • 3 tbsp pure rose water
  • 1 tsp lemon juice
  • Clean bottle for storage
  • Facial cleanser
  • Towel

Prep Time

2 minutes

Treatment Time

2 minutes

Method

  1. Combine the glycerin, rose water, and lemon juice and pour the mixture into a clean bottle so that it can be stored. (Store the mixture in your refrigerator.)
  2. Take a coin-sized amount of the mixture and apply this to your face and neck.
  3. Ensure that your hands are clean during application.
  4. Gently massage your skin in circular motions until the lotion is completely absorbed.
Advertisements

How Often?

Every night.

Why This Works

Glycerin helps hydrate your face and leaves your skin feeling extremely supple. The ingredient is easily absorbed and provides your skin with non-greasy, long-lasting hydration. Lemon, on the other hand, gives your skin a vitamin C boost and also helps fade any marks or scars with its bleaching properties.

Advertisements

3. Multani Mitti, Milk, And Rose Water for Dry Skin

You Will Need

  • 2 tbsp Multani mitti
  • 1 tbsp milk
  • 1 tbsp pure rose water
  • Facial cleanser
  • Towel

Prep Time

2 minutes

Treatment Time

20 minutes

Method

  1. Wash your face with a facial cleanser and pat dry.
  2. Combine the Multani mitti, milk, and rose water until you get a smooth paste.
  3. Apply this paste onto your face.
  4. Wait for 20 minutes and then proceed to wash the mixture off of your face with cool water.
Advertisements

How Often?

1-2 times a week.

Why This Works

While Multani mitti is generally used to treat oily skin, this face mask contains the goodness of milk and rose water to help treat dryness. Milk contains lactic acid, which helps soften your skin while fading blemishes. The mask helps exfoliate, nourish, and soften your skin.

Advertisements

4. Sandalwood and Rose Water for Dry Skin

You Will Need

  • 1 tbsp sandalwood powder
  • ½ tsp coconut oil
  • ½ tsp almond oil
  • 1 tsp pure rose water
  • Facial cleanser
  • Towel

Prep Time

2 minutes

Treatment Time

20 minutes

Method

  1. Wash your face with a facial cleanser and pat dry.
  2. Combine the sandalwood powder, oils, and rose water until you get a smooth paste.
  3. Apply this mixture onto your face as you would a face pack.
  4. Leave it on for 20 minutes or until it is completely dry.
  5. Wash your face with cool water and pat dry.
Advertisements

How Often?

1-2 times a week.

Why This Works

Sandalwood helps mildly exfoliate your skin while nourishing it. When combined with the oils and rose water, it creates an excellent face pack for intense hydration. This face pack will help nourish your skin and get rid of dryness.

Rosewater is an amazing ingredient to incorporate into your skincare routine. With that said, I cannot stress enough how important it is to have a balanced skincare routine that varies according to skin type and changes according to the weather. Have you ever used rose water for your skin? Tell us about your experience in the comments section below.

How To Add Rosewater into Your Skincare + The Benefits

How to Treat Cracked Skin on Your Feet, Hands and Elbows

Dry skin is uncomfortable and can be hard to treat. When your skin is dry and cracked, though, it can be even more challenging to deal with. Because the skin on your hands, feet, and elbows is thick, it can be prone to these skin issues, especially during the winter. To learn how to prevent it from happening and how to heal cracked skin in these areas, keep reading. 

Advertisements

What Causes Dry, Cracked Skin?

Environmental factors like cold temperatures and a lack of humidity (hi, winter) can cause the skin to become drier than usual and lead to cracking. Other causes include hot water (so stick to lukewarm showers and baths), harsh cleansers, and skin conditions, such as atopic dermatitis or psoriasis. 

Advertisements

How to Address Dry, Cracked Skin on Your Feet, Hands, and Elbows

Keep Your Showers Short

The American Academy of Dermatology (AAD) states that keeping showers and baths short, using a mild cleanser, and opting for a warm instead of a hot water temperature can help prevent dry skin.

Pay Attention to Skin-Care Ingredients

The AAD stresses that those with dry, cracked skin should pay close attention to the ingredients in their skin-care products. Avoid products that contain dehydrating and potentially irritating ingredients like alcohol, fragrance, and harsh sulfates. 

Use a Humidifier

Humidifiers can benefit your skin all year but are particularly helpful when your skin needs extra moisture in the fall and winter. The AAD suggests using a humidifier to add some much-needed moisture into the air to help relieve dry, cracked skin.

Moisturize Your Skin Regularly and Use Healing Ointments

Moisturizer or lotion can help replenish and lock in moisture. The AAD recommends applying hand cream after you wash your hands. We like the allergy-tested La Roche-Posay Cicaplast Hand Cream because it not only moisturizes with shea butter and glycerin but also helps soothe damage from cold weather and frequent hand-washing. When it comes to your feet and elbows, hydrate the areas as needed, especially after taking a bath or shower while your skin is still slightly damp. 

If you’re experiencing cracked or chapped skin and your go-to cream or lotion isn’t doing the trick, reach for a soothing balm like the CeraVe Healing Ointment. Formulated to relieve irritation and extreme dryness and restore the skin barrier. 

Advertisements

Sheet Mask Not Delivering Glow-Enhancing Results? This Could Be Why

Turns out there’s actually a fine art to applying a sheet mask that, until now, nobody was aware of. 

It’s a little known fact that face masks can solve any of life’s problems. Bad day at work? Face mask. Overplucked your eyebrows? Face mask. Rent is due next week and you have less than five euro in your bank account? Face mask.  Accidentally swiped left to a super hot guy with a dog on Tinder? Face mask.

Advertisements

While it may not exactly ~solve~ those problems, a face mask will, however, distract you long enough that you won’t become a nervous wreck and that’s pretty much the same thing. But face masks can be time-consuming, especially if you go the DIY route. So that’s why when sheet masks first came on the scene, our lazy but enjoys-being-pampered selves were thrilled. 

TRENDING TODAY: 5 “MEH” BEAUTY PRODUCTS YOU REALLY DON’T NEED IN YOUR ROUTINE

Simply take out of the packet, pop on your face, leave for 15 minutes and boom, glowing skin. Easy right? Well, actually no – it’s not that simple. Turns out there’s actually a fine art to applying a sheet mask that until now, nobody was aware of. 

It may be that you forgot to set a timer, you applied too much product, or you simply picked up the wrong formula. Don’t worry, we’ve all been there. Thankfully, this is a judgement-free zone and we’ve got you covered. Keep scrolling for common mistakes and a few tips on applying (and removing) a sheet mask correctly.

Advertisements

NOT USING THE RIGHT KIND OF MASK FOR YOUR SKIN

So okay, maybe this seems like an obvious one but we bet at some stage in your sheet mask life, you’ve bought one just because it’s metallic gold…and not because it’s actually good for your skin. Hey, no judgement, we’ve done it too, but as fun as it is to have a metallic gold face for 15 minutes, you really should start paying attention to what skin type those face masks are designed for and buying the ones that best suit you and your skin.

USING TOO MUCH PRODUCT 

From foundation to ketchup, we’ve got a heavy hand when it comes to liquids and it’s no different when we use an ‘apply it yourself’ face mask. Look, there are days where our skin feels extra crap so we tend to whack on a thicker layer than usual to give our skin that bit more TLC but the truth is:  it’s actually doing more damage.

Advertisements

TREATING FACE MASKS AS A TREAT

If we have a special event coming up, we often get a bit too excited because it gives us an excuse to pamper ourselves. But guess what? You don’t need an excuse to treat yourself.  You should be incorporating a face mask into your weekly skincare routine. If you’re unsure of how frequently you should be using a face mask, check the back of the packaging because no two face masks are the same. Some will suggest once a week only where others will recommend 3-4 times a week. 

NOT PREPPING YOUR SKIN BEFOREHAND

So picture this: you’re having a no make-up day and it hits about 8 pm and you’re feeling very proud of yourself for giving your face a chance to breathe so you think about treating it that bit more by doing a face mask, so you just lash it on without washing your face first. Sound familiar? Us too. Just because you haven’t applied makeup to remove doesn’t mean you can skip a cleanse. You should be applying your face mask to clean, dry skin so not giving your face a wash beforehand just means you’re layering a face mask on top of dirt and bacteria it’s picked up during the day… #gross.

THINKING A FACE MASK IS THE FINAL STEP

Hate to break this one to you but a face mask doesn’t solve all of life’s problems. After masking, you aren’t finished. You need to carry on with your regular skincare regime, applying toner, serum and most importantly a moisturizer is key to locking in all those face mask benefits.

Advertisements

USING A SHEET MASK STRAIGHT OUT OF THE PACKET

Okay, so maybe you’re thinking we’re the silly ones for not already knowing this but you should be cutting your face mask to make it fit your face. We mean once you think about it, it makes a lot of sense. You cut your false eyelashes to fit your eyes, so you should be cutting your sheet mask to fit your face instead of almost suffocating because it’s too big.

USING A DIRTY BRUSH

Now judge us all you want, but sometimes we just can’t find the energy to wash our brushes but applying a face mask with an unwashed brush is utterly pointless. Not only are you contaminating your tub of face mask by dipping a dirty brush into the pot, but you’re also then smearing all that bacteria around your face which is doing more harm than good. 

Advertisements

LEAVING A FACE MASK ON TOO LONG

It happens: the packet says to leave on for 15 minutes so you take to Instagram to fill the time but you get carried away creeping on your crush account and suddenly, an hour has gone by. Leaving a face mask on longer than it should be is actually super harmful to your skin because the benefits only apply while the mask is still wet. Once the mask dries out, it begins to draw moisture and vitamins away from your face as opposed to nourishing the skin like intended.

YES, THERE IS A RIGHT SIDE

Again, so maybe we really just didn’t have a clue about sheet masks to begin with but we’re feeling confident that you too have at one stage or another worn a sheet mask the wrong way round. It’s time to set the record straight reveal that the side facing the paper is the side you should be applying to our skin. Groundbreaking, we know. 

Advertisements

POSTS YOU WILL ENJOY: