This DIY Oil Will Give You The Richest Tan

While we realize the saying “life is better with a tan”, may be a little OTT, it does make you feel like an absolute goddess. While some beauties can literally spend 20 minutes in the sun and be transformed into a bronzed bombshell, there are some of us who need a little assistance from a trusty tanning oil. We know summer is almost over but for the ones who got that sunshine in their pocket, we decided it was time to check out the best tanning formulas on the market and DIY. And we’re SO impressed with the results!

Our DIY tanning oil gives you the deepest tan without having to spend days in the sun and leaving your piggy-bank empty. Plus it got loads of amazing ingredients that nourish and hydrate your skin at the same time. We’re kinda annoyed we didn’t think of it sooner!

Why you need to DIY your own tanning oil

Yes…. black people and people of color do tan too. So, with that being said, recently me and my beauties were thinking about how we could save money on tanning oils. With research and experimenting, we realized how easy it would be to recreate our fave branded tanning oil at-home, as they’re mostly just a combination of oils. Plus, buying the original oils is often a lot cheaper in the long run, as we tend to go through our branded tanning oil in under a month. Nothing can beat that Floridian sun, haha.

Our DIY tanning oil is also seriously beneficial for your skin; it’s bursting with antioxidants and of course, it’s uber-moisturizing, so while you’re attracting the rays, you’re also rejuvenating your skin. Plus, the healthier and more hydrated the skin, the deeper the tan will be and the longer it will last. Here’s what you need:

Ingredients 

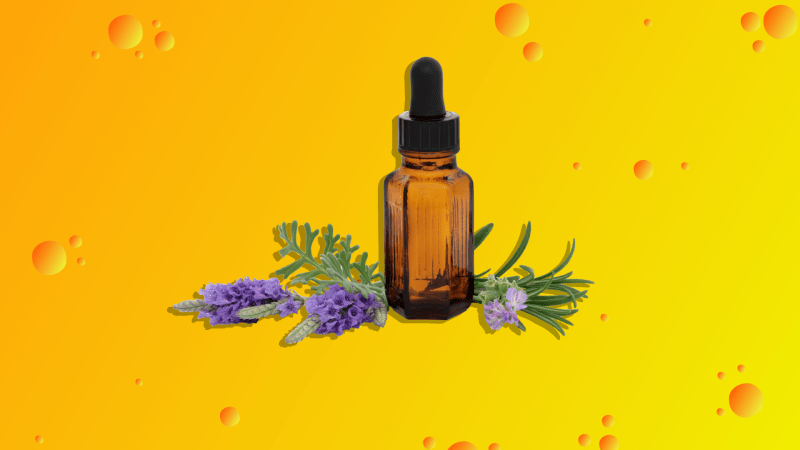
3 tablespoons of vitamin E Oil or carrot seed oil
½ cup of Jojoba oil
½ cup of Grapeseed oil
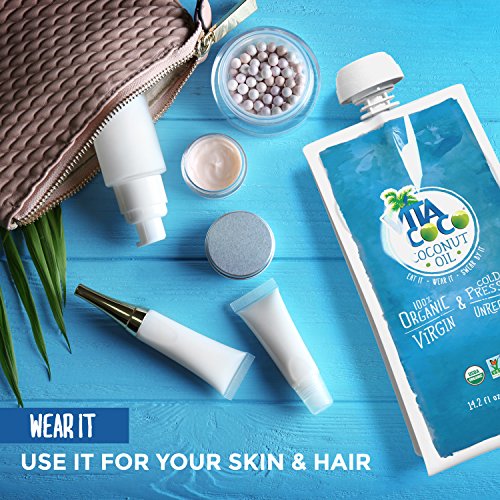
½ cup of Coconut oil
Optional: A bronzed shimmer eyeshadow or highlighter

Mix the oil together in a bowl (try to use cold pressed organic oils), then using a funnel dispense the mixture into a spray bottle. If you want to amp up your glow, you can also break a bronze highlighter into the mixture. Shake well before use and apply onto your skin, once you’ve applied sunscreen.

But NEVER forget SPF…

We cannot stress enough how important SPF is whenever you’re in the sun. If your skin is left unprotected, you can damage your skin and increase the risk of premature aging, dark spots and hyperpigmentation, and increase your risk of getting skin cancer. So before you apply your DIY oil, you need to apply a lot of SPF, and then apply even more. We recommend at least a factor 30 to be reapplied every 2 hours as a minimum, as we tend to apply it much more sparingly than is done during lab testing so an SPF 30 will offer you only SPF 15 in most cases.” If you have fair skin, make sure you apply factor 50 – and yes, you can still tan through SPF (we know because we use factor 50 every weekend)!

Now, go and enjoy every second of that beautiful sun!

Let us know if you guys try this DIY tanning oil in the comments below.

One Thing You Never Thought Of Doing With Oil

It sounds extra AF, but swishing oil around your mouth might just be the best thing for your health and skin, seriously! The idea comes from ancient Ayurvedic medicine and involves taking a tablespoon of oil and swishing it around your mouth like mouthwash, for twenty minutes. Believe it or not, this detoxifying method actually has a ton of health benefits that improve oral health, and it can even improve acne, whiten your teeth, help with headaches, and detox your entire body.

How To Do Oil Pulling:

On an empty stomach – first thing in the morning is the best time – swish a tablespoon of oil around your mouth for twenty minutes (at least ten minutes if you’re in a hurry). Our preference is coconut oil, because obvs we have a ton lying around and it’s also antibacterial, but you can also use sesame, olive or sunflower oil. Initially, it might feel a little gross, but persist, and like us, you might even end up enjoying the experience! It should always be done on an empty stomach, so wait at least four hours after eating, and an hour after drinking.

Whatever you do, don’t swallow the oil; otherwise, you’ll basically allow all the toxins that have been drawn out to go into your stomach. Once you’ve swished for 15-20 minutes, spit it out in your bin. You can do almost anything (except speak) while you do this, but keep an eye on the time, as if you do it much longer than 20 minutes, it’s possible that the toxins could be reabsorbed into your body. Rinse your mouth with warm water or salt water, and brush your teeth.

How Oil Pulling Works:

how oil pulling works

It’s quite gross to think about, but your mouth is filled with bacteria, fungi, toxins, and plaque. Oil pulling literally cleanses your mouth by drawing out all the toxins from your gums and teeth, before they’re able to spread to the rest of your body.

Why Oil Pulling is Awesome:

Who’d have thought that you can forego a ton of expensive beauty products simply by following this daily ritual? Oil pulling is an amazing way to improve your health and detox your body, skin, and gums. Though there’s yet to be significant research into oil pulling, promising results have been found, and many doctors recommend it – apparently, Gwyneth Paltrow and Shailene Woodley are fans. Here’re just some of the amazing benefits:

Skin-clearing: Catching out nasty toxins before they reach the rest of your body has a huge impact on your skin. The same way washing your skin gets rid of surface bacteria, oil pulling gets rid of bacteria that causes skin problems before they have a chance to take hold. Reports have shown that oil pulling for a month has helped improve acne and eczema.

Teeth whitening and fresh breath: Oil pulling can remove surface stains from your teeth, and because the fats in oil can dissolve plaque, it prevents plaque build-up and reduces the risk of tooth cavities for an extra white smile. The removal of bacteria from your mouth also results in fresher breath throughout the day.

Detoxes your body: The mouth is our gateway to the majority of substances in our body, by removing bacteria from the mouth before it has a chance to reach the rest of your body it majorly impacts on your health.

Increases energy: Our immune system works 24/7 to eliminate toxic waste from the body. By getting rid of these nasty toxins at the source before your body has to, it saves precious energy to be spent on other activities.

Reduces headaches and hangovers: We’ll be honest, anything that promises to cure a hangover is worth trying; the process of oil pulling will remove alcohol toxins still lurking in your body from the night before, helping you and your body feel much better. Headaches and migraines can be a reaction to your body being under toxic stress; so extract the toxins, reduce the stress!

Why Coconut Oil is Our FAVE:

We’ve found that coconut oil, (try to use 100% raw organic cold-pressed coconut oil) is the best oil to use. Not only is it easy to find and inexpensive, but it’s also by far the best tasting of the bunch. Coconut oil also contains lauric acid that has antimicrobial and anti-fungal properties, while Vitamin E is rich in antioxidants and it’s antibacterial. If you’re going to have oil in your mouth for twenty minutes, it should at least taste okay!

Oil pulling can easily become part of your morning routine: swish while you shower and tone, or while you get dressed and scroll your Insta feed. If you’re at home, take advantage of the period after lunch before dinner and swish on an empty stomach while you watch TV.

WHAT DO YOU GUYS THINK?

5 Tips For Creating A Spa Atmosphere At Home

After a busy, grueling week, it’s nice to come home to an oasis to relieve tension and feel restored. As it’s not realistic, or budget-friendly, to go to a spa every day, it’s a great idea to create your own spa-like setting within the comforts of your home.

IMG_3338

Use Essential Oils

An essential oil diffuser can create a variety of different atmospheres and appeal to the senses, to really give you that “zen” setting. Lavender is for relaxation, and basil oil has an uplifting effect on the mind and promotes alertness. Peppermint oil relaxes muscles, eases tension and can help relieve sinus congestion, and rose oil is used to relieve anxiety and depression.

Get Steamy

Steam inhalation is a wonderful addition to an at-home spa and the heat is shown to improve circulation, which can also improve the skin’s appearance, naturally.

Plus, steam loosens dead skin cells, revealing new cells and resulting in a youthful glow. Inhale steam from a steam machine or let the shower run so the bathroom gets super steamy, and simply sit and relax for a few minutes.

Use Dim Lighting

Low, dimmed lights help your body relax and really set the mood. “Scientific studies have proven that low lights actually allow your body to rest better as they reset your pineal gland,” explains Veronica Parker, a certified Yoga Teacher, Energy Healer, and Meditation Coach.

You can also use candles for light. “Place 2-4 candles of your favorite scent around. The candle flame and the scent will enhance your state of relaxation,” she says. “My favorite scents are lavender, lemon balm and sandalwood,” she suggests

Take a Bath

After a long day, come home to a warm bath to restore tired muscles. “Prepare a warm bubble bath with Epsom salts. The salts will inspire you to untangle your muscles, release inflammation and induce a deeper state of relaxation.

Play Music

Either listen to relaxing music or ocean sounds (what resembles “spa music” you typically hear when at a spa) or try a guided meditation to release stress. Download and listen to a guided meditation while you are soaking in the bath. Focusing on your breathing is key to help you let go of stress and your day’s activity. Alternatively, you can listen to soft music to unwind.