
Ready to level up your summer mani? Pool Water Nails are making a splash — and we’re obsessed. This fun, aqua-inspired look has flooded our feeds with its glossy blue hues and ripple-like designs that mimic the look of actual water. It’s playful. It’s nostalgic. And best of all? It’s surprisingly easy to recreate. Whether you’re a DIY nail girlie or booking a salon sesh, this is the statement nail of the season. Keep scrolling for inspo and the easiest way to try the trend at home.

💅 Step 1: Build Your Base
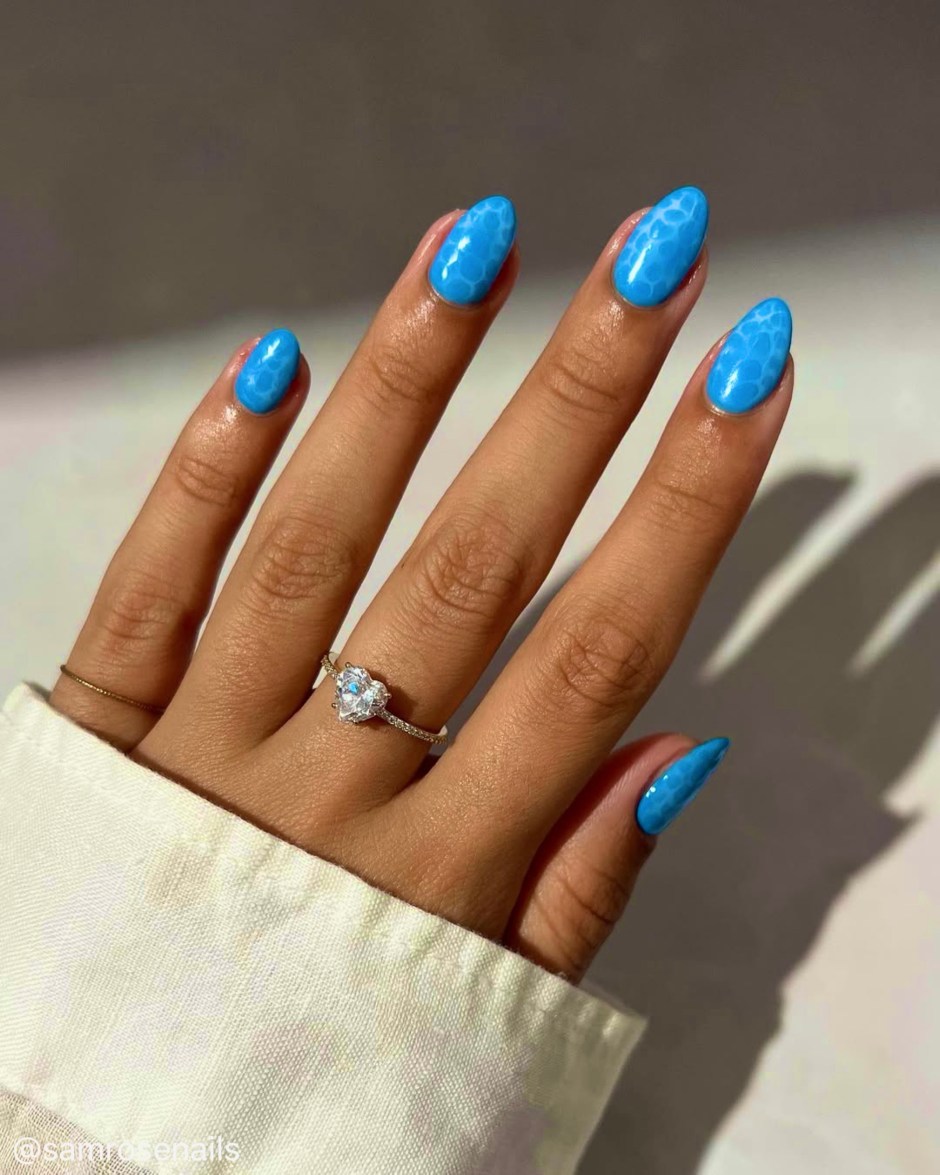
As always, start with clean, prepped nails — file, push back the cuticles, and apply a solid base coat. Now for the fun part: color.
Pick a blue gel polish to set the tone. Want something soft and ocean-like? Try “Iced Blue” by Le Mini Macaron. Feeling bold? Go bright and punchy with Gelcare’s “Aura Blue”. Apply one even coat and allow it to fully cure or dry before proceeding.
Next up, it’s time for that dreamy ripple effect. Grab a milky, semi-sheer gel polish — “Chantilly Lace” is a go-to — and apply a thin layer right on top. Here’s the trick: don’t cure it just yet. You’ll need that wet polish to create the water-like swirls in the next step.
🌊 Step 2: Create the Ripple Effect
While your milky layer is still wet, grab a dotting tool and dip it into either a clear polish or a blooming gel. Gently tap random-sized dots across the nail — no need to overthink it! As the product spreads, it’ll naturally create those soft, ripple-like waves that look just like sunlit pool water. Dreamy, right?
Once your ripples have settled into a design you love, pop your nails under a lamp and cure to lock it in.
Finish off with a high-gloss top coat, cure one last time, and boom — your pool water nails are officially ready to make a splash. Expect compliments. Lots of them.
Pool Water Nails Inspo:


