3 DIY Lip Balms For Smooth Lips All Winter

With the holiday season right around the corner, you don’t want to be caught under the mistletoe with anything other than smooth, pillowy lips. But as the temperature drops and the wind picks up, our lips get dry and chapped, which is why it’s super important to stock up on lip balms to keep your lips hydrated at all times! Stash them in your purse, on your desk, on your bedside table – everywhere!

To help you guys save the dollars we’ve sharing three bomb DIY lip balms: They’re super hydrating, and they’re all-natural. We’ve even made dupes of some of our fave lip balms but for a fraction of the price. You can be as creative as you like and mix in any of your favorite flavors. Here are our three favorite recipes:

1. Peppermint lip balm

If there’s one lip balm we’re always lusting after, it’s the La Mer Lip Balm, $70 – it’s a cult classic for a reason, but we can’t deny it’s pretty damn expensive. So, we decided to make our own using the signature ingredients; peppermint, almond oil, and Aloe Vera. The sweet almond oil is high in vitamin E, which will help protect your lips from UV damage and the aloe vera will hydrate and soothe.

Ingredients:
2 tbsps of petroleum jelly or coconut oil
1 drop of peppermint oil
1 drop of sweet almond oil
½ tsp of aloe vera

In a pan on a low heat melt the petroleum jelly (or just use softened coconut oil). When it’s melted, add in the other ingredients and stir well. Leave it on a low heat for two to three minutes and then pour it into a small dish (we use our leftover lip balm tins) using a funnel. Leave it in the fridge to set for six to eight hours.

2. Coconut lip balm

We’re in love with this DIY coconut lip balm – it leaves your lips feeling super soft and nourished, plus it has a sweet rose tint – your lips will literally be irresistible. All three oils are miracle workers: the coconut oil is a natural emollient, the argan oil is bursting with nourishing antioxidants, and olive oil is high in squalene, which creates a protective barrier on your lips.

Ingredients:
2 tsp of virgin coconut oil
2 tsp of Argan oil
2 tsp of Olive oil
Colored berry lipstick

In a pan on a low heat, melt together the coconut oil with about 1 cm of lipstick and add it into the pan. Next, add in the oils and stir well. Leave it on the heat for two to three minutes and then pour it into a small dish or an old lip balm tin. Leave it in the fridge to set for a few hours.

Posts You’ll Love:

3. Honey lip balm 

The Burt’s Bees Honey Lip Balm, $4, has been a firm favorite of ours for years, as the combination of beeswax and honey will soothe even the driest lips. Honey is a humectant so it draws moisture into the skin, while the addition of lavender gives extra healing powers as it has antiseptic properties, plus it’s full of antioxidants that’ll help fight against aging free radicals.

Ingredients
2 tsp of organic beeswax
1 tsp of organic coconut oil
1 tsp of raw liquid honey
2 drops of lavender

Add the beeswax, oils, and honey into a glass bowl, then place in a pan of very hot water and mix until they melt, then add two drops of lavender. Using a funnel, pour it into a small dish or lip balm tin. Leave it in the fridge to set for six to eight hours.

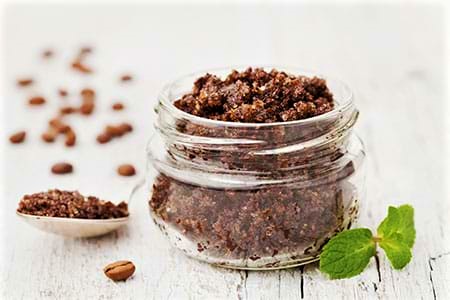
Bous: Rose Lip Scrub

We’re throwing in an extra DIY lip scrub for you guys, but you actually have Priyanka Chopra to thank for this delicious exfoliating lip balm. We like to do this a couple of times a week to get rid of any dead skin, which to be honest, in the winter is a regular occurrence.

Ingredients:
2 drops of glycerin
2 drops of rose water
1 teaspoon of sea salt or brown sugar

Mix one teaspoon of salt or sugar with a couple of drops of rose water and vegetable glycerin. Then, gently massage it onto your lips and wash it off with warm water.

Let us know if you’ve ever tried making your own DIY lip balms, in the comments below.

How To Banish Greasy Hair For Good (In One Wash)

During a autumn (Fall) vacay, something super embarrassing and frustrating happened to us. Somehow, our hair got this horrible, waxy and greasy buildup, and no matter how much we washed our hair – literally triple shampooed it – the residue didn’t go away. Our hair looked and felt gross and greasy hair is never a good look.

We soon discovered that we weren’t the only ones to experience this, and there’s a ton of questions about ‘waxy buildup on scalp won’t wash out’ online. If you’ve had this oily buildup before, it could be down to a number of things, including using hair-care products that are too ‘heavy’ for your hair to over-stripping with harsh products. (If you simply have typically oily hair, this DIY hair mask will also work wonders).

We found that our scalp was itching and sometimes dry which sometimes dandruff would be found. This is often brought on by stress, hormones, and even the weather. So when all shampoos failed us, our DIY beauty skills came into play and we were shocked at how amazing our clarifying hair mask turned out to be.

So, whether you’re experiencing this waxy buildup or you just want to detox your scalp and greasy hair, then you have to try this ultimate DIY clarifying hair mask. The only thing that actually worked to rid our hair of this waxy sebum residue and leave it feeling soft AF!

Clarifying Hair Mask

We already knew that Apple Cider Vinegar was an amazing way to detox hair, but we took it one step further and added some major beauty powerhouses to the mix; bentonite clay and activated charcoal powder. This natural hair mask works to deeply cleanse and re-balance by removing excess oil and toxins that can build up on the scalp. Whether you have product buildup, dandruff, greasy hair that won’t go away or a frustrating case of seborrheic dermatitis, this mask will fix it – tried and tested!!

Clay: Clay is packed with minerals and nutrients and helps draw out toxins and absorb the extra sebum produced by your scalp. The clay also helps to inhibit the growth of fungus that causes dandruff.

aztec indian healing clay

Activated charcoal: This works in a similar way that clay does to detox the scalp. Activated charcoal is adsorbent, which means it has an electrical attraction that pulls molecules, ions, and atoms towards its surface so that they stick to it – essentially sucking up dirt and oil from your scalp.

Apple cider vinegar: One of nature’s most potent creations, it’s full of active ingredients, vitamins, mineral salts, and amino acids, and it’s antibacterial and anti-inflammatory. It also has anti-fungal properties, and helps restore your skin’s natural pH balance and destroy dandruff by killing fungus and cleaning clogged pores and hair follicles.

How to make the clarifying detox hair mask:

Ingredients:

2 tbsp Aztec Healing Indian Clay
1 tbsp Activated Charcoal Powder
6 tbsp of Raw Apple Cider Vinegar

1 tablespoon coconut oil
½ tablespoon castor oil
½ tablespoon almond oil
Water
Glass bowl
Wooden spoon

We buy big tubs of these products and use them for all kinds of DIYs, from face masks to hair masks and body scrubs (and we’ve had our pots of activated charcoal powder and Aztec Indian Healing clay for months!). If your hair is just a little bit greasy and you just want to detox, you can also add one teaspoon of honey to nourish your hair.

How to:

Step 1. Combine bentonite clay, coconut oil, castor oil, and almond oil in the bowl (make sure you use wooden or ceramic utensil as activated charcoal reacts with metal); the formula will bubble up and should combine into a runny paste. Add the apple cider vinegar to the bowl and let it froth for 15 seconds before mixing it vigorously. Mix the ingredients slowly. It should form a smooth, yogurt-like consistency. Make sure there are no lumps.

Step 2. Apply the mask to dry hair using a medium-sized brush, working your way in sections across your scalp – like you would if you were dying your roots. Once you’ve covered your scalp with the mask, tie up your hair (apply a shower cap if you like) and leave the mask to work for 20 to 30 minutes.

Step 3. Wash out the mask until the water runs clear, then shampoo your hair thoroughly. You can shampoo twice to ensure no mask remains, then follow with conditioner on your ends.

The result is all traces of oil or any waxy buildup are completely gone. Flakes from dandruff are wiped out, and the scalp feels balanced. It also makes your hair feel super lightweight and soft and gives your hair natural volume. We recommend doing this mask once a month to keep your scalp in top condition.

If your scalp is super flaky or you’ve experienced the waxy buildup on your hair that doesn’t go away with washing, then you should definitely visit a derm to see if you have seborrheic dermatitis. A derm will be able to advise you on the best medicated shampoos, and also prescribe an ointment to improve seborrheic dermatitis. Let us know if you’ve experienced this before!

Did you try the Aztec Secrets Indian Healing Clay Mask for the hair– it works for facial but does it work for your hair type!? Lemme know about your experience….

DIY: Gold Face Mask

I have always been a fan of gold mask treatments and knew the benefits. But, truthfully, I just started using gold masks around March of this year. If you follow me @beautyleebar then you know I am a firm believer in self care which sometimes include me trying on different face masks.

Discriminating against beauty products based on the suggested retail price isn’t in our DNA. From drugstore steals to luxury splurges — and everything in between — we have more than enough room in our hearts (and medicine cabinets) to embrace beauty products from all over the price-point spectrum. The luxurious 24K gold face masks is very trendy with celebrities at the moment. I can definitely confirm MissSpa Gold Face Mask is the truth at a affordable price range that still gives you that rich luxurious vibe.

I decided to cook up a at-home recipe for Gold Mask.

Ingredients:
Your favorite moisturizer
Gold leaf sheets

Directions:

I order a package of 24K gold leaves from Etsy.com ($30). The gold is food-grade and comes from Thailand, so it takes awhile to arrive in Florida. Because of that, I always make sure to order more before I run out.

Then, I simply wash my face as I normally would, making sure to get every last bit of makeup off. I cleanse two or three times, usually starting with a micellar water makeup remover, then doing 2 rounds of Clarisonic with a cleanser. I want my face to be REALLY clean.

Next, I apply a liberal amount of my favorite moisturizer, Ren Evercalm Global Protection Day Cream ($50) or TATCHA Creams. This is part of what helps the gold stick to my face, so I am very generous with the amount.

I then place the tiny squares of gold all over my T-zone, nose and cheeks, and wait. Sometimes 20 minutes, sometimes an hour. However long I can hang out with a face covered in gold. Then, simply rub it in with (clean) fingertips. (Don’t wash it off! Let the gold absorb into the skin for maximum results.)

I find that this mask makes my skin plump and radiant. It’s not a mask that will magically transform your skin in one use; this is more of a special occasion treat, for when you want that extra bit of glow. In other words, less treatment, more treat.

My favorite part of this discovery is that for $30 and a little patience and DIY, I get a brilliant mask that makes my skin look nearly perfect without makeup. Many luxury brands charge hundreds of dollars for “gold-infused” products, but I feel that I’m getting a superior experience at a relatively inexpensive price point. One package of 100 sheets of gold allows me to do about 5 face masks, which works out to $6 per mask. Luxury at a bargain!

Also, Cleopatra was rumored to do this every night. If it’s good enough for her, it’s good enough for me!

DIY: Cellulite Scrub

While cellulite is largely genetic, most forms are caused by a combination of poor circulation, fat pockets (that’s why you’ll see cellulite on your butt, thighs, and sometimes even arms), and female hormones. But here’s the thing: just because your limbs are long and lean doesn’t mean that this is a post to skip. In fact, it can happen to you (read all about that here from our friends at Beauty Banter).

As we’ve shared, avoiding certain foods can help. Sarah from Beauty Banter also shares, “Exercise is a must. Hydration is essential. But treating the affected area consistently and vigorously is really your best bet. Commit to six weeks of two to three treatments a week. Combine your treatments with exercise, better diet (low in sugars and processed foods), and tons of water.

While there is no topical cure for cellulite, scrubs and creams with effective ingredients will help to diminish its appearance. Caffeine is considered the Holy Grail ingredient for anti-cellulite. So, naturally, this scrub is essentially coffee grinds. It’s easy to make, simple to apply, and affordable—especially compared with those costly medical-grade creams and treatments.

This scrub has the ability to subtly reduce the appearance of cellulite. And, bonus, it leaves skin soft and hydrated. But beware, while skin will look gorgeous, your tub or shower won’t—it will most likely resemble the inside of a coffee maker. Fret not, a quick rinse and wipe-down will clean the basin. Just be careful not to slip.” Read on for the step-by-step instructions and benefits of this DIY scrub.

What You’ll Need:
Coffee grinds (caffeinated)
Juniper oil
Coconut oil

Benefits of the Ingredients:
– Fresh coffee grinds (caffeinated)—Caffeine can immediately diminish the appearance of cellulite by stimulating blood flow, toning and tightening the area. The grinds are also rich in antioxidants (which aid in releasing toxins).
– Juniper oil—A berry that increases circulation and energizes the underactive tissues.
– Coconut oil—Hydrates, smoothes, and helps your skin absorb the caffeine and juniper.

Directions:
Combine 2 tablespoons of coconut oil and 20-30 drops of essential juniper oil in a bowl. Mix in about 1/2 cup of fresh caffeinated coffee grinds until the grinds are completely soaked with the oils. You’ll want this scrub to be grind-heavy, so if it’s feeling too watery, add more grinds. There are no exact measurements, so feel free to play around, but these are good jumping-off points.

Take into the bathroom (I highly suggest doing this in the bath or tub, prior to turning on the water) and firmly rub into affected areas using circular scrubbing motions.

Continue for at least five minutes. Then rinse and pat dry. Feel free to apply pure coconut oil to moisturize and soothe the skin (and massage that in too).

Note: Apply to affected areas two to three times a week. For quicker results, wrap the scrubbed area (concoction still on) with Saran Wrap to essentially heat the skin. Relax for 15 minutes then remove the wrap and shower.

I suggest making a new batch daily as the caffeine is said to be most effective when coffee grinds are fresh.