These 5 Essential Oils Will Make You Look And Feel Better Instantly

Beyond smelling amazing and making us feel super sophisticated, the benefits of essential oils are huge! The right oils can improve wrinkles or acne, soothe you, send you into a deep sleep, energize, and even uplift your mood. Whether in your bath salts, shampoo or skincare products, essential oils are used in a ton of different products and in their pure form, they offer everything from healing properties to mind and body support. It’s no coincidence they’re called essential oils  – if you know what we mean! So to make sure you’re not missing out on one of nature’s greatest offerings, we’re here to help you take advantage of them!

What are essential oils?

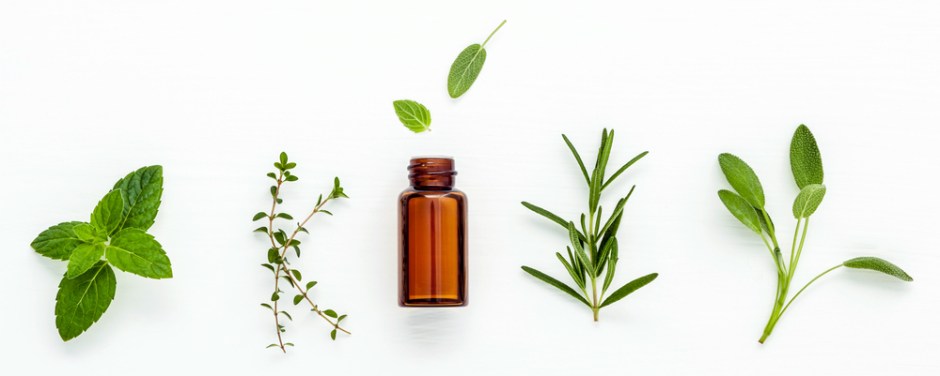
Essential oils come from naturally occurring compounds found in seeds, stems, roots, flowers, or the bark of plants. They’re amazing for skincare as they’re rich in antioxidants, antimicrobial and anti-inflammatory properties, but they’re not even technically an oil, they’re an intensely concentrated plant extract. Essential oils seem oil-like, but as they have no fatty acids in, technically they’re not an oil. Take this crazy fact, it takes 5000 pounds of rose petals to make just one pound of pure rose β€˜oil’ and one drop of peppermint β€˜oil’ is equivalent to 28 cups of peppermint tea. That’s why when you’re using essential oils, you only ever need a few drops as the formula is so intensely concentrated. You can even use Jasmine Oil for times when you need a pick me up, like for an interview or important meeting, just sniff it and it calms nerves, acts as an antidepressant, and has uplifting properties that will help you to feel more optimistic and calm.

Our Essential Oil Beauties:

Tea Tree

This amazing essential oil, derived from the Australian native plant Melaleuca alternifolia, has been used around the world for hundreds of years, and if you’ve ever struggled with acne, you’ve probably already take advantage of this antimicrobial ingredient. Tea tree is so good you’ll find the active ingredient in thousands of moisturizers, cleansers, and wipes, but it’s even better in its pure form for DIYs at home.

We love it for treating acne, and this DIY instantly targets problem areas: Mix together two teaspoons of organic honey with 4-5 drops of pure tea tree essential oil. Rub this mixture onto oily areas or pimples for 1-2 minutes and wash off with warm water. You can use this up to three times a week. But FYI, be careful as tea tree is a powerful cleanser and it could irritate and create redness from overuse, so be sure to always mix it with other ingredients.

Eucalyptus

From its incredible anti-inflammatory properties to its ability to act as a potent decongestant, deodorant and antiseptic, eucalyptus is the ultimate multitasker.

We love it for its capacity to relieve muscle pains and aches of all sorts. If you’re suffering mild twinges in your shoulder, stiff muscles, rheumatism or nursing any recent injuries, massaging eucalyptus oil on the surface of your skin will relieve stress and pain. Rub 2-3 drops of eucalyptus oil directly onto your problem areas and massage in a circular motion until it is fully absorbed. Do this twice a day until the affected areas of the body improve.

Peppermint

Peppermint is a bit like the superwoman of essential oils; it can be used both orally and topically and has powerful antimicrobial properties. Seriously, there are few mind, health or body issues it can’t help with and it’s often used to combat stomach aches, improve bad breath, clean wounds, release tight muscles, boost energy and mood, and alleviate soreness from respiratory tracts.

In the beauty world, you’ll find peppermint oil in a lot of high-quality hair care products for its ability to cleanse, brighten, nourish and promote healthy hair growth. All you need to do to get the benefits yourself is add 2-3 drops of it into your regular morning shampoo and conditioner. Not only will it stimulate your scalp and hair follicles, and thoroughly cleanse your scalp but it will energize your mind – and who doesn’t love the smell of peppermint?
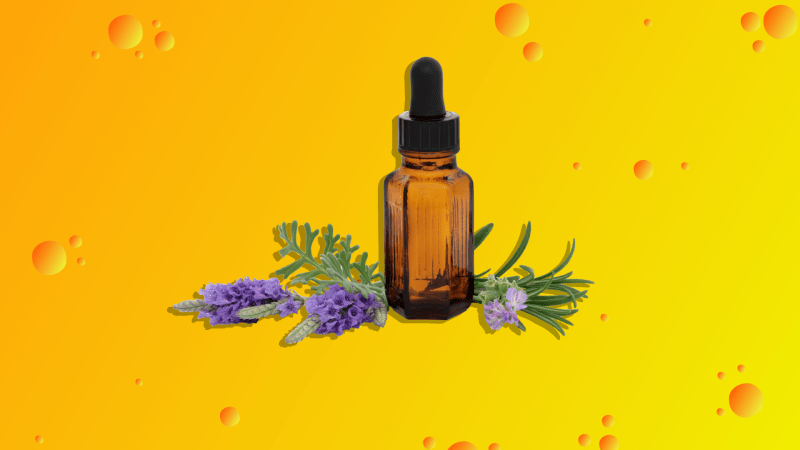
Lavender

Lavender isn’t just a fragrance, it a powerful regenerative oil that can help combat aging (maybe that’s why your granny likes it so much!) with its ability to promote the production of your body’s most powerful antioxidants: glutathione, catalase and superoxide dismutase. Unlike most oils that are too reactive to use directly on your skin, you can gently rub two or three drops of lavender oil directly onto fine lines or problem areas to diminish aging symptoms.

And of course, it’s widely sold as both sprays and oils to alleviate depression, headaches, and insomnia; a few drops on your pillow (or dabbed on your temples) is the perfect way to exploit lavender’s potent healing properties and chill out.

Lemon

Lemons are an incredible antioxidant, packed with vitamin C and A, which are vital for fighting free radicals and preventing premature aging. As well as boasting AHAs (a natural exfoliant that helps remove pore-clogging dead skin), it breaks down sebum with its astringent acidic properties. Not only do lemons smell great and taste great in water (squeeze some in your morning glass to detox your body), but they’re great for removing excess oil too. Squeeze lemon juice onto a cotton pad and use it to tone your skin after cleansing.

When choosing an essential oil, look for an organic version, the extra quality is worth it when it comes to skincare. Feeling inspired? Check out theΒ one thing you never thought of doing with oil here!

One Thing You Never Thought Of Doing With Oil

It sounds extra AF, but swishing oil around your mouth might just be the best thing for your health and skin, seriously! The idea comes from ancient Ayurvedic medicine and involves taking a tablespoon of oil and swishing it around your mouth like mouthwash, for twenty minutes. Believe it or not, this detoxifying method actually has a ton of health benefits that improve oral health, and it can even improve acne, whiten your teeth, help with headaches, and detox your entire body.

How To Do Oil Pulling:

On an empty stomach – first thing in the morning is the best time – swish a tablespoon of oil around your mouth for twenty minutes (at least ten minutes if you’re in a hurry). Our preference is coconut oil, because obvs we have a ton lying around and it’s also antibacterial, but you can also use sesame, olive or sunflower oil. Initially, it might feel a little gross, but persist, and like us, you might even end up enjoying the experience! It should always be done on an empty stomach, so wait at least four hours after eating, and an hour after drinking.

Whatever you do, don’t swallow the oil; otherwise, you’ll basically allow all the toxins that have been drawn out to go into your stomach. Once you’ve swished for 15-20 minutes, spit it out in your bin. You can do almost anything (except speak) while you do this, but keep an eye on the time, as if you do it much longer than 20 minutes, it’s possible that the toxins could be reabsorbed into your body. Rinse your mouth with warm water or salt water, and brush your teeth.

How Oil Pulling Works:

how oil pulling works

It’s quite gross to think about, but your mouth is filled with bacteria, fungi, toxins, and plaque. Oil pulling literally cleanses your mouth by drawing out all the toxins from your gums and teeth, before they’re able to spread to the rest of your body.

Why Oil Pulling is Awesome:

Who’d have thought that you can forego a ton of expensive beauty products simply by following this daily ritual? Oil pulling is an amazing way to improve your health and detox your body, skin, and gums. Though there’s yet to be significant research into oil pulling, promising results have been found, and many doctors recommend it – apparently, Gwyneth Paltrow and Shailene Woodley are fans. Here’re just some of the amazing benefits:

Skin-clearing: Catching out nasty toxins before they reach the rest of your body has a huge impact on your skin. The same way washing your skin gets rid of surface bacteria, oil pulling gets rid of bacteria that causes skin problems before they have a chance to take hold. Reports have shown that oil pulling for a month has helped improve acne and eczema.

Teeth whitening and fresh breath: Oil pulling can remove surface stains from your teeth, and because the fats in oil can dissolve plaque, it prevents plaque build-up and reduces the risk of tooth cavities for an extra white smile. The removal of bacteria from your mouth also results in fresher breath throughout the day.

Detoxes your body: The mouth is our gateway to the majority of substances in our body, by removing bacteria from the mouth before it has a chance to reach the rest of your body it majorly impacts on your health.

Increases energy: Our immune system works 24/7 to eliminate toxic waste from the body. By getting rid of these nasty toxins at the source before your body has to, it saves precious energy to be spent on other activities.

Reduces headaches and hangovers: We’ll be honest, anything that promises to cure a hangover is worth trying; the process of oil pulling will remove alcohol toxins still lurking in your body from the night before, helping you and your body feel much better. Headaches and migraines can be a reaction to your body being under toxic stress; so extract the toxins, reduce the stress!

Why Coconut Oil is Our FAVE:

We’ve found that coconut oil, (try to useΒ 100% raw organic cold-pressed coconut oil) is the best oil to use. Not only is it easy to find and inexpensive, but it’s also by far the best tasting of the bunch. Coconut oil also contains lauric acid that has antimicrobial and anti-fungal properties, while Vitamin E is rich in antioxidants and it’s antibacterial. If you’re going to have oil in your mouth for twenty minutes, it should at least taste okay!

Oil pulling can easily become part of your morning routine: swish while you shower and tone, or while you get dressed and scroll your Insta feed. If you’re at home, take advantage of the period after lunch before dinner and swish on an empty stomach while you watch TV.

WHAT DO YOU GUYS THINK?

HOW TO DIY THE PERFECT AT-HOME PEDICURE IN 10 EASY STEPS

As tempting as it is to dish out money for a salon pedicure (with the soaking, foot scrubbing, massage β€” the works) it’s not always doable, especially when you already splurged on makeup in the beginning of the week and are left to question your self-control. So if you currently find yourself in a similar position and are in desperate need of a pedi, we’re here to prove that it’s possible to achieve salon-quality results pedicure in the comfort of your own home β€” for a lot less money.

STEP 1: Let Your Nail Polish Remover Do Its Thing

Completely remove any nail polish that’s still on your toenails using nail polish remover and a cotton pad. If you don’t have any leftover polish, you should still run nail polish remover over your nail to remove any excess oil.

Primp Tip: If you’re left with any weird stains or a yellow tinge (you’ll usually see this after removing darker colors, like red or black), rub cuticle oil over the surface of your nails to lighten any residue.

STEP 2: Soak Your Feet Like You’re at the Spa

Okay, before you start soaking, your first jobβ€”and this is importantβ€”is to go around your house and gather every candle you can find. Oh, and get yourself a glass of wine while you’re at it. The trick to making an at-home pedicure feel like a spa experience instead of, you know, rubbing your own feet in your too-small-for-comfort apartment is setting the ~mood~ at your makeshift pedicure station.

Once the ambiance is right, you’re ready to soak your feetβ€”which softens tough skin and cuticles (and is downright relaxing). Lennon suggests using a basin (aka a really big bowl) if you have one, but your bathtub is also a sound option. Fill ’er up with warm water and add a liberal scoop of skin-soothing bath salts (Lennon recommends CΓ΄te Re-Treat Himalayan Pink Salt Soak, but you can also try my favorite Kneipp Mineral Bath Salts or just use a cup of kosher salt). Let your feet soak for a few minutes before moving to the next step. This is a great opportunity to multitask and try out that new face mask.

STEP 3: Get Rid of Dead Skin

After drying off your feet, use a foot file to remove any dead skin from callused (hard) areas. Parts to pay attention to are the balls of your feet, the sides of your feet and your heels. Scrape these areas until they feel smooth, but don’t overdo it. Try a pumice stone or foot file to gently smooth the skin. Then, switch your feet and repeat.

STEP 4: File and Shape Your Nails

Use a nail trimmer to achieve the length and shape you want (we recommend trimming nails straight across). Follow by filing the corners of your nails and buffing to make them smooth. According to Hadley, a big mistake people make at this point in the process is cutting their cuticles. β€œTrimming or cutting cuticles during a manicure or pedicure is purely cosmetic and sometimes it doesn’t benefit the nail in any way,” she explains. β€œThe cuticle is a barrier to protect your surrounding skin and protect against infection.”

STEP 5: Apply Cuticle Oil

Apply cuticle oil to the base of your nail. Cuticle oil doesn’t just keep your feet soft and moisturized, but it also keeps your polish from chipping.

STEP 6: Moisturize

Take both feet out of the tub and dry them off with a towel. With a foot cream or body lotion, begin massaging your toes, feet, and calves until, well, you wanna stop. Moisturize your feet with an unscented lotion. β€œScented lotions with synthetic fragrances can cause your nail polish to crack.”

STEP 7: Prep Your Toes

Use toe separators (you can buy a 12-pack for cheap online) to make painting your toes easier and avoid making a mess.

If you don’t have toe separators, Lennon suggests tearing off a piece of paper towel, rolling or twisting it into a rope, and weaving it through your toes to prevent the polish from smudging.

STEP 8: Apply Your Base Coat

Then, apply a thin layer of base coat on each nail. Follow with two thin coats of your color of choice, letting the paint dry for a few minutes between each coat.

STEP 9: Finally, Do the Damn Thing

Paint on your base coat and wait at least two minutes to ensure it’s dry. Don’t forget your base coat because it gives your nail polish something to sink into besides your actual nails.

STEP 10: Finish With a Quick-Drying Top Coat

Finish with a top coat so your nails maintain high shine and luster. Because nail polish takes about 12 hours to harden.

Primp Tip: Recommends sticking your finished toenails into cold water for a few minutes to make your nail polish harden faster and help it solidify.

Tell me: Do you do your own nails?


The Ultimate Hack for Super Soft Lips

Summer is finally here, and I’m super excited! It shouldn’t have to cost thousands of dollars to achieve that beautiful supple, glowy and hydrated look… But fortunately, there are SO many ways you can cheat it!

One of the first places dehydration shows is on your lips, and not only is chapped and cracking lips uncomfortable, but it’s also not very attractive… and there’s no reason you shouldn’t look your best. Here’s what I like to do to keep my lips soft and hydrated:

DIY Honey Mask:

One of my favorite ways to keep my lips soft and supple during summer is a honey mask. It’s super easy, just slather your lips in honey every night before you go to bed, and just leave it on for 10 to 15 minutes before removing it. Honestly, this works wonders!

Lanolin Products:

During the day, a good lip balm is an essential. I’ve always found products with Lanolin in to have THE most amazing moisturizing properties, and it’s actually because it’s a completely natural ingredient that comes from sheep’s fleeces. My favorite pure lanolin lip balms to date have to be Lanolips (which literally lasts allll day) and Dr. Lipp. Carmex is also amazing and contains lanolin, beeswax, shea butter, Menthol, and Aloe, which all work together to really soothe your lips.

DIY Balm

Take your lanolin lip balm (or another lip balm) and whip it up in a mini container with a couple of drops of rose oil. This is totally optional, but rose oil has the most amazing hydrating effects.

Be sure to drink as much water as you can in the evenings so your body can catch up on the hydration it needs.

Let me know in the comments, which DIY is your favorite! Check out the review I did on Lanolips