This quick, easy and inexpensive homemade turmeric and honey face mask is as simple as pouring 3 natural ingredients into a bowl, stirring and…THAT’S IT! You’re done. This post also includes helpful reader FAQs.
We’re back with another DIY homemade beauty recipe. I’m so excited to share one of my new favorite skincare masks: a 3-ingredient DIY Face Mask for clear, glowing skin!
Yep, you heard me right–with just three ingredients, you can make a homemade face mask in under two minutes flat that will have a MASSIVE impact on your skin. Here’s a few of the results you can expect after using this mask a few times:
🤍 Reduced acne, clogged pores, breakouts and blackheads
🤍 Dry skin will be hydrated with fewer wrinkles
🤍 Lightened dark spots and acne scars
🤍 Reduced redness and a more even, brightened skin tone
How is all of this possible with just one homemade face mask? Take a look!
RELATED POSTS:

Joanna Vargas Skincare Bible
Hello Beauties, by now everyone knows how Lee and her other Editors are obsessed with skincare. If you didn’t know then you have either been living under a rock or new here; so ” Welcome To BeautyLeeBar ” aka your new favorite beauty go-to blog. Of course, we are still learning about our skin and learning…
TURMERIC BENEFITS FOR SKIN
Did you know that turmeric is one of the most powerful herbs for preventing, fighting and even reversing disease? The dozens of healing properties found in the root make it just as effective (if not more) than conventional medicine. (source)
Typically, turmeric is ingested, either from food or in supplement form. But it can be just as healing when applied directly to your skin thanks to its anti-inflammatory abilities. The active ingredient in turmeric, called curcumin (it’s what gives turmeric it’s orange hue), is incredible at purifying and cleansing the skin, resulting in a healthy, bright glow (it’s a ritual at Indian weddings for this very reason!).
Turmeric is also great for acne due to its antiseptic and antibacterial properties, which fight pimples and breakouts, cleansing clogged pores and blackheads. Turmeric even reduces oil secretion from the sebaceous glands, preventing acne from recurring. And its anti-inflammatory properties help soothe flare-ups. (source)
RELATED POSTS:

This Easy DIY Coffee Scrub Can Be Tweaked to Suit Every Skin Type
If you want skin that glows with a capital “G,” it comes down to one thing: exfoliation, exfoliation, exfoliation. You’ve got options here: You could slather on an at-home peel with glycolic or lactic acids, pop the top on one of your favorite face scrubs, or whip up a scrub at home with a gentle exfoliant…

BENEFITS OF HONEY ON FACE AND SKIN
Using honey as part of your skincare routine is easily one of the best things you can do for your skin. But not just any honey. At the very least, you want to make sure you’re using an organic, raw, unpasteurized, unfiltered honey, ideally from a local source.
Why is this so important? Most conventional honey bears are not much different from high fructose corn syrup. Not only that, but when honey is processed using techniques like pasteurization or filtering, the nutrients are removed in the process, leaving with you nothing but sugar.
On the other hand, raw honey is full of amino acids, B vitamins and dozens of vitamins and minerals, like Copper, Iron, Magnesium, Potassium and Zinc.
Even better? Manuka honey, which is produced in New Zealand by bees that pollinate the Manuka bush, actually has four times the nutritional content of normal flower honey AND considerably higher level of enzymes, which create a natural hydrogen peroxide that works as an antibacterial. (source)
Starting to understand why honey is so amazing for your skin? Considering honey’s antimicrobial, anti-fungal, and anti-inflammatory properties, honey has been proven to calm redness and irritation, cleanse pores, and soothe and heal skin, whether your ailment is acne, eczema, or even burns and wounds (I’m looking at you, face picker…oh wait, that’s just my reflection in the mirror 😉 )
If you, like me, just can’t help yourself but to pop pimples, you’ll love the effect of honey on your skin! Honey is proven to lighten skin, decrease the appearance of scars and increase healing and tissue regeneration. (source)
Honey improves skin tone and texture, and thanks to its natural antioxidant levels, it’s an effective anti-aging treatment (read: fewer wrinkles). It’s also a natural humectant, meaning it draws moisture from the air into the skin where it’s penetrated and retained for long-lasting hydration. (source)
RELATED POSTS:

DIY: Gold Face Mask
I have always been a fan of gold mask treatments and knew the benefits. But, truthfully, I just started using gold masks around March of this year. If you follow me @beautyleebar then you know I am a firm believer in self care which sometimes include me trying on different face masks. Discriminating against beauty…
ADDING YOGURT OR KEFIR FOR NATURAL PROBIOTICS
As if this mask wasn’t amazing enough just with the honey and turmeric, I’ve pushed it full-on over-the-top (in the best way, of course) by adding some natural probiotics in the form of yogurt or kefir.
I actually recommend using coconut kefir for this recipe, as you’ll remove all dairy and lactose concerns and add insane amounts of probiotics to the face mask.
In fact, kefir is one of the most probiotic-rich foods in the world with incredible medicinal and healing benefits (source). But yogurt is totally fine too–just make sure it’s plain/unflavored.

This Quick & Easy DIY Mask Will Give You An Instant Glow!
I’m obsessed with DIYs and always have been since I was a teenager. This papaya and honey DIY mask is one of my all-time faves as it brightens, hydrates, improves tone and texture, and most importantly leaves your skin glowy AF. It’s also great for acne-prone skin as it can help reduce inflammation and fight acne-bacteria,…
With its natural anti-bacterial and anti-fungal properties, yogurt and kefir are also chockfull of protein, calcium and vitamin D, which help fight acne, nourish your skin, leaving if soft and hydrated. (source)
Not only that, but the lactic acid in yogurt will help dissolve dead skin and tighten pores by gently exfoliating your skin to create a natural glow and prevent breakouts. Did I mention this natural acid will also diminish the appearance of lines and wrinkles?
AND AND AND, when used regularly, yogurt has very mild bleaching properties to help with discoloration, blotchiness, acne scars and age spots. YES!
RELATED POSTS:

How to Treat and PREVENT MASK-NE AKA “Mask Acne” – It’s A Thing!
If it wasn’t enough that half of our lovely faces must remain covered by masks these days, now we are starting to suffer breakouts as a result. It doesn’t help that we are entering a heat wave and the height of summer is around the corner, just in time to bundle up an area we typically let…

WHY YOU SHOULD MAKE HOMEMADE FACE MASKS
If you’ve been following BEAUTYLEEBAR, you know that the sheer amount of toxic and harmful chemicals and additives allowed in our skincare products is truly APPALLING!
Unfortunately, face masks are no different. Most store-bought options are brimming with artificial colors and preservatives, hormone-disrupting chemicals like parabens and phthalates, harsh alcohols and acids that irritate our skin and cause allergies, and even carcinogenic additives.
If those toxic chemicals weren’t enough to convince you to make your own, consider the AMAZING MONEY SAVINGS you’ll find when you make your own face masks.
RELATED POSTS:

The Acne-Prevention Strategies Glasses Wearers Need to Know
How four eyes become five After months of procrastinating to get a new prescription, I finally decided to splurge on a pair of glasses… can’t wait! But with them came a surprise: acne. It seemed like there was a new pimple on the bridge of my nose basically every other day. Because I hadn’t purchased my new…
And, of course, by now you know that I’ve gotta take a minute to just talk about how easy it is to make your own skincare products.
I often get comments from readers saying things like “I just wish I had the time” or “If only I had the discipline to make my own products.”
Listen, this recipe is literally as simple as pouring THREE natural ingredients into a bowl, stirring and… THAT’S IT! You’re done. It’s been less than 30 seconds and you’ve made an incredible face mask!
BUT, if you’re still not convinced you want to make your own face mask, there are a few safer store-bought options I’d recommend:
🤍 PURE TROPIX TURMERIC ACNE MASK $24.00 NOW $21.99
🤍 GLEAMIN VITAMIN C CLAY MASK $39.99
But just note that none of these face masks combine the healing powers of honey AND probiotics! For that, you’ll just have to add in those ingredients.
FAQS FOR THIS DIY TURMERIC HONEY FACE MASK
Inevitably, I always get a lot of questions about DIY skincare products. No complaints–I LOVE hearing from you! But to help a baddie out, I thought I’d share some of the most frequently asked questions I get about this homemade face mask:
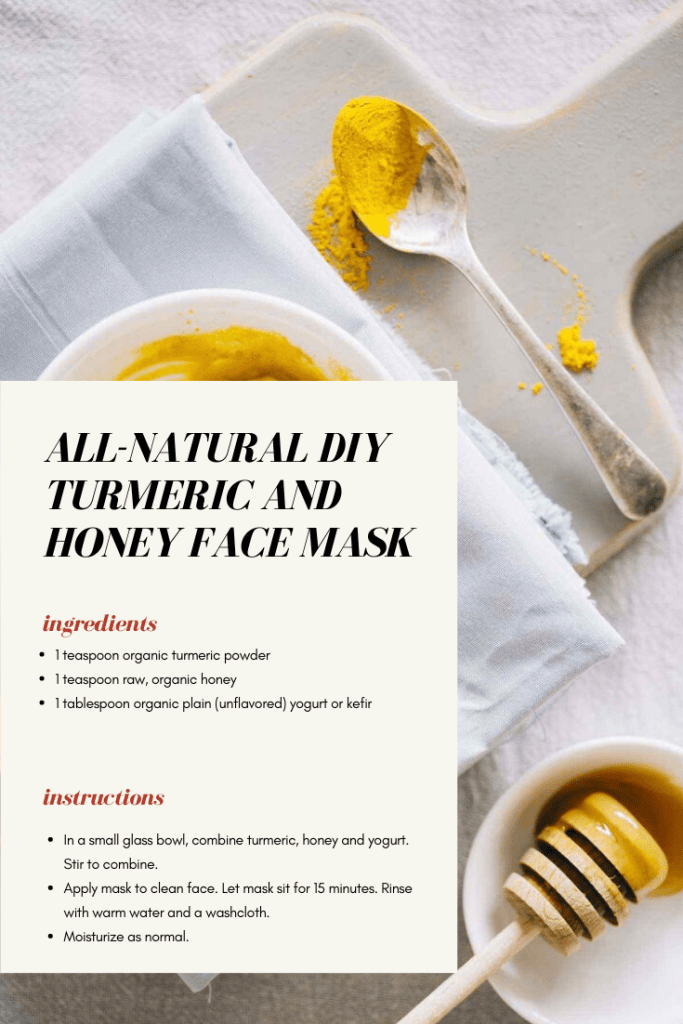
🤍 How to prepare this DIY Turmeric and Honey Face Mask? I’ve already talked about how easy it is to make this mask, and the detailed recipe below should help answer any remaining questions you have. But if not, feel free to leave a question in the comments and I’ll be sure to answer.
🤍 How to apply a Turmeric Honey Mask? If you’re looking at this mask and wondering how to use it, don’t worry–it couldn’t be easier. Simply use your fingers or a clean paint brush and apply the mixture directly onto clean skin, covering your entire face except for your eyes, nostrils and lips. Leave the mask on for 10-15 minutes.
🤍 How to remove a Turmeric Honey Mask? Likewise, you might be wondering how to get this mask off. Again, it’s easy as pie. Over the sink, splash your face with water, gently massaging the mask off your face until there’s no more left on your skin. It’s just like any other face mask you’ve tried before 🙂
🤍 How to store homemade face masks? Unlike store-bought masks that are filled with toxic preservatives, this homemade face mask recipe is just for one batch, or a single-use that should be applied to your skin as soon as it’s made. Otherwise, the mask will harden if left out too long, so make it as needed.
🤍 How often should you use this Turmeric Honey Mask? The skin on our faces is extremely delicate, and even if you don’t think you have sensitive skin, I’d recommend using a mask no more than 2-3 times per week, max. I try to use this mask once a week, and then this DIY Charcoal + Clay Mask a few days after. Usually I’ll put the mask on during or after I take a DIY Epsom Salt Detox Bath.
🤍 Does this turmeric face mask stain? I recommend only leaving them on for 10-15 minutes to avoid staining your skin temporarily. If you follow the instructions, you should be able to use this turmeric face mask without staining. BUT, if you run into any trouble, don’t worry! Simply apply this DIY Makeup Remover to a cotton pad and swipe it over your skin until all yellow/orange residue of the mask is removed. You can also try washing your face with a mild cleanser. Be careful not to get it on your clothes, as the turmeric will stain. p.s. turmeric will stain your clothes. it could stain your skin, so just use a thin layer. The thicker the mask, the more likely it is to stain you skin. If your skin does get stained, wash your face twice and it should easily go away!
🤍 Can turmeric cause allergic reactions? Some people have reported allergic reactions to turmeric after skin exposure, so I recommend testing this mask on a small area of your skin first, like your wrist or a small patch on your face. Most people only have positive results, but everybody reacts differently, so it’s important to test your own skin’s reaction before applying it all over your face.
Disclaimer: This post includes affiliate links, and I will earn a commission if you purchase through these links. Please note that I’ve linked to these products purely because I recommend them and they are from companies I trust. There is no additional cost to you.