One Thing You Never Thought Of Doing With Oil

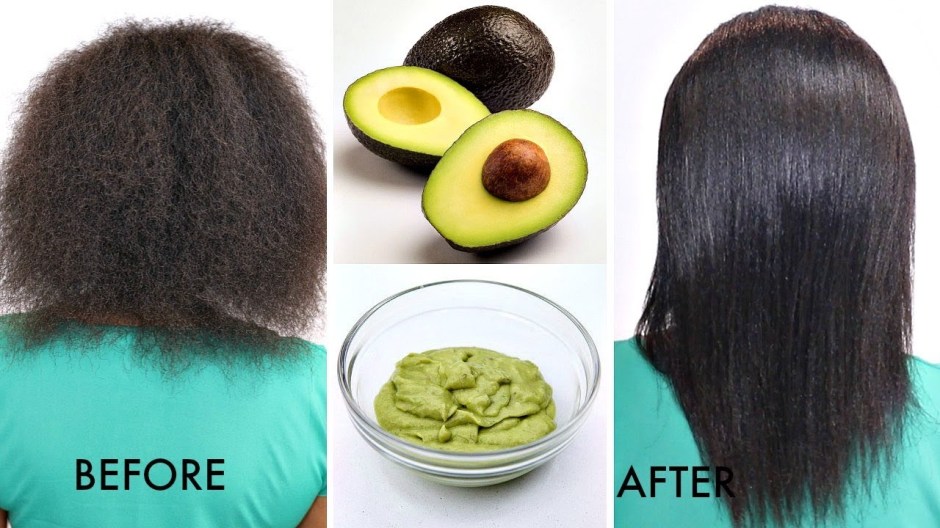
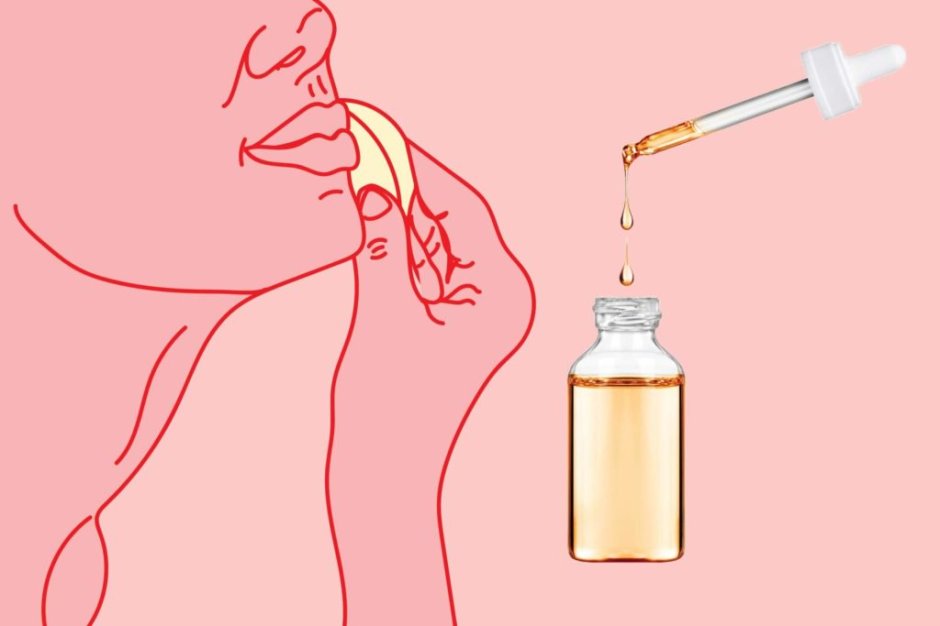
It sounds extra AF, but swishing oil around your mouth might just be the best thing for your health and skin, seriously! The idea comes from ancient Ayurvedic medicine and involves taking a tablespoon of oil and swishing it around your mouth like mouthwash, for twenty minutes. Believe it or not, this detoxifying method actually has a ton of health benefits that improve oral health, and it can even improve acne, whiten your teeth, help with headaches, and detox your entire body.

How To Do Oil Pulling:

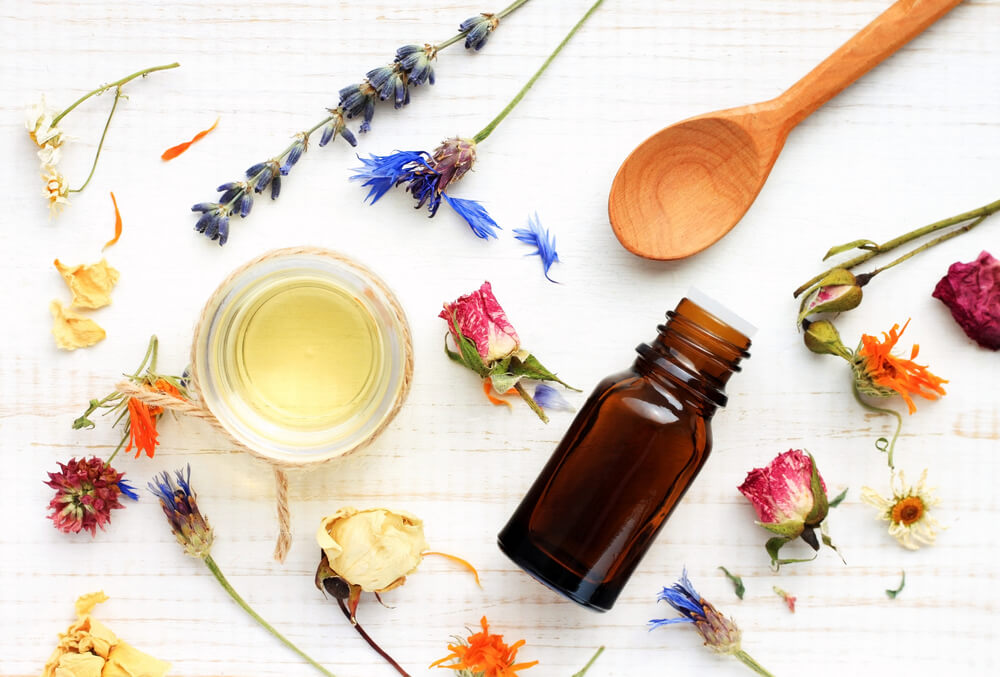
On an empty stomach – first thing in the morning is the best time – swish a tablespoon of oil around your mouth for twenty minutes (at least ten minutes if you’re in a hurry). Our preference is coconut oil, because obvs we have a ton lying around and it’s also antibacterial, but you can also use sesame, olive or sunflower oil. Initially, it might feel a little gross, but persist, and like us, you might even end up enjoying the experience! It should always be done on an empty stomach, so wait at least four hours after eating, and an hour after drinking.

Whatever you do, don’t swallow the oil; otherwise, you’ll basically allow all the toxins that have been drawn out to go into your stomach. Once you’ve swished for 15-20 minutes, spit it out in your bin. You can do almost anything (except speak) while you do this, but keep an eye on the time, as if you do it much longer than 20 minutes, it’s possible that the toxins could be reabsorbed into your body. Rinse your mouth with warm water or salt water, and brush your teeth.

How Oil Pulling Works:

how oil pulling works

It’s quite gross to think about, but your mouth is filled with bacteria, fungi, toxins, and plaque. Oil pulling literally cleanses your mouth by drawing out all the toxins from your gums and teeth, before they’re able to spread to the rest of your body.

Why Oil Pulling is Awesome:

Who’d have thought that you can forego a ton of expensive beauty products simply by following this daily ritual? Oil pulling is an amazing way to improve your health and detox your body, skin, and gums. Though there’s yet to be significant research into oil pulling, promising results have been found, and many doctors recommend it – apparently, Gwyneth Paltrow and Shailene Woodley are fans. Here’re just some of the amazing benefits:

Skin-clearing: Catching out nasty toxins before they reach the rest of your body has a huge impact on your skin. The same way washing your skin gets rid of surface bacteria, oil pulling gets rid of bacteria that causes skin problems before they have a chance to take hold. Reports have shown that oil pulling for a month has helped improve acne and eczema.

Teeth whitening and fresh breath: Oil pulling can remove surface stains from your teeth, and because the fats in oil can dissolve plaque, it prevents plaque build-up and reduces the risk of tooth cavities for an extra white smile. The removal of bacteria from your mouth also results in fresher breath throughout the day.

Detoxes your body: The mouth is our gateway to the majority of substances in our body, by removing bacteria from the mouth before it has a chance to reach the rest of your body it majorly impacts on your health.

Increases energy: Our immune system works 24/7 to eliminate toxic waste from the body. By getting rid of these nasty toxins at the source before your body has to, it saves precious energy to be spent on other activities.

Reduces headaches and hangovers: We’ll be honest, anything that promises to cure a hangover is worth trying; the process of oil pulling will remove alcohol toxins still lurking in your body from the night before, helping you and your body feel much better. Headaches and migraines can be a reaction to your body being under toxic stress; so extract the toxins, reduce the stress!

Why Coconut Oil is Our FAVE:

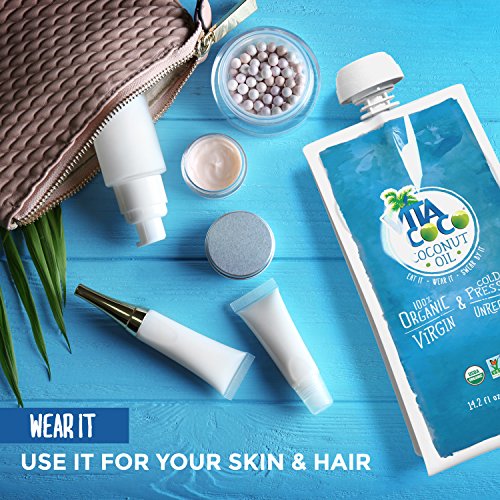
We’ve found that coconut oil, (try to useΒ 100% raw organic cold-pressed coconut oil) is the best oil to use. Not only is it easy to find and inexpensive, but it’s also by far the best tasting of the bunch. Coconut oil also contains lauric acid that has antimicrobial and anti-fungal properties, while Vitamin E is rich in antioxidants and it’s antibacterial. If you’re going to have oil in your mouth for twenty minutes, it should at least taste okay!

Oil pulling can easily become part of your morning routine: swish while you shower and tone, or while you get dressed and scroll your Insta feed. If you’re at home, take advantage of the period after lunch before dinner and swish on an empty stomach while you watch TV.

WHAT DO YOU GUYS THINK?

Tone It Up: DIY Avocado Hair and Face Mask

Love reading articles from, Tone It Up! We’ll be sharing Tone It Up’s best fitness and healthy living tips. In today’s, Serena and Katrina will be showing you how to add shine to your hair and a glow to your skin with two of their favorite DIY mask recipes:

Hi everyone, it’s Katrina and Serena here from Tone It Up! Today we’re excited to be telling you about two DIY masks you can make for your hair and face. They are both so easy to make and for when you are in the mood for a relaxing evening at home. Plus, they will freshen up your pretty locks and clear your beautiful skin! The key ingredients in both of these masks are avocado and apple cider vinegar, both of which will make your hair shiny and soft and add a glow to your skin.

Here’s how to make them (be sure to pin the image below to remember it for later!)…

To recap, here’s how to make these masks:

Avocado Hair Mask

You will need:

  • 1 banana
  • 1 ripe avocado
  • 1 tsp olive oil

Instructions:

  1. Blend all the ingredients together and massage into your hair from roots to ends, covering thoroughly.
  2. Let sit for 30 minutes.
  3. Shampoo well, then rinse with apple cider vinegar.


Avocado Face Mask

You will need:

  • Β½ ripe avocado
  • 1 tbsp of honey
  • 1 tsp of apple cider vinegar

Instructions:

  1. Blend the ingredients together or mash in a bowl.
  2. Apply to your face and leave on for 15 minutes. Focus on your breathing and relax while letting it set.
  3. Rinse off with cool water and a damp cloth.

We love the avocado in these masks because it helps to moisturize and rejuvenate your hair and skin. The healthy fats act as an all-natural and super hydrating moisturizer. And let’s not forget about the apple cider vinegar (one of our favorite elixirs). You might remember us talking about the benefits of apple cider vinegar here on BeautyLeeBar.com couple weeks ago. Not only is it good for your body, it’s great for your hair. It closes the cuticles, allowing your locks to lay flat for shinier hair that’s easy to style. It also acts as an astringent that clears your skin as well.

Now that you’ve read a bit about two of our favorite masks, we want to know…

Will you give our DIY avocado hair and face masks a try?

Let us know how they work for you in the comments below! And don’t forget to pin the image above so you will have it for later πŸ™‚

XO Team BLB

P.S. If you liked this post, be sure to check out last week guest blog about apple cider vinegar by clicking here.

DIY SUNDAY: The Best DIY Face Oil For Dry Skin

Face oils are one of the most effective ways to hydrate and nourish your skin. The right blend can pump your skin with skin-enhancing vitamins and protective antioxidants and give deep hydration while smoothing fine lines. But face oils can be expensive, which is why I’ve become absolute pros at making my own blend of face oils to target different skin types.

Face oils are especially great for dry skin as they’re lipophilic, which means they have a smaller molecular structure that can penetrate further into your skin, allowing your skin to retain hydration at a deeper level. Plus, oils are one of the richest formulas, so unlike other skincare products, like moisturizers, they’re pure goodness from nature.

Understanding Dry Skin

Dry skin is often dull, especially around the eyes, accentuating fine lines and wrinkles. If your skin is dry, your pores will most likely be small and barely visible (yay for you!). Your skin might feel tight and rough; it may even chap. Although, if your skin is extremely flakey, your skin may be prone to skin conditions like eczema or dermatitis.

DIY Face Oil Rules

Face oils are made of two different types of oil: a carrier oil and an essential oil. A carrier oil will act as the base, while the essential oil is much more potent and will have more healing and nourishing power.

Best carrier oils for dry skin: Avocado oil, Sweet Almond oil, Apricot oil, Camellia Oil.
Best essential oils for dry skin: Lavender oil, Geranium oil, Jasmine oil, Rosehip oil, Cedarwood Seed Oil.

Depending on what oils you have or can find, you can mix up your own. The general rule is for every 30ml of a carrier oil, you can use 1-2 drops of essential oil. You can also mix different carrier oils as long as you keep the carrier oil to essential oil ratio the same. Try to getΒ cold-pressed, organic oils, as these will be the purest and most potent.

DIY Face Oil for Dry Skin

60 ml of Camellia seed oi
2 drops of Sea Buckthorn Berry oil
2 drops of Rose oil

Directions: Add all ingredients into a glass bottle and roll between the palms of your hands to combine.

The benefits:Β This oil is super nourishing, making it the ultimate cure for dry or sensitive skin. A Japanese favorite, Camellia Seed oil is crazy hydrating because its molecular weight is almost identical to our skin, allowing it to be absorbed quickly. It’s also full of skin-boosting omegas, just like Sea Buckthorn Berry oil, which is a rich source of omega 7, a rare fatty acid that’ll nourish, heal, reduce scarring, and strengthen the skin. Finally, the Rose oil will not only instantly brighten, but also contains a powerful antiseptic that can help calm breakouts.

Have you guys tried making your own DIY face oil before? Let me know if you’re going to try this in the comments below.

WHAT DO YOU GUYS THINK?


DIY SUNDAY: This Is Our Secret To Longer Lashes

This DIY is the secret to longer lashes and fuller brows. I swear, within weeks me and my fellow BLB SQUAD noticed a difference! If you try this hack morning and night, you’ll have lashes Bambi would be proud of and brows to rival Cara Delevigne. This has to be the easiest DIY in BeautyLeeBar history – it’s literally one ingredient – Jamaican Black Castor Oil (JBCO) but been referring to it as a gift from the beauty gods! It’s literally bursting with beauty-enhancing vitamins that’ll stimulate growth, making it the perfect remedy for short lashes and sparse brows. You can even use the oil to combat acne, PMS and insomnia… intrigued? Here’s everything you need to know:

What Makes Jamaican Black Castor Oil SO Magical?

Chances are, you’ve already heard of castor oil, but it’s unlikely that you’ve been introduced to its more powerful sister –  Jamaican black castor oil. So don’t get confused between the two, because JBCO is a lot more potent, thanks to the unique extraction process. Unlike regular castor oil, the seeds of JBCO are roasted and ground, then the powder is mixed with water and slowly boiled on a wood fire. The oil is completely natural and isn’t diluted or altered, so the nutrients and vitamins pack a great punch.


Source: Tropic Isle Living

For your lashes and brows: Castor oil is rich in omega-6 and omega-9 fatty acids, as well as ricinoleic, all of which will help stimulate growth, leaving you with longer lashes. It also contains beauty-boosting vitamin E, that’ll not only boost growth but it’ll leave your lashes looking thicker. We’re currently using the Tropic Isle LivingΒ Jamaican Black Castor Oil, $8, as it’s 100% pure JBCO and is hand processed from pure wildcrafted and organic beans, so it doesn’t contain any nasty chemicals and is potent AF.

DIY Lash and Brow Serum:

First of all, make sure you double cleanse to guarantee that all your eye makeup is thoroughly removed – you’ll be surprised at how much mascara you take off with the second cleanse. Then, soak a cotton bud ( use these amazing tiny micro buds from Amazon, $7) in castor oil, then brush through your lashes and eyebrows. Massage your brows to ensure that the castor oil coats each hair. Do this every night before you sleep, and you’ll notice a difference in about three weeks – don’t worry it won’t transfer onto your pillow, it’ll be absorbed into your lashes within 10 minutes! If you’re having a makeup-free day, then go ahead and apply it during the day as well.

P.S. Jamaican black castor oil isn’t just great for your lashes; here’s how to maximize on its powers:

For your skin: Jamaican black castor oil has both anti-inflammatory and anti-fungal properties, which means it’s great at soothing existing and preventing further breakouts as it kills acne-inducing bacteria. All you do is massage a small drop of oil onto cleansed skin, then gently remove the oil with a washcloth soaked in boiling water (make sure you let the cloth cool a little before using it)!

For your health: Jamaican black castor oil also has some major health benefits and is used as a natural remedy to cure insomnia and to relieve menstrual cramps. For instant pain relief, massage the oil onto your skin – either to your lower abdomen or your temples. The oil is packed with anti-inflammatory properties and can even help detoxify the body.

Let me know if you’ve tried castor oil for your lashes and brows in the comments below.