In the black community it’s a common misconception that our melanin infused skin completely eliminates the need for sunscreen as protection. Yes, our melanin does protect from some UV rays, but we actually do need to wear sunscreen too.
Skin cancer and aging lines don’t discriminate. Every skin tone on earth is at risk of being dried out, aged and burnt by the sun. It’s not too late to properly take care of your melanin.
Let’s take a moment to explore the reasons why sunscreen is a must, even for darker tones.
Cancer
This alone is good enough reason to buy sunscreen for your melanin. Skin cancer effects both light skin tones and dark. Your natural skin protectant blocks UV light up to SPF 13. This isn’t as strong as the sunscreen (SPF 30 is recommended) which is created for skin protection.
That means cancer can and will develop in your skin, if not properly protected. Studies also show that we are more likely to die from skin cancer than those with lighter skin. Melanated people are simply more likely to die from skin cancer because we aren’t looking for the signs and don’t take the necessary precautions to prevent skin cancers.
While people with dark skin have more melanin, which helps to protect their skin from UV rays, they are still at risk for developing different types of skin cancer, including melanomas. UV rays also contribute to photoaging, and regular use of sunscreen can help prevent the formation of wrinkles, dark spots, and sagging leathery skin.
You can find important information on skin cancer and melanin on Health Care’s website.
Aging and Dark Spots
One of the benefits of dark skin is the ability to look as if you haven’t aged a day. You want to keep these good looks, right? Don’t let the sun dry out your skin creating fine lines and wrinkles. It’s simply not worth it when you can purchase sunscreen designed specifically for your needs.
Sunlight also creates uneven skin tones and dark spots which can be totally avoided with a little sun screen. Aging spots and lines aren’t the only thing to worry about. Your skin will lose tone, and volume.
Sagging skin will become a reality if sunscreen isn’t used while you’re in the sun. This is especially true for those who live in areas like Texas, Florida and other places where the sun always shines.
Unwanted Burns
If you’ve never experienced a sunburn lucky you. It’s the worst feeling and seeing your skin peel right before your eyes is pretty weird. Sunburns can happen on all skin tones. Sure, you won’t burn as quickly as those with fair skin, but you can still develop burns.
Take the extra precaution of choosing the right sunscreen designed for your skin type. It doesn’t hurt to take these measures. In the long run your skin will truly thank you.
While you’re in the sun your skin will become darker, everyone knows this but do you know why? The tanning effect isn’t really a tan it’s a sign of skin damage from the sun. Your body produces more melanin in effort to protect that previous outer layer of skin.
Your melanin is amazing. It performs super hero like duties but unfortunately it cannot completely protect you from harmful UV rays. Take the time to research skin cancer in African Americans and purchase sunscreen. Your body will thank you.
Knowing the ingredients and the resulting properties isn’t on every shoppers mind, but the undesirable outcomes are. The majority of shoppers look for a product that isn’t greasy or that doesn’t leave a noticeable residue on the skin. A good deal of people also look for a product that is in line with their own ethics. I, for one, look for Vegan/ cruelty free products that also hydrate the skin. I normally just stick with Aveeno PROTECT + HYDRATE Lotion but today… well read on to see why Bolden SPF 30 Brightening Moisturizergot me singing ♪♪♪. (Click here to continue)
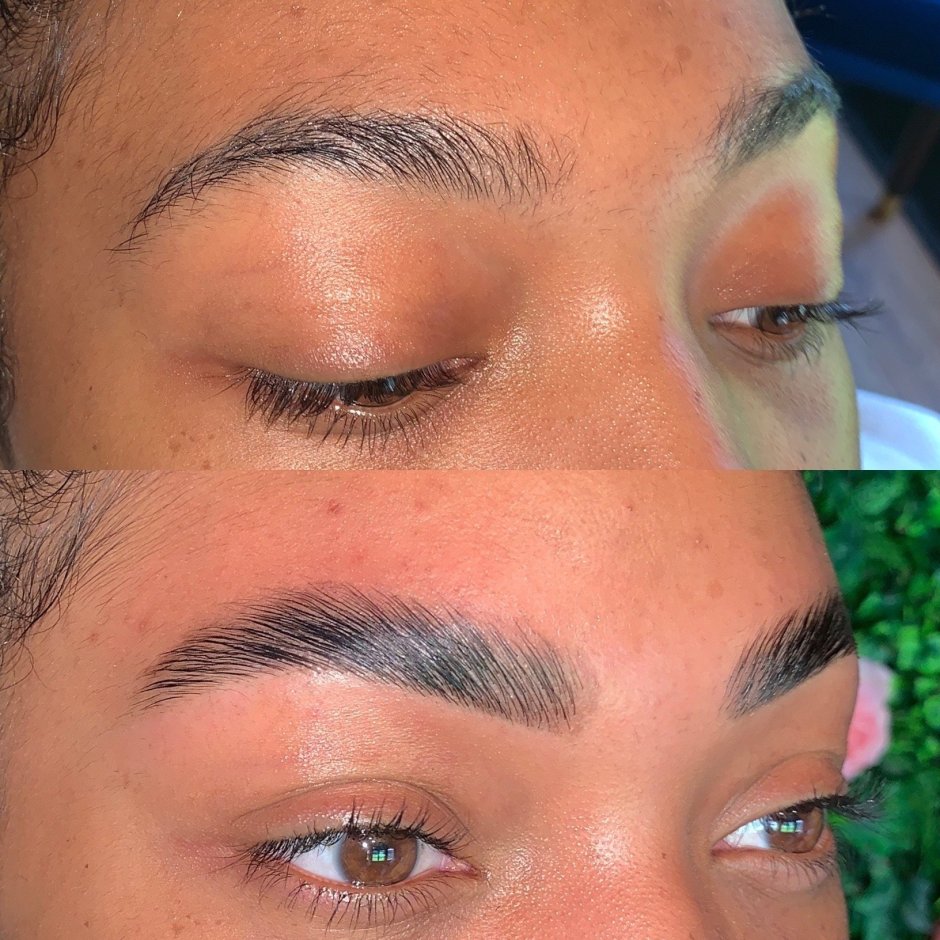
If you rewind to 2018, the world was obsessed with perfectly sculpted, HD brows. Two years later, that trend has officially died (RIP) and in its place is the boy brow. It’s equally bold yet more natural, fluffy, and (looks) untouched – we’re low key obsessed.
The bad news? Not everyone is #blessed with naturally thick, fluffy brows. The good news? You can fake it with brow lamination; a semi-permanent brow treatment that straightens, sets, and tints your brow hair leaving you with full, thick brows for up to eight weeks. Brow lamination, as it’s called, is like a perm for your eyebrow hairs.
Originating in Russia, but blowing up in England and US, brow lamination tames unruly hairs and sets them in place for a fluffy just-combed look. Brow lamination is essentially a perm for your eyebrows, but without using the same harsh chemicals. It’s a keratin treatment that not only stimulates growth while strengthening the brow hairs, but creates thick, fluffy, and full brows.
Lamination is a good alternative to microblading because it works with your existing hair, giving you your ideal brow look without the use of needles, ink insertion into the body, and pain.
Here’s everything you need to know:
What Is Brow Lamination?
According to Instagram, brow lamination is a chemical process that straightens the eyebrow. It’s very similar to a lash lift, but what it does is straighten the brow in a vertical and swept way that lasts for five to eight weeks.
Brow lamination is the latest brow treatment to blow up on Instagram and the results really do look amazing. The treatment reworks and tints your natural brow hairs to create a fuller shape. This treatment will help give you a uniform, full brow shape. This treatment is perfect for “Eyebrows that do not have symmetry: where the hairs follow a different pattern.”
Lamination is different than micro-feathering, for example, because it’s about texture, not color. “Most brow treatments are meant to fill in the brows and add darkness and pigment and can mimic the look of the hair.” Lamination, on the other hand, is a perm for the brow hairs.
To achieve this naturally full effect, brows are brushed into place in a way where every hair follows the same direction of growth. Then brush into a shape to create a very soft, natural arch. Brow Lamination is for nearly all skin types; however, a patch test is always carried out before the treatment to ensure no irritation or reaction occurs.
The entire lamination process is 30 minutes from start to finish. “A chemical solution is applied to the brow that breaks down the bonds in the hair to straighten it. After that, a neutralizer is applied to reform the bonds to create the new shape. Then, a post-treatment oil is applied to nourish the hair. This process should be done before brow tinting and before brow shaping.
Once the treatment is complete, brows will look very sleek with a wet look. This wet look lasts for 24 hours and once washed will remain fluffy. If you want that glossy look, you can achieve it easily by applying a brow gel or serum.
Post service, avoid hot showers and don’t exercise for 24 hours in order to keep them dry. After the initial 24 hours, you can wet and cleanse the face with any of your favorite products, which wouldn’t disrupt the shape of the brow.
Overall, thicker hair can endure more treatments every six weeks, but with finer brow hairs, it’s recommended they wait at least ten weeks because it can be damaging to the brow hair. If you want to get the look without the laminating process, try the NYX Professional Makeup Fill & Fluff Eyebrow Pomade Pencil to lift your natural brows with makeup.
How Long and How Much Does Brow Lamination Cost
With proper care, brow lamination can last four to eight weeks. Many Brow Experts recommend castor oil, as it helps boost hair growth: simply apply a coating of castor oil using a Q-tip before your sleep. The price ranges from $50 to $300 depending on location and the artist who’s performing the treatment.
Like with any new treatment, the results may be transformative, but there’s also underlying risks. If you’re curious about brow lamination, make sure to do your research to find a skilled artist that works out of a licensed, clean salon before booking an appointment.
A new year always puts our previous habits into perspective. From majorbeauty investments, pulling off new makeup trends, or our favorite skincare products, we’ve definitely had our fair share of beauty experiments in 2019. However, now that 2020 has arrived, our beauty forecast did too. A new year means a refreshed routine focusing on clear skin, the best brows (always), and lots and lots of self care.
Since our beauty routines are such a major staple in our lives, we wanted to share our 2020 beauty resolutions with you too. That way, you can follow along with us on our path to bolder looks, greener products, and great skin to jumpstart your new year. Scroll through to see our beauty resolutions that’ll have us conquering 2020…
1. Better Brows
Strive for greatness and perfect your brow game in 2020. Your brows, as you know, frame the windows to your soul, so we want you to be as religious as possible about having a foolproof regimen. Whether that means investing in microblading, getting them professionally shaped, or taking time to fill them in, put your brows first in your makeup routine. Your eyes {and the rest of your face, for that matter}, will thank you later.
2. Try a New Lip Color
It’s SO easy to get comfortable using the same color and wearing the same makeup look every day. We get it. Being comfortable in your routine is important. However, trying something new is the perfect refresh to your tried-and-true products. Even if that means wearing a new nude lip from a different brand or a bold and fierce berry hue, incorporating a new color into the mix always add a little adventure.
3. Focus on Your Skin
Your skin is the canvas and base for your makeup, so implementing products that will do your skin some good is your highest priority. Whether it’s anti-aging, acne fighting, or another skincare concern, find products that are going to treat your skin with the utmost care.
4. Stick to a Self-Care Routine
You’ve heard it before and you’ll hear it again: self-care is and will be an important staple in not only your beauty routine, but also the rest of your life. We have stressors all around us and they affect our hair, skins, nails, and overall health. Sticking to a self-care routine can create a more harmonious and focused part of your life that can help balance out all of the hectic points in your day.
5. Green-Out Your Beauty Bag
If some of your products have ingredients that you can’t even pronounce, it’s probably not the best product to be using on your body. There are a lot of amazing eco-friendly, green, and sustainable beauty products on the market, so take some time and do your research to find the ones that are a lot more beneficial to you {and the earth}.
What beauty resolutions are you going to try this year?
Let us know in the comments below—we love to hear them!
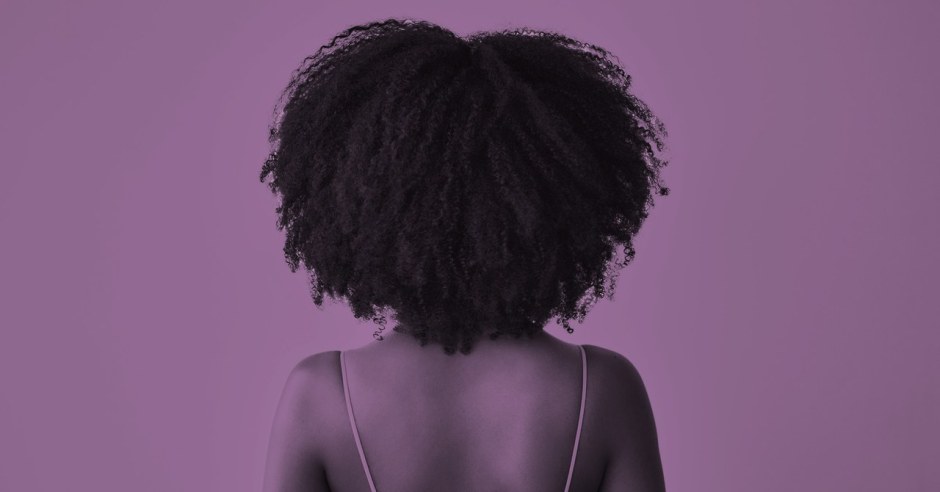
Whether you’ve just recently decided to go natural or if you’ve long been wearing your hair in its unprocessed form, there’s always so much to learn about having natural hair. Before you attempt to absorb all there is to know about caring for your curls, we’re here to provide you with a few useful terms that’ll likely be of service to you in the long run. This, of course, is in no way a guide to everything you’ve ever wanted to know about natural hair, but we’d say it’s a great start.
Ahead, you’ll find a glossary of sorts, featuring 20 haircare terms that should be in every natural’s vocabulary.
Curl pattern is a term used to describe the shape of your hair strands when they’re in their natural state. It’s usually broken down into four types: type 1 hair is typically bone straight; type 2 hair is wavy; type 3 hair is curly; and type 4 is coily. From there, the types are broken down into three subcategories each (a, b, and c) that are determined based on the width of your waves or curls.
Elasticity
This refers to your hair’s ability to return to its natural shape after being pulled, stretched, or heated in any way. Hair with low elasticity normally won’t return to its natural shape, while hair with high elasticity will.
Porosity
Porosity refers to your hair’s ability to absorb and retain moisture. It’s looked at in three different categories — low, medium, and high porosity — and it’s normally determined by the way your hair’s cuticles lay. Head over here for a more in-depth breakdown on what that means.
Sulfates
Think of sulfates as the reason why your shampoo lathers up and thickens the way it does when you work it into your hair. They are chemicals that are often found in cleaning products, and they’re widely debated in the hair community, since many people think they’re harmful and have the power to strip the hair of its natural oils and nutrients. On the other hand, there are also those who believe sulfates aren’t as bad for your hair as they’re made out to be.
Humectants
Humectants are chemicals found in hair products that promote moisture retention.
Sealant
Not to be confused with a moisturizer, a sealant is any product that sits on top of the cuticle to hold the moisture in your hair. These typically come in the form of oils and butters, and are to be applied after a moisturizer, since some of the oil molecules aren’t small enough to actually penetrate your hair shaft. Some popular sealants include jojoba oil, Jamaican black castor oil, and shea butter.
Moisturizer
On the flip side, a moisturizer is any product that — you guessed it — moisturizes your hair. When attempting to determine if a product will work as a good moisturizer, consider the amount of water that’s in the product; if water is the first ingredient listed on the label, you should be okay. Leave-in conditioners and light oils (coconut, avocado) often fall into this category.
Transition
Transitioning refers to the process of . . . well . . . “transitioning” from processed or relaxed hair to natural hair. A person who’s in the transitioning phase is someone who’s cut the use of harsh chemicals and heat from their haircare regimen and has opted to grow their hair out in its natural state while slowly trimming off their processed ends. They do this until their natural hair has grown to a length they’re comfortable with and their damaged ends are gone completely.
Big Chop
This process is often looked at as an alternative to transitioning, since big chopping your hair means cutting off all of your relaxed or processed hair at once. That said, you can also transition your hair before performing a big chop, growing it out slowly until you can clearly see where your natural hair and what’s left of your processed strands meet.
Shrinkage
Shrinkage refers to curly or coily hair’s ability to shrink up and look a few inches shorter than it actually is. When your hair is stretched — via twist outs, braid outs, blowouts, etc. (more on that later) — it should be able to shrink back to its normal state, as shrinkage is normally a sign that your hair is healthy and properly moisturized.
LOC Method
LOC is an acronym of “liquid, oil, cream,” and it’s basically a mnemonic device (think PEMDAS or ROYGBIV) that can be used to help you remember how to order certain products when you apply them to your hair. In this case, you’d use a liquid-based product or leave-in conditioner, followed by a sealing oil and a moisturizer.
Twist Out
This one’s a popular styling method achieved by installing several twists throughout a head of wet or damp hair before allowing them to set or dry for several hours. Some people also like to manipulate their twist outs by wrapping flexi rods at the end of each twist to give their ends a little more support in the curl department. Depending on how fast your hair dries, twists are typically taken out within a day or two of being installed, with the end result being a head of superdefined curls that can be worn for days at a time.
Braid Out
A braid out is essentially the same as a twist out, except it’s done with braids. Braid outs often stretch the hair more than twist outs do, which is good for anyone hoping to sport a style that shows off a little more length, but they often take a bit longer to dry as well.
Wash and Go
A wash and go is exactly what it sounds like, though there’s just a little more to it than literally just washing and going. It’s basically when a person washes their hair and wears it out in its natural state without twisting, braiding, or using tools to curl it. Typically leave-in conditioners and other products like curl creams or styling gels are added to keep frizz at bay for these styles.
A protective style is basically any hairstyle that tucks away the ends of your hair and protects them against possible damage from factors like weather, chemicals, and over-manipulation. Ideally, they require only a small amount of maintenance and are often a go-to for those looking to experiment with various colors and hair lengths without the risk of putting extra stress on their strands.
TWA
An abbreviation of “teeny weeny afro, a TWA is a natural hairstyle formed on hair that’s typically about 1-2 inches in length.
Co-Wash
“Co-wash” is an abbreviation for “conditioner-only washing,” which is pretty self-explanatory. People who use conditioner to cleanse their hair and scalp normally do so as a way to avoid the use of harsh, sulfate-filled shampoos that can often strip the hair of natural oils. Conditioners don’t technically cleanse the hair, though, these days, you can purchase conditioners that have special cleansing benefits.
Pre-Poo
A pre-poo (or pre-shampoo) is an oil or conditioning treatment that’s applied to the hair before shampoo. It’s normally necessary if you’re looking to detangle or add a little extra moisture to your hair ahead of a wash.
Protein Treatment
Protein treatments are reparative products that are used to help strengthen damaged and porous hair by attaching a variety of proteins and nutrients directly to the follicle. Because of how intensive they are, it’s best to limit yourself to using protein-rich products every four to six weeks.
Deep Conditioning Treatment
Not to be confused with protein treatments, deep conditioners are intensive conditioners that provide the hair with an extra boost of moisture after shampooing. They’re usually applied to the hair and allowed to sit for at least 30 mins before being rinsed out. Depending on how dry your hair is, they can normally be used one to two times a week.