How To Make a Honey Face Mask + 4 Extra Recipes for Clear, Glowing Skin

If there’s one natural ingredient to stock on your beauty shelf, it is honey. You can find the bee sap in anything from a hair mask, face wash, even an all-natural moisturizer—is there nothing the golden goop can’t do?

Consider honey the ultimate DIY superstar, one that you can add to virtually any treatment. But let’s start with the simplest out there: a single-ingredient honey face mask. Easy to make, and the benefits are just as sweet.
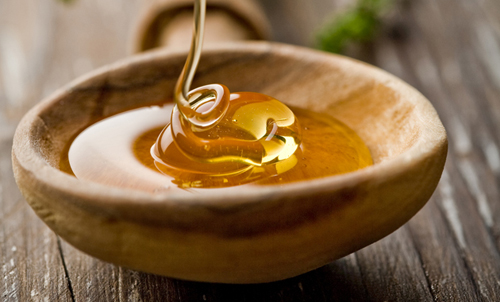
Advertisements

What is Honey?

Honey has centuries-long credibility as a respected ingredient beyond kitchen use. Chief among the benefits is the antimicrobial activity of many honey varieties—it kills bacteria living on the skin. This effect probably explains how honey came to be used traditionally as a wound-healing agent in many different cultures. The sweet substance is produced by plant matter, enzyme activity, and live bacteria. According to these research scientists Howe and Marisa Plescia, what honey contains will depend in large part on what plant source the bees who are making it are using.

Honey is what’s called a natural humectant (draws moisture into the skin). If your skin needs a hydrating boost, this is the perfect ingredient. It is antibacterial, anti-inflammatory, and acts as an anti-viral/anti-fungal.

Benefits of Honey for Skin

As Shamban describes, it is full of flavonoids, hydrogen peroxide, and phenolic acid dermal benefits. Raw, unpasteurized honey is one of Mother Nature’s power players you want to have on your A-team to get the job done when needed.

  • Cleanses pores: good news: Honey is naturally antibacterial, one of the reasons it makes for a great face wash. Remove dirt and debris with nothing more than a little raw honey—just add water.
  • Treat Acne: You can use honey as a cleanser to help prevent certain types of breakouts because of its anti-fungal properties. For a more potent effect, honey can be left on breakouts to help them heal faster.
  • Exfoliate Skin: Honey on its works better as a cleanser as opposed to an exfoliator because of its smooth consistency. You generally won’t find honey, even in its purest form, to be particularly granular.
  • Fade Scars: Honey contains trace amounts of hydrogen peroxide. This might give it mild lightning properties, which is particularly helpful when it comes to resolving pesky post-acne marks and hyperpigmentation.
  • Hydrates Skin: Honey draws moisture into the skin from the air. Applying honey on the face is a great way to keep your skin hydrated, glowing, fresh, and supple at all times.
  • Helps Skin Conditions: Howe shares, “One researcher has shown it to treat seborrheic dermatitis, atopic dermatitis, and psoriasis.” Raw honey can also soothe eczema.
Advertisements

How to make a honey face mask

A honey face mask is as simple as it sounds: Snag some raw/unfiltered honey from your favorite grocery store, and you’ve got yourself a spa-grade mask in a snap. Using honey by itself is an effective skin clearing, nourishing, and revitalizing treatment. That’s because honey, especially of the Manuka variety, has anti-inflammatory and antibacterial properties that calm the skin and keep breakouts at bay.

With all the benefits honey has to offer, no surprise you can invest in a jar of the straight-up goop and slather on. Here’s how to do it right: 

  1. Apply an even layer of raw/unfiltered or Manuka honey on damp skin after your face wash routine.
  2. Leave on for 20 minutes, then rinse off with cold water. It rinses off much more easily than you might expect! It’s hardly sticky at all when you add water.
  3. After rinsing, apply warm water to face towel and gently dap the hot face towel on face for a minute. Then, follow with a cream or oil to seal in the moisture. 

Primp Tip: If you have a blemish you’d like to nix, try dabbing a little raw honey directly on as a spot treatment. “It can be particularly beneficial for acne or blemish-prone skin. There have been clinical studies proving positive results both in lessening size and duration of blemishes,” says Shamban.

Advertisements

In terms of how often you should mask, we recommend sticking to a couple of times per week. While it certainly won’t hurt to slather on every single day, it’s not necessary to reap all the benefits mentioned above. Just 20 minutes 2x a week is plenty: It will still provide all those skin-boosting benefits.

With that being said, it’s also not necessary to leave the treatment on overnight; while you certainly can if you feel so inclined, know that you’re not providing your skin with any extra benefits. Remember, honey is thick and has a sticky texture so that might be messy when you wake up unless you’re able to sleep on your back through the night.

4 honey face masks for clear, glowing skin

Sure, a honey face mask is a simple, one-ingredient mask, but that’s not to say you can’t include some add-ons if you’re feeling fancy. Here are four ways to upgrade your honey mask, for any skincare concern you’ve got:

  • Brightening turmeric, honey, and lemon mask 

Turmeric and lemon are amazing for skin-brightening: Turmeric (and its active ingredient, curcumin) has antioxidant properties that can help protect the skin from free-radical damage, while lemon has a fair share of vitamin C—perfect for fading dark spots.

To make this mask, combine 1 tbsp. of raw or Manuka honey, 1 tsp. of ground turmeric, and ½ tsp. of lemon juice. Slather on and leave for 10 minutes or until the mask starts to harden, then wash off with warm water. 

  • Moisturizing honey and olive oil mask

This nourishing mask feels downright luxurious: Adding a natural oil to your honey mask can not only help with the stickiness and application of the honey, but natural oils are emollients that contain high levels of fatty acids, which moisturize and soothe the skin. The result? A lightweight mask chock-full of skin-healthy antioxidants. Feel free to choose any oil here (coconut, jojoba, argan—the list goes on.) We use olive oil because olive oil work wonders on dry skin and contains many antioxidants, such as vitamin E. Simply mix the two until combined, then leave on for 20 minutes. 

Advertisements
  • Exfoliating yogurt and honey mask

Yogurt is jam-packed with lactic acid—a sensitive-skin-approved chemical exfoliator—which gently sloughs dead skin cells with ease. When you add honey to the mix, it becomes even more gentle and hydrating: Simply combine 1 tbsp. of finely ground oatmeal, 1 tsp. of raw or Manuka honey, and 1 tsp. of full-fat dairy or nondairy yogurt. Stir until it forms a paste, then slather on and leave for 15 minutes.

  • Skin-soothing mint, honey, and aloe mask 

If you’re looking for a fun, summery option reminiscent of a poolside cocktail, this refreshing mask is practically screaming your name. Both aloe and rosewater are great skin-soothing and -balancing ingredients, bound to tame any inflammation you’ve got (it feels especially lovely post-sun). Try this mixture during your next impromptu spa night: Mash 2 to 4 mint leaves, and mix with 2 parts honey, 2 parts aloe gel, and a few sprays of rosewater. Leave it on for up to 20 minutes before rinsing with warm water. 

Advertisements

The takeaway. 

With all the skin-health benefits the goop has to offer, no surprise honey reigns supreme as a DIY-friendly ingredient. Of course, remember to do a patch test before applying honey to your face, especially if you’re new to DIY: Even if you consume honey all the time, your skin might have an unexpected reaction to it as a topical treatment. If you have any bee or pollen allergies, you may want to steer clear entirely, as raw honey might contain trace amounts of bee pollen or other tree pollens.

Other than that, feel free to slather on the star of DIY. A single jar of honey can have you glowing in no time.

BeautyLeeBar takes every opportunity to use high-quality sources, including peer-reviewed studies, to support the facts within our articles. Read our editorial guidelines to learn more about how we keep our content accurate, reliable, and trustworthy.

GIVE YOURSELF A SALON-LIKE PEDICURE AT-HOME WITH THESE 9 EASY STEPS

As tempting as it is to dish out money for a salon pedicure (I mean, the massage, you guys), it’s not always doable. Thankfully, it is possible to achieve salon-quality results at home. Ahead, find out the must-have products and a step-by-step tutorial on how to DIY a salon-quality Pedi in the comfort of your own home — for a fraction of the price.

DIY Pedicure Step #1: Let Your Nail Polish Remover Do Its Thing

Completely remove any nail polish that’s still on your nails using nail polish remover and a cotton pad. If you don’t have any leftover polish, you should still run remover over your nails to remove any excess oil on the nail bed.

DIY Pedicure Step #2: Soak Your Feet Like You’re at the Spa

Fill your tub with warm water and soap (body wash will do!) and let your feet soak for 15 minutes. (Pro tip: While you’re in the rest and relaxation mode, break out a face mask.) 

DIY Pedicure Step #3: Get Rid of Dead Skin

After drying off your feet, use a foot file to remove any dead skin from calloused, hard areas. Pay attention to the balls of your feet, the sides of your feet and your heels. Scrape these areas until they feel smooth, but don’t overdo it — you could end up causing irritation. 

DIY Pedicure Step #4: File and Shape Your Nails

Use a nail trimmer to achieve the length and shape you want. We recommend cutting straight across and then going in with a nail file to buff out the corners. According to Hadley, a big mistake people make is cutting their cuticles. “Trimming or cutting cuticles during a Mani or Pedi is purely cosmetic and sometimes it doesn’t benefit the nail in any way,” says Hadley. “The cuticle is a barrier to protect your surrounding skin and protect against infection.”

DIY Pedicure Step #5: Apply Cuticle Oil

Apply cuticle oil like Essie Apricot Cuticle Oil to the base of your nail. “Cuticle oil doesn’t just keep your feet soft and moisturized, but it also keeps your polish from chipping,” says Hadley. 

DIY Pedicure Step #6: Moisturize

Moisturize your feet with an unscented lotion to keep the skin hydrated and smooth. “Scented lotions with synthetic fragrances can cause your nail polish to crack.” We love La Roche-Posay Lipikar Daily Repair Body Lotion for this step. 

DIY Pedicure Step #7: Prep Your Toes

Use toe separators (you can buy a 12-pack for cheap online) to make painting your toes easier and avoid making a mess.

DIY Pedicure Step #8: Apply Your Polish

“Don’t forget your base coat because it gives your nail polish something to sink into besides your actual nails,” says Hadley. After about two minutes, the base coat should be dry. Then, you’re ready to go in with a color. Apply two to three coats of nail polish, making sure each coat has dried. Make sure to build thin coats of polish; thick strokes will have the paint looking clumpy and take longer to dry. 

DIY Pedicure Step #9: Finish With a Quick-Drying Top Coat

Finish with a top coat so your nails maintain high shine and luster. Because nail polish takes about 12 hours to harden, Hadley recommends sticking your feet in cold water for a few minutes to help your nail polish solidify. 

Processing…
Success! You're on the list.

Hype or Not: Aztec Secret Indian Healing Clay Review

While there are hundreds (if not thousands) of face masks options available, you’d be hard pressed to find one that boasts more five-star reviews and celeb love than the Aztec Secret Indian Healing Clay Mask. Amazon customers are practically writing novels about how it has transformed their skin, sharing astonishing Aztec Clay Mask before-and-after photos.

Since going viral a few years ago, the mask has racked up over 13,000 positive reviews from Amazon shoppers who have referred to is as the “holy grail of face masks” for acne—and it makes sense because it’s made with 100 percent bentonite clay, which helps to draw out the skin’s impurities. Unlike most face masks—which come ready to apply—you’ll have to whip up your own concoction using equal parts Aztec Indian Healing clay and apple cider vinegar or water. Yes, it’s a little extra work, but reviewers and stars alike agree it’s totally worth the time because it leaves their pores feeling so refreshed.

WHAT IS IT: AZTEC SECRET INDIAN HEALING CLAY is natural Calcium Bentonite Clay from Death Valley, California, where it is sun- dried for up to six months in temperatures that sometimes reach 134 degrees. The unique structure of the molecules in Aztec Secret Indian Healing Clay carry a negative electron charge. This comes from the valance electron count from the specific minerals found in Aztec Secret Indian Healing Clay. This Indian Healing Clay lifts the pimple and blackheads into the clay bed to cause accelerated healing and nourishment to the skin with over 50 minerals.

  1. 100% NATURAL
  2. Deep pore cleaning with 100% natural calcium Bentonite Clay
  3. Does not contain: additives, fragrances or animal products
  4. Use for acne and blemishes. Use it once per week

HOW TO USE: After mixing with vinegar, apply the smooth, paste-like substance to the skin using your fingertips or, as reviewers recommend, with a silicone brush applicator, and allow it to dry for up to 20 minutes. (Note: Dry time can vary depending on your skin’s sensitivity.) As it dries, you’ll feel a pulling and tightening sensation, which is just the deep pore cleansing in action. The mask is so powerful that many customers recommend only using it once a week and moisturizing right after, as it’ll leave your skin feeling a tad on the dry side.

WARNING: Please note that when you rinse off the mask your face may be red and this is normal with this clay mask. This redness will be gone within 20 to 30 minutes.

PRIMP TIP: It’s easy to customize this clay mask depending on your skin’s mood. If you want a shot of moisture, add a teaspoon of raw honey to your mixture. For a more soothing formula, add some Aloe Vera gel, and if blemishes are an issue, a few drops of Tea Tree Oil will do the trick. Aztec Secret Indian Healing Clay is as powerful as it is versatile.

“This product is AMAZING. It’s an official Holy Grail product of mine,” another reviewer wrote. “I ideally use it once-a-week, and it feels as if angels themselves have taken the time, to delicately renew my skin with the magical touch of their wings.”

Dramatic, yes, but the mask is so popular, it even has a long list of celeb fans, including Kourtney Kardashian—the latest A-list to chime in on her love for it. In a recent post on her website, Poosh, she shared that the Aztec clay mask is one of three products she rotates in her “self-care Sunday masking routine.” As it turns out, her sister Khloé Kardashian is also a huge fan, along with Mindy Kaling and Lili Reinhart.

In 2015, Kaling shared a photo on Instagram wearing the Aztec mask that she mixed with Bragg’s organic raw apple cider vinegar (also available on Amazon).

PRIMP TIP: I learned from some people that you should spray a hydrating facial mist on your face while the Aztec Secret Indian Healing Clay is on your face. That way it will be kept moist and easier to remove and the clay will not take moisture off from your skin. It’s the same logic with sheet masks.

MY EXPERIENCE: This pulsating sensation is pretty intense as the clay mask is working hard to rid your skin of all the dirt and grime. You will feel some tugging! After the recommended 20 minutes, the clay concoction hardens and makes your face feel a little tight. That’s your cue to wash it all off. I was left with slightly reddish skin, but this dissipated after five to ten minutes. I looked in the mirror, and an unbelievably squeaky clean face greeted me. “Is this really MY skin?” I marveled.

That’s not all. After prolonged use, you will find that your skin is no longer as prone to breakouts. And there’s still so much clay left in the tub!

This clay mask is truly no joke. It leaves a wonderful sensation on your skin but more than that, it is healing. It heals by getting rid of all the grit and sebum that causes breakouts. With a great price to boot, great reviews by thousands of users and some pampering time on offer, you can’t go  wrong with this one.

*This product may or may not help you. If the pimple persists, you may need to know the type of pimple you have or better, consult a doctor.

Did you try the Aztec Secrets Indian Healing Clay Mask – the world’s most powerful facial!? Lemme know about your experience….

HOW TO DIY THE PERFECT AT-HOME PEDICURE IN 10 EASY STEPS

As tempting as it is to dish out money for a salon pedicure (with the soaking, foot scrubbing, massage — the works) it’s not always doable, especially when you already splurged on makeup in the beginning of the week and are left to question your self-control. So if you currently find yourself in a similar position and are in desperate need of a pedi, we’re here to prove that it’s possible to achieve salon-quality results pedicure in the comfort of your own home — for a lot less money.

STEP 1: Let Your Nail Polish Remover Do Its Thing

Completely remove any nail polish that’s still on your toenails using nail polish remover and a cotton pad. If you don’t have any leftover polish, you should still run nail polish remover over your nail to remove any excess oil.

Primp Tip: If you’re left with any weird stains or a yellow tinge (you’ll usually see this after removing darker colors, like red or black), rub cuticle oil over the surface of your nails to lighten any residue.

STEP 2: Soak Your Feet Like You’re at the Spa

Okay, before you start soaking, your first job—and this is important—is to go around your house and gather every candle you can find. Oh, and get yourself a glass of wine while you’re at it. The trick to making an at-home pedicure feel like a spa experience instead of, you know, rubbing your own feet in your too-small-for-comfort apartment is setting the ~mood~ at your makeshift pedicure station.

Once the ambiance is right, you’re ready to soak your feet—which softens tough skin and cuticles (and is downright relaxing). Lennon suggests using a basin (aka a really big bowl) if you have one, but your bathtub is also a sound option. Fill ’er up with warm water and add a liberal scoop of skin-soothing bath salts (Lennon recommends Côte Re-Treat Himalayan Pink Salt Soak, but you can also try my favorite Kneipp Mineral Bath Salts or just use a cup of kosher salt). Let your feet soak for a few minutes before moving to the next step. This is a great opportunity to multitask and try out that new face mask.

STEP 3: Get Rid of Dead Skin

After drying off your feet, use a foot file to remove any dead skin from callused (hard) areas. Parts to pay attention to are the balls of your feet, the sides of your feet and your heels. Scrape these areas until they feel smooth, but don’t overdo it. Try a pumice stone or foot file to gently smooth the skin. Then, switch your feet and repeat.

STEP 4: File and Shape Your Nails

Use a nail trimmer to achieve the length and shape you want (we recommend trimming nails straight across). Follow by filing the corners of your nails and buffing to make them smooth. According to Hadley, a big mistake people make at this point in the process is cutting their cuticles. “Trimming or cutting cuticles during a manicure or pedicure is purely cosmetic and sometimes it doesn’t benefit the nail in any way,” she explains. “The cuticle is a barrier to protect your surrounding skin and protect against infection.”

STEP 5: Apply Cuticle Oil

Apply cuticle oil to the base of your nail. Cuticle oil doesn’t just keep your feet soft and moisturized, but it also keeps your polish from chipping.

STEP 6: Moisturize

Take both feet out of the tub and dry them off with a towel. With a foot cream or body lotion, begin massaging your toes, feet, and calves until, well, you wanna stop. Moisturize your feet with an unscented lotion. “Scented lotions with synthetic fragrances can cause your nail polish to crack.”

STEP 7: Prep Your Toes

Use toe separators (you can buy a 12-pack for cheap online) to make painting your toes easier and avoid making a mess.

If you don’t have toe separators, Lennon suggests tearing off a piece of paper towel, rolling or twisting it into a rope, and weaving it through your toes to prevent the polish from smudging.

STEP 8: Apply Your Base Coat

Then, apply a thin layer of base coat on each nail. Follow with two thin coats of your color of choice, letting the paint dry for a few minutes between each coat.

STEP 9: Finally, Do the Damn Thing

Paint on your base coat and wait at least two minutes to ensure it’s dry. Don’t forget your base coat because it gives your nail polish something to sink into besides your actual nails.

STEP 10: Finish With a Quick-Drying Top Coat

Finish with a top coat so your nails maintain high shine and luster. Because nail polish takes about 12 hours to harden.

Primp Tip: Recommends sticking your finished toenails into cold water for a few minutes to make your nail polish harden faster and help it solidify.

Tell me: Do you do your own nails?