Ask Lee: How To Know If You’re Ready for the Chop

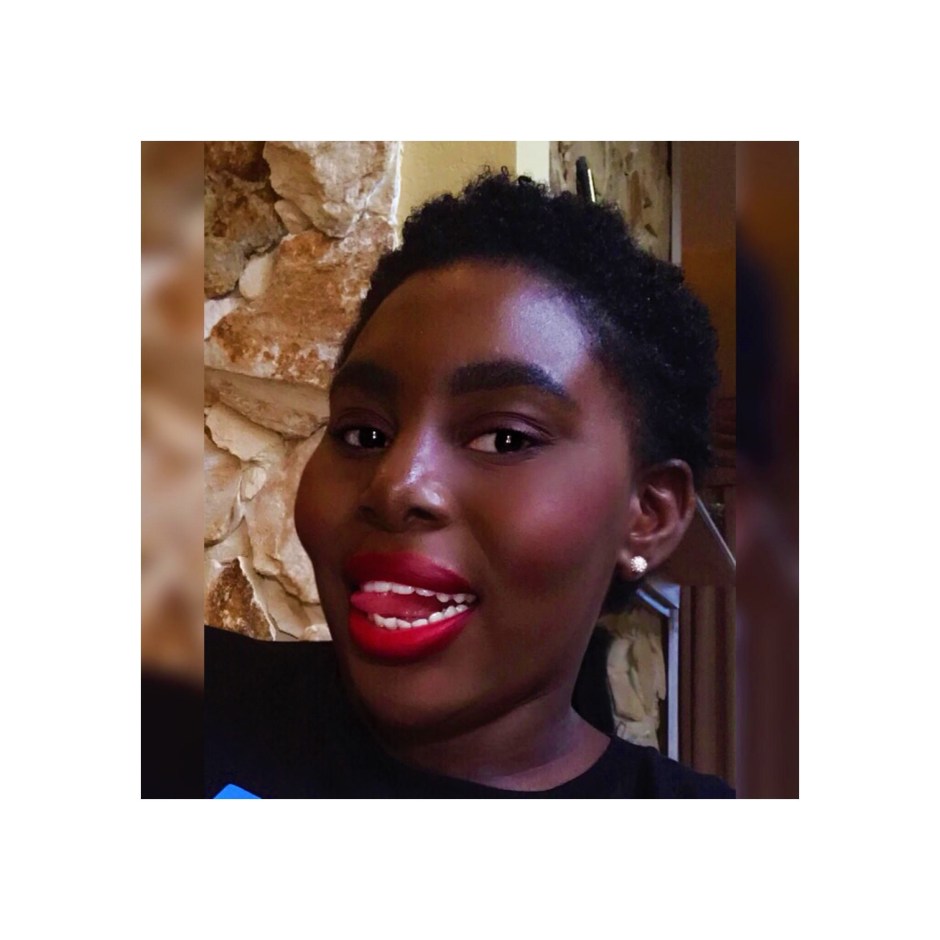
As all of you know, I keep shaving off my hair. It was my first real haircut in years, so it was a big change. But I’ve got to say, I’m loving my short haircut so far! I’ve received a lot of compliments on my hair from followers, family members, and strangers. There have been a few messages on my Instagram asking me why I did it and how I felt before and after the chop. Today I wanted to address those questions in my latest Ask Lee post. Here are the things to consider before getting a major haircut…

Is everything else in your life stable?

I understand the instinct to chop your hair off right after a breakup or other major life change. But as nice as it is to start fresh, you’re also more likely to make a rash decision you’ll regret. So if you’re considering making a big change to your look, try to do it when everything else in your life is status quo.

To some, it might seem I woke up one morning and just shaved off my head but,  in reality, I thought about it for a least 2 weeks. Sometimes I do things without thinking and with my hair, I put a lot of thought into it. If you know me, you know growing up I hated getting trims. Always felt like they cut off too much. It was never a good time until now. I still don’t trust anyone with my hair but my aunt Jillie who went to cosmetology school and her specialty was haircuts shaved my head for me. After looking into my mirror, I knew I made the best decision for me. 

Can you take it slow?

When I told my hairstylist Jillie that I wanted a shave, she kept asking me am I sure. The reasons I wanted to shave off my hair was because I had dead ends and because I wanted to be free.

But I would suggest you cut a little bit off first and get used to playing with your new texture and length before really going for it. It will make the transition a lot easier and also gives you a chance to change your mind. 

Are you prepared for high maintenance?

It’s a big misconception that shorter hair is easier to care for. Yes, you might save a little time shampooing. But it takes more time to style shorter hair, and you will also have to get more frequent trims (every 4-6 weeks) to maintain your shortcut. I now wear wigs whenever I just want to switch it up or don’t feel like dealing with my short hair. 

But I will say, I’ve been using Curls, Elasta QP and Orshaircare for months now, maybe even for a year and my short hair has been easier to handle and to take care of especially when my hair is under those wigs. I now shave my own hair with Wahl Corded Color Pro Color Kit. The kit has everything I need and more, I feel like a real barber.

If you answered yes to all three questions, then you are ready for a short haircut!

I know it seems silly to put so much thought into getting a haircut, but as anyone who has ever had a bad haircut knows, it’s best to really be sure about these things! Plus, if you anything like me, then you will want to make sure you have the best barber and tools for your hair. Also, make sure you in the right frame of mind to make this type of big decision that can change your life forever.

Are you considering cutting your hair?

I hope my advice helped!

XO Lee


These 6 Mistakes You Make In The Shower Are Ruining Your Skin

So you probably think how you’ve been showering for the last 20 years was on point. Like really, how wrong can you go in the shower – as long as you get your body clean, goal achieved, right? Well yes, but it’s like your skincare routine – you can get WAAAY better results just by layering your products in the right order – and showering is the same. By doing different steps at the optimum time, it’ll result in cleaner and softer skin. Intrigued? Here’s what you’re doing wrong, and how to shower the right way:

showering tips (2)

1. Blasting the heat too high

We know, we know, it feels great, but soaking your skin in hot water is actually drying your skin out. Super hot showers strip your skin of their natural oils and dehydrate it, making it feel dry and itchy; it can even lead to rashes. You should also cut back on how long you spend showering, 5 to 10 minutes is ideal – if you’re washing your hair, aim for 15 minutes max, to avoid stripping the skin of its natural moisture levels. The drier your skin, the more likely you are to get rashes, as it’s easier for bacteria to penetrate the cracks in your skin.

2. Not washing in the right order

If you’re in a rush, you most likely take advantage of those few minutes when you let your conditioner do its thang, and wash your body. But doing this could be the reason you get pimples on your chest, body or back, as when you wash out the conditioner, it leaves a film on your skin that can block your pores. Try the Bioderma Atoderm Shower Gel; it’s hypoallergenic, soap and paraben-free, moisturizes dry skin and is also amazing for getting rid of body acne. Also, Glow Goddess bar soap, $10.00 is another good choice as well. Goddess bar soap has lavender essential oil that can be used for treating burns, inflammation, eczema, acne, nervous tension, asthma, arthritis, acne, and bacterial infections. This gentle bar soap is soft on the skin and is packed with lavender flowers as a soft exfoliant. Another tip is to use your shower gel only in the places where your skin is oily, your lady parts (look for fragrance-free), underarms, and feet – unless you’ve been exercising and sweating excessively. Because your arms and legs have much less oil to spare, using soap here regularly can make your skin drier.

3. Not masking in the shower

This is juicy news to us, but it makes so much sense! The experts say the best time to do your face mask is in the shower when your pores are open from the warmth of the water. This means that hydrating and nourishing masks will be able to deliver all their vitamins and minerals as they can soak into your pores more easily. Similarly, ‘extracting’ masks like clay, mud, and charcoal can pull more toxins from your open pores, without running the risk of dehydrating your skin as the mask won’t completely dry out. For a quick nourishing and moisturizing DIY, you can apply a thin sticky layer of organic honey over your skin for 5 minutes while you shower.

4. Shaving at the beginning of your shower

Shaving is an eternal pain in my butt – no matter how much you do it, it keeps coming back. If you want to maximize on your silky soft skin for as long as possible, the key is to wait until the end of your shower, about ten minutes in (or while you have your conditioner in). By this time, your hairs will have softened and your pores will have opened, making it much easier to get a closer, smoother shave. Another hack, don’t keep your razor in the shower, as the steam will gradually rust the blade and speed up blunting. Instead, leave it to soak in baby oil, which keeps the metal from oxidizing, so it’ll stay sharper for longer. Try Nad’s Natural Hair Removal Cream, $5.99 for a smooth, razor bump free look and feel.

5. Using old sponges and loofahs

We know it’s painful to throw something away that seems like it still has at least another six months of effective use, but sometimes it’s what you can’t see that you need to be cautious of. Loofahs and sponges collect bacteria and mold due to the damp conditions they’re stored in, which can lead to rashes or dry patches. Ideally, you shouldn’t use either for longer than a month. To keep your loofah or sponge in the best condition, ring it out as much as possible after using it, and allow it to dry completely before you next use it, storing it in a dry place, not directly in your steamy shower.

6. Not moisturizing immediately after showering

First things first, instead of vigorously rubbing your skin dry with a towel, try gently patting it instead. The aim is not to be completely dry, but to use any leftover moisture on your skin to your advantage when you moisturize. Experts agree that within three to five minutes after you shower is the best time to rehydrate your skin so that you can trap any excess water on the surface of your skin without it evaporating. Moisturizer and body oils act as a barrier to lock in moisture; I love using Gloww Goddess Body Oils, $20 as these contain rich vitamins, antioxidants, and essential fatty acids to help restore your skin. Otherwise rich moisturizers like shea butter or cocoa butter are amazing natural moisturizers.

Which of these showering mistakes are you guilty of?

**FTC: This post is not sponsored. No monetary compensation was received for this post, however, products were sent to me. Opinions are 100% my own, of course.

DIY Gift Guide: Wine Charms


tac3a7as-3
There is a fine line between giving someone a lovely homemade gift and giving someone something that looks like a disastrous school project. While the former can be thoughtful, it’s important that DIY presents have some level of practicality to them…and they shouldn’t look too homemade if you know what I mean. Ideally, you want to make something that the recipient would otherwise buy himself or herself. In light of these parameters, I thought today’s DIY gift would be the perfect project to share: homemade wine charms.

I love this idea because you can really tailor it to your recipient’s personality and tastes, and because they are very practical. (If you’re unfamiliar with wine charms, they are basically little drink tags that you affix to the stem of a wine glass so people can keep track of which drink is theirs.) Plus they are very quick and easy to put together, making them excellent last-minute gifts. Without further ado, here’s how you can make your own gift set of wine charms…

What You Will Need

  • thin, malleable wire
  • wire cutters
  • beads
  • needle nose pliers

Quick Tip: The beads are a great opportunity to really personalize your gift. Pick shapes and colors that are reflective of the person’s aesthetic.

NzHEBzzPYBGn5ZVNQNSAXHWb

Instructions

  1. First, decide how many charms you want to make. I would recommend a set of six, eight, or ten.
  2. Cut your wire into 3-inch pieces.
  3. Shape each wire piece into a semi-circle.
  4. String beads onto wire piece.
  5. Using needle nose pliers, bend both ends of the wire piece so you create a little hook. Finally, hook the ends together and you’ve got yourself a wine charm!

One of my favorite ways to present these charms is by stringing them onto a ribbon and tying the ribbon onto a nice bottle of wine or bubbly. Otherwise, you can box them up or simply tie them with ribbon, too.

What do you think? Are you going to give this DIY a try?

Also, if you have a great DIY gift idea, be sure to share it in the comments below.

For more gift ideas, click here. Happy crafting!

XO Lee

P.S. Looking for more gift ideas? Check out my Beauty Buff Gift Guides.

Moving On Up: 10 Tips to Make Moving So Much Easier

Frequent moves are practically a fact of life especially if you’re about 20- or 30-something. I’ve moved at least a half a dozen times in my life. As you transition from high school to college to a career and maybe a family of your own, it’s only normal for your living arrangements to feel like they’re in a constant state of flux.

Packing and unpacking all of your possessions isn’t exactly the most fun pastime. Recently, I have helped my mom moved so today I thought I’d share 10 of my most useful moving tips with all of you. Check them out below…

moving-tips 1
1. Purge before you pack.
Before you even begin packing, take a good look at your possessions and get rid of anything you don’t need.­ If there was ever a time to be ruthless rather than sentimental, this is it. Make three piles for your unwanted items—donate, toss, and sell—and then clear your house of them accordingly.

2. Start packing the items you use the least.
When you’re packing for a move, you always want to box up the items you use the least, and then gradually work your way up to things you use weekly or daily. This allows you to get your packing started early without feeling like you’re missing any necessities in the meantime. If it’s summer, for instance, pack up all your winter sweaters and coats ahead of time. But, Save your clothes and swimsuits for a couple of days before the move.

3. Pack for a pretend weekend getaway.
After a long day of moving, the last thing you’re going to want to do is rifle through boxes in search of your toothbrush or clean underwear. So, I suggest packing a bag with all of your essentials for the first few days in your new home. It’s a lot easier to live out of a suitcase for a couple days while you unpack the rest of your possessions at your leisure.

4. Hang ten.
Re-hanging all of your clothes is one of the most tedious moving tasks. So if you can, try to keep all of your clothes on their hangers. I suggest tying groups of 10-or-so hangers together using rubber bands. For added protection, you can create a makeshift garment bag for each bundle using a plastic trash bag.

5. Take the doggies to daycare and take the kittens to the new house first.
Pets get confused and worried during a move. So I always suggest finding a sitter for your four-legged friends on moving day. It will make things less stressful on you and your pets.

6. Go green.
Nothing beats the ease of having boxes delivered to your old home and then picked up at your new one. It’s also the eco-friendly thing to do. I suggest using a company that rents reusable plastic crates like Rent a Green Box because they’re sturdier and better for the environment than disposable cardboard boxes.

7. Play hooky from work.
Many truck rental and moving companies offer cheaper rates on weekdays. So if you can take a day off work or school, it will save you money to move on a weekday. Plus, having the weekend to just relax and unpack is invaluable.

8. Have a labeling system.
Having a detailed labeling system will make the moving and unpacking process so much easier. I recommend using stickers, brightly colored duct tape or colored sharpies to color code by room. Share your color-coding system with the movers so they unload the boxes in the correct rooms for you. You should also draw ‘This Side Up’ arrows on all boxes to make sure the contents aren’t tossed around too much.

9. Pack tight.
Don’t leave empty spaces in boxes. If there is an empty space, pad it with towels or packing paper. It’s a no-brainer to bundle breakables, but even seemingly indestructible items can get damaged if they’re shifting around a lot. It also makes boxes harder to lift if items are shifting around.

10. Pay it forward.
If you want to do something nice for your old place’s new residents, leave behind a box of useful information (appliance warranties, favorite local boutiques, takeout menus, etc.). It’s a small gesture, but a sweet one.

Do you have any other moving tips?

Share them with me below!

XO Lee